Make it EXTRA Special! A Treat Bag for Anyone You Love
Hey there friends, it’s Nina-Marie Trapani here with you! Today I am sharing a sweet little bag project, perfect for giving small candies or gifts to your favorite people. I’m using many of our Simon Says Stamp exclusive products, including the new Harlequin Heart background stamp, our Gift Bag die set, Swing Blossoms dies, and Love You Greetings set!

One of the techniques I used during the creation of this bag was stamping a soft, tone-on-tone pattern using the Harlequin Heart background. I’ll show you how to use your blending brushes to soften the ink prior to stamping, which gives a perfect finish!

The window that I created on my gift bag was made with our Simon exclusive Nested Round Hearts die set; after cutting the window into the bag I put some of our new Shimmer Vellum. This gives a slight sparkle to the bag, which looks so good!

I share the entire creation process for this bag, plus tips and tricks along the way—so be sure to watch the video below to see how this pretty little gift bag comes together!
WATCH THE VIDEO

SUPPLIES
|


DIY Delight: Make Colorful Plaid Backgrounds with Simple Paper Techniques | Let’s Get Crafty with Caly!

Hi everyone! It’s Caly Person here today!
I’m sharing a card with spring vibes and hope you’ll enjoy today’s paper-weaved rainbow plaid background using the Double Plaid Cover die!

What I love about this technique is that you can personalize the colors your card for your intended recipient! Be sure to check out the video below to see it come together!
WATCH THE VIDEO:

I die-cut Beautiful Buttercup flowers with pink cardstock and ink-blended with Watermelon ink to give it some contrast and also added foliage from the Etched Meadow Flower and Leaves set.

I finished this card with the Just a Note 2 sentiment die, die-cut from Rose Gold Metallic Cardstock and vellum. All products used will be linked below!

I hope you enjoyed this project! Thanks so much for visiting!
~Caly
SUPPLIES:
|


Transforming a Monstera Leaf Die Into Two Cards

Hi friends! Happy Sunday! I’m delighted to welcome back special guest Heather Hoffman to our blog who’s sharing a fun way to use our large Monstera Leaf die to make two cards using both the positive and negative space of the die cut! Read on and enjoy!

Hello! When it comes to card making, I love creating sets of cards. After all, if I’m already putting in the effort, it’s often just as easy to make two or three cards as it is to make one! I also absolutely adore designs that give me a “two-for-one” bonus – especially when it helps ensure no leftover pieces go to waste. These cards were a delightful way to combine both of those things!


By die cutting the Monstera leaf in the center of my white cardstock panel, I could use the main image on one card and the negative space to create a shaker card. For these particular cards, I opted to skip the coordinating stencils and used the simple outline image instead. I chose some Memory Box plaid pattern paper for both cards – the monochromatic plaid offers a perfect subtle pattern that doesn’t distract from the sentiments and images but adds more interest than solid cardstock.


The sentiments on both cards were created with the Happy Combos stamp and die set, and I stamped them in coordinating Cabbage and Artichoke inks. To keep the small sentiments nice, crisp, and clear, I stamped them in black ink. I filled the shaker card with shimmery seed beads and added a few Dazzling Gems in Sprout to the other card for a touch of sparkle. Finally, I tied some Rose Gold cord around that card, securing it at the bottom of the leaf for an extra decorative touch!
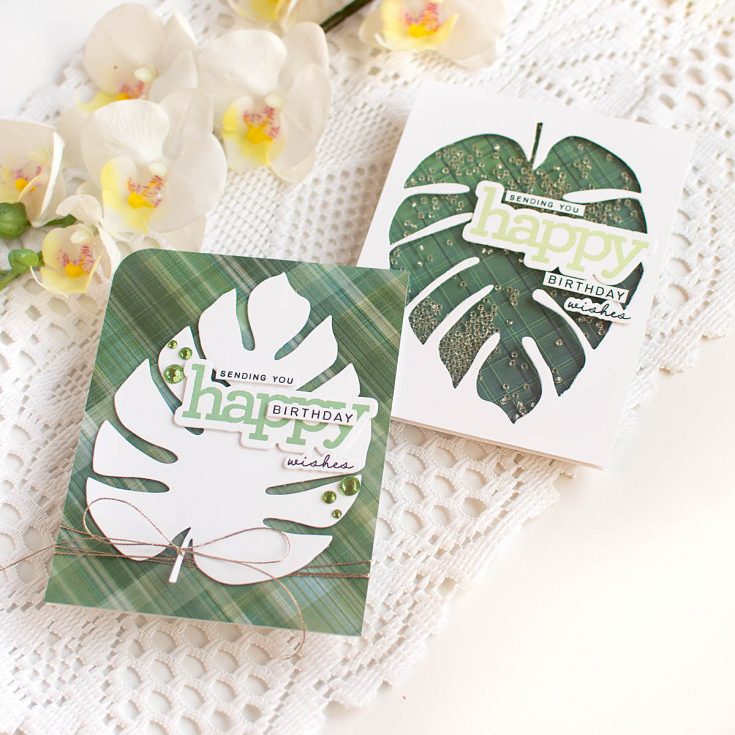
I love that these cards also have a masculine feel – so are super versatile and could be changed just by adjusting the colors!
SUPPLIES:
|


Thanks so much for stopping by, and thanks to Heather for being our guest!
Did you know?
For even MORE fun with our Monstera design, check out our coordinating stencil set or pick up the bundle!


