Card Kit Reveal and Inspiration: Beautiful and Curious
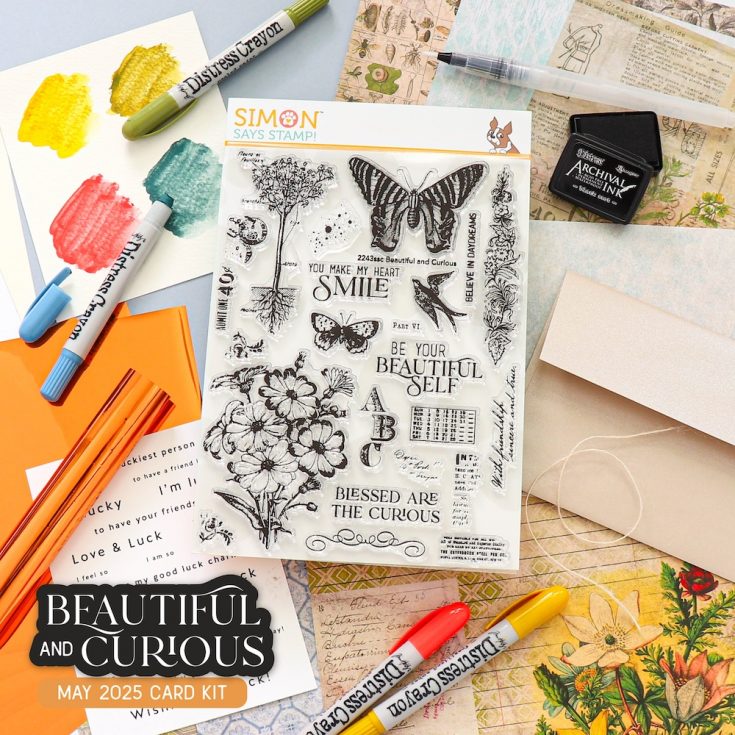
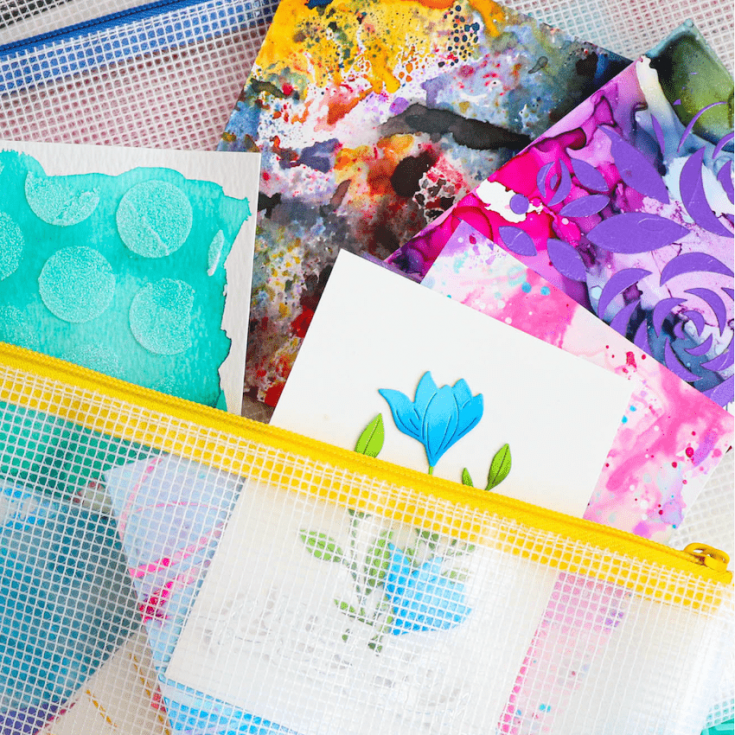
Spark your creativity with our May 2025 Card Kit—Beautiful and Curious!
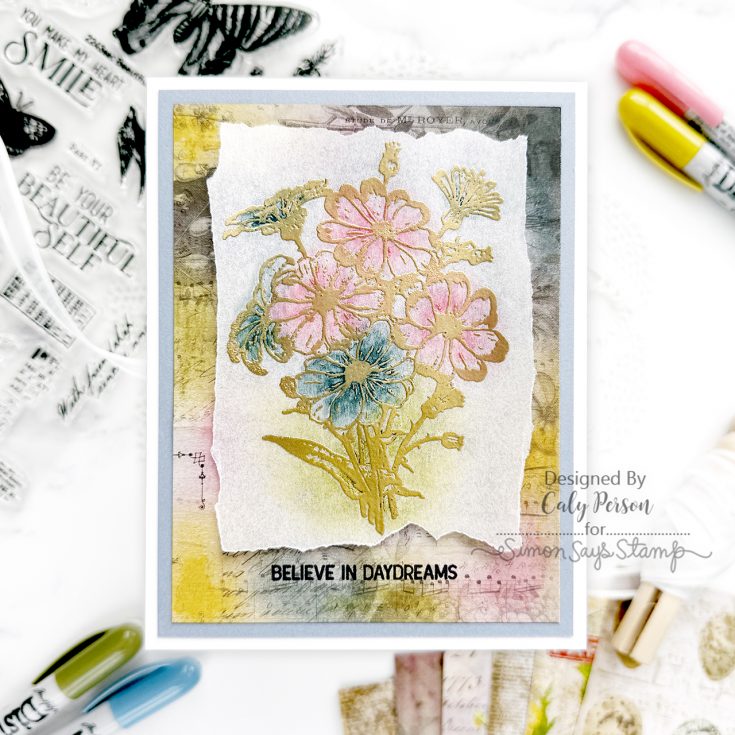
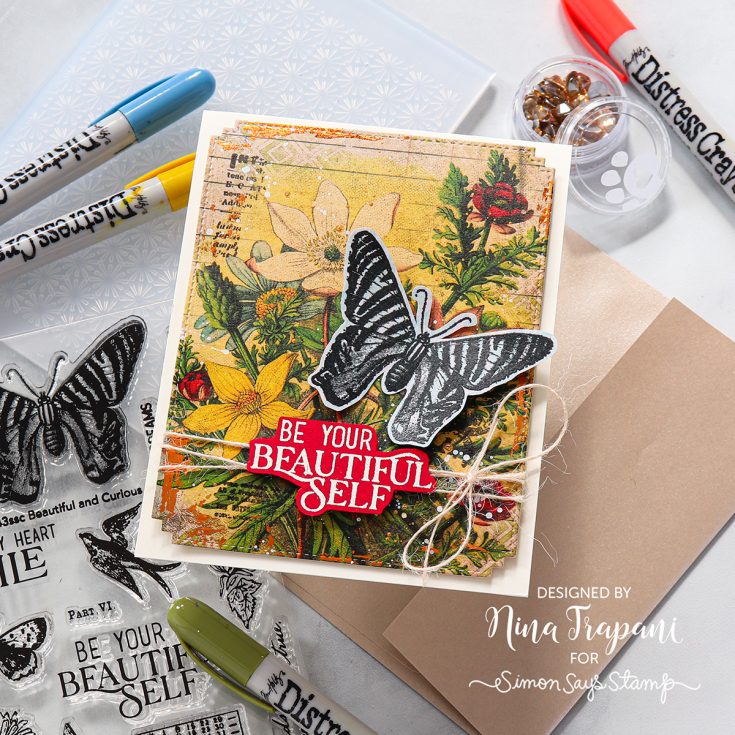
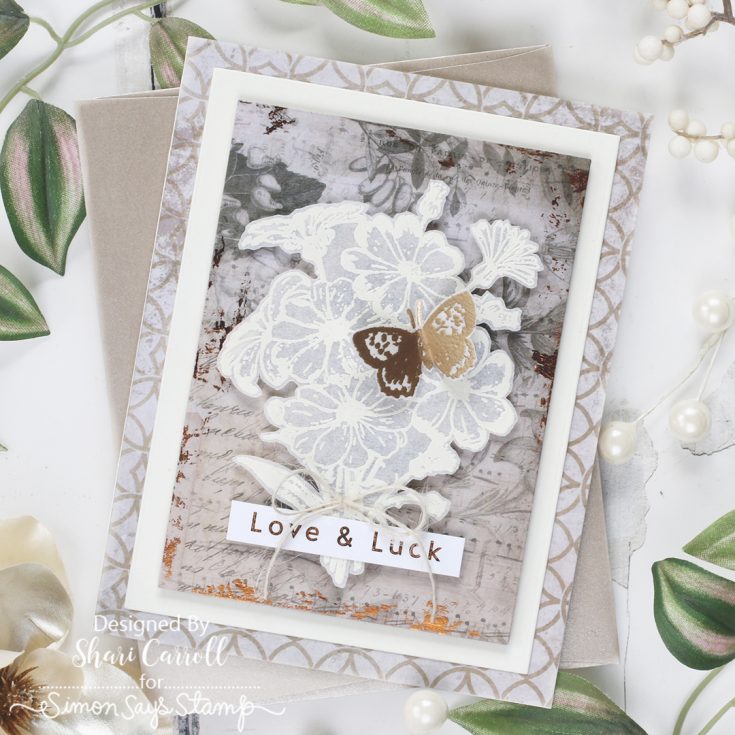
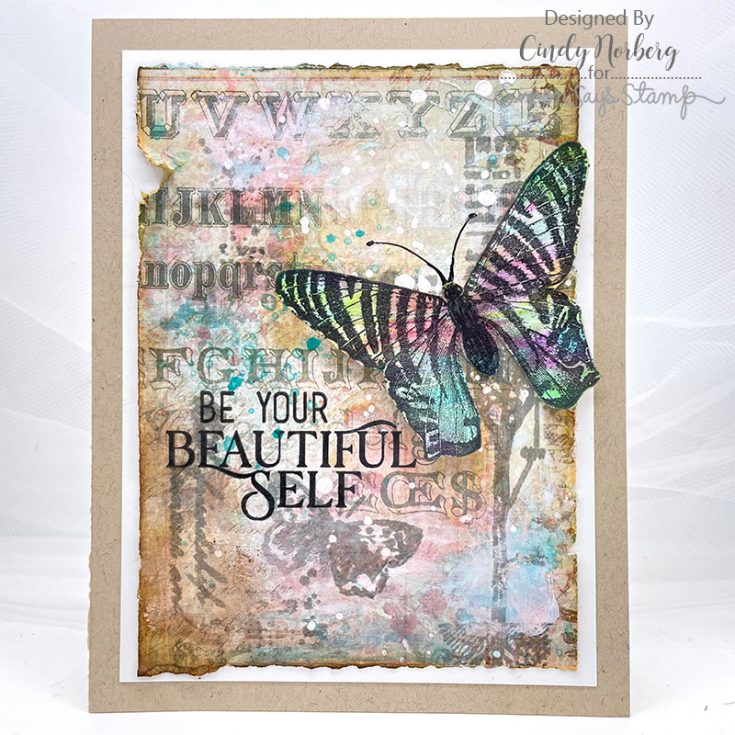
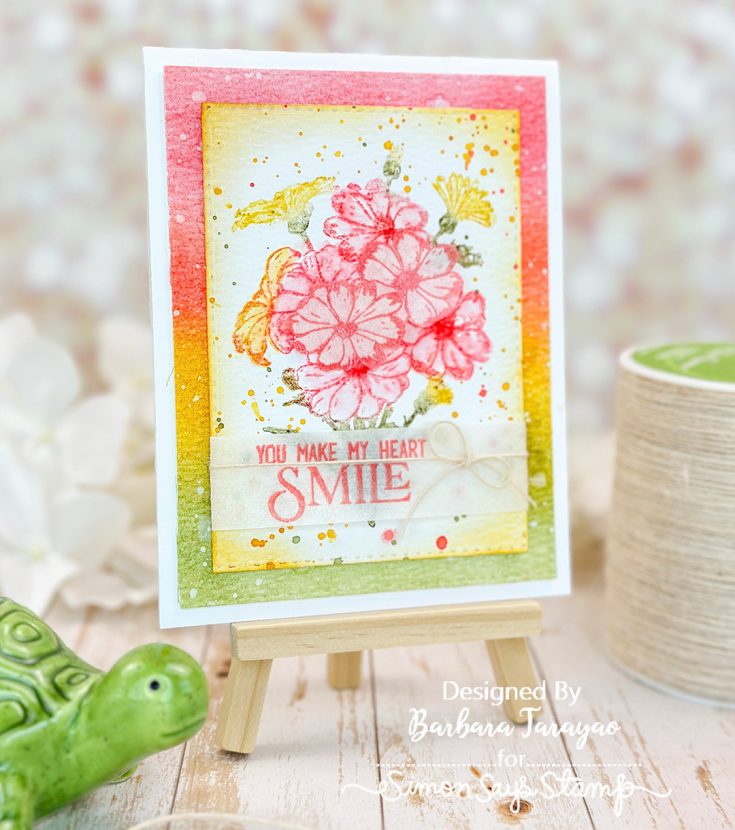
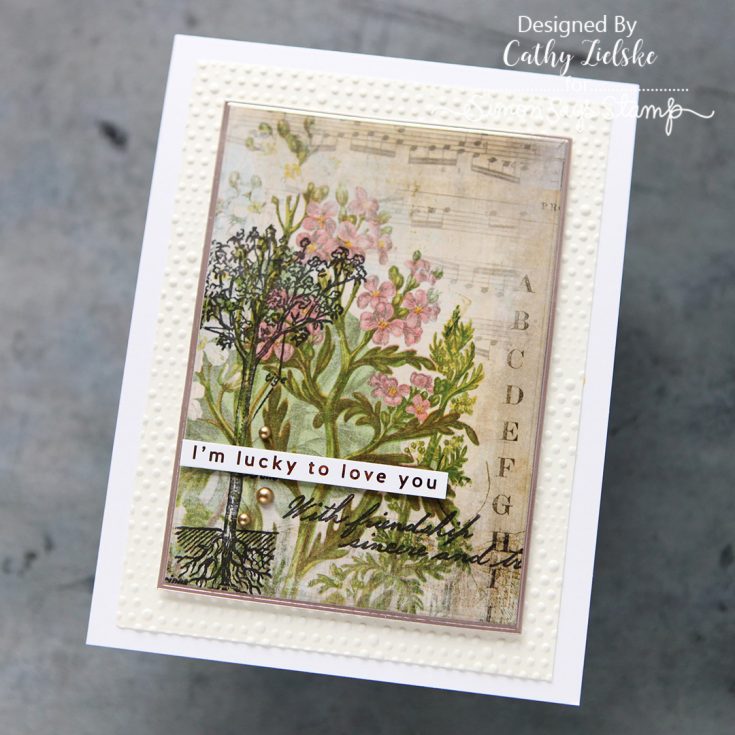
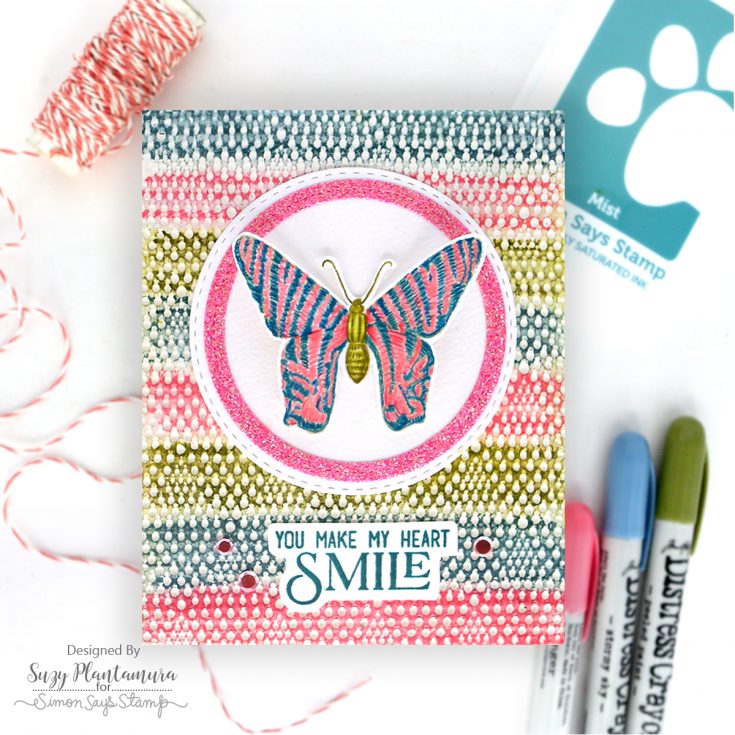
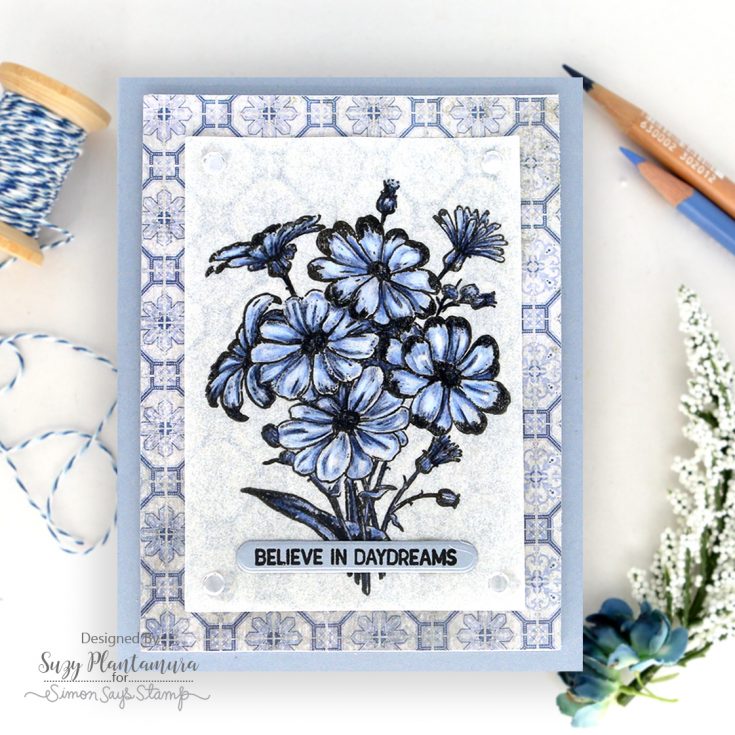
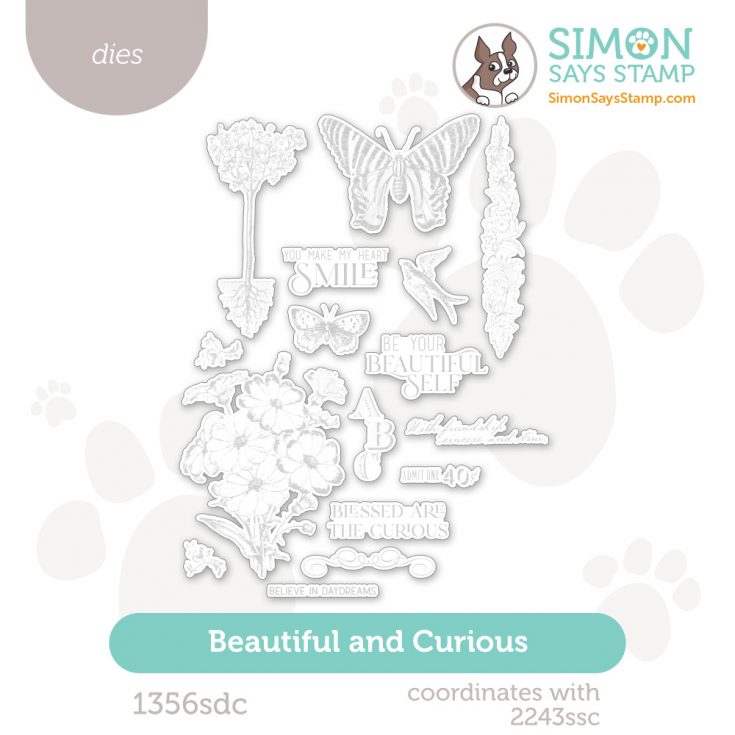
This vintage-inspired kit is carefully curated with you in mind and includes lovely NEW exclusive products from Simon Says Stamp: Beautiful and Curious 6×8 stamp set and Ice vellum.
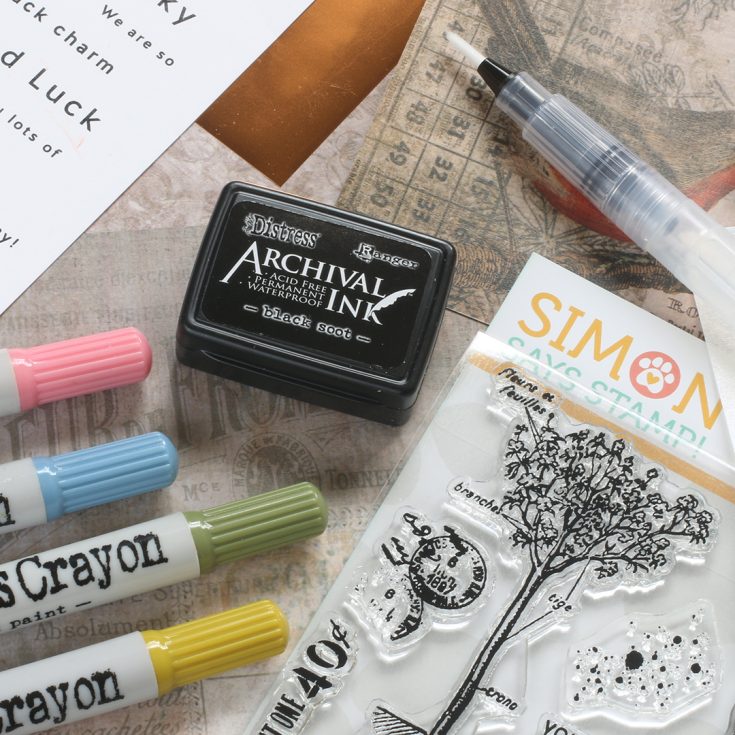
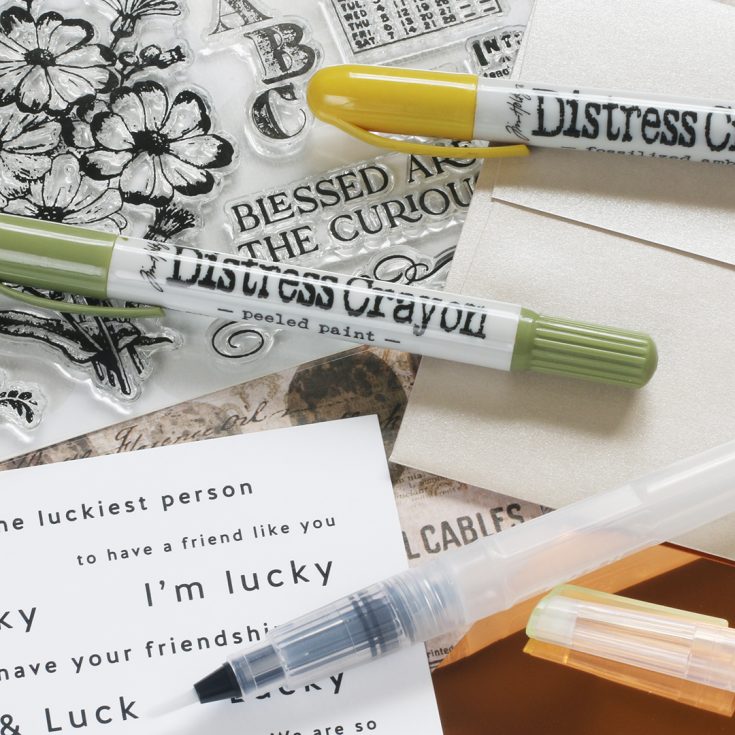
Enjoy these amazing and inspiring products from Tim Holtz: 6 assorted double-sided patterned papers from the 8×8 Idea-ology Wallflower pack, 4 assorted Ranger Distress crayons, and a Ranger Black Soot mini ink pad. In addition, we’ve included 1 pack of Simon Says Stamp Copper foil transfer sheets, 1 sheet of Lucky sentiment strips, 1 watercolor brush pen, and a bit of twine from May Arts!
Rounding out this awesome kit are 1 sheet each of Simon Says Stamp Steel and Ivory cardstock, 1 sheet of Neenah Solar White cardstock, and an A2 Metallic Khaki envelope!
WATCH THE VIDEO:
Ideas to INSPIRE!


Enhance your kit with the coordinating die set (sold separately!)
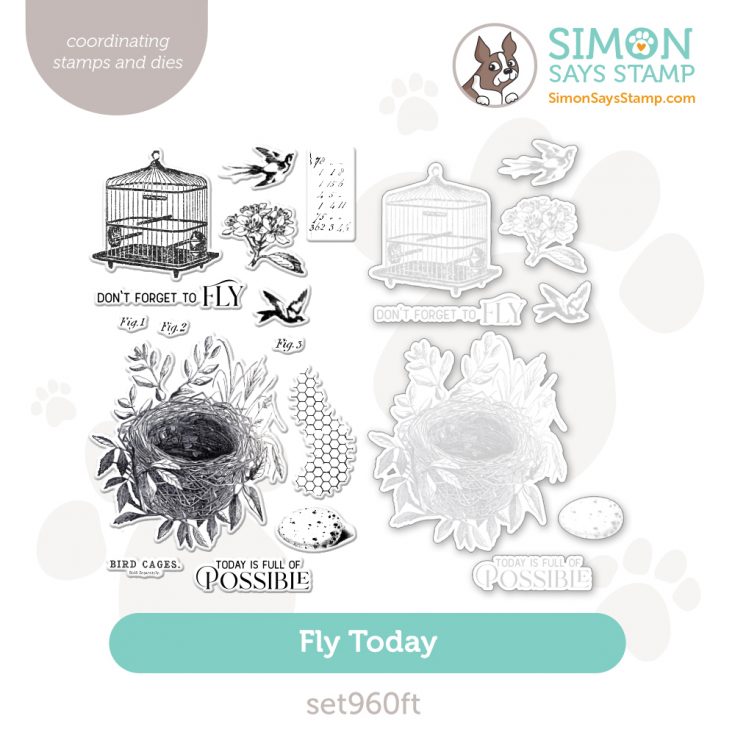
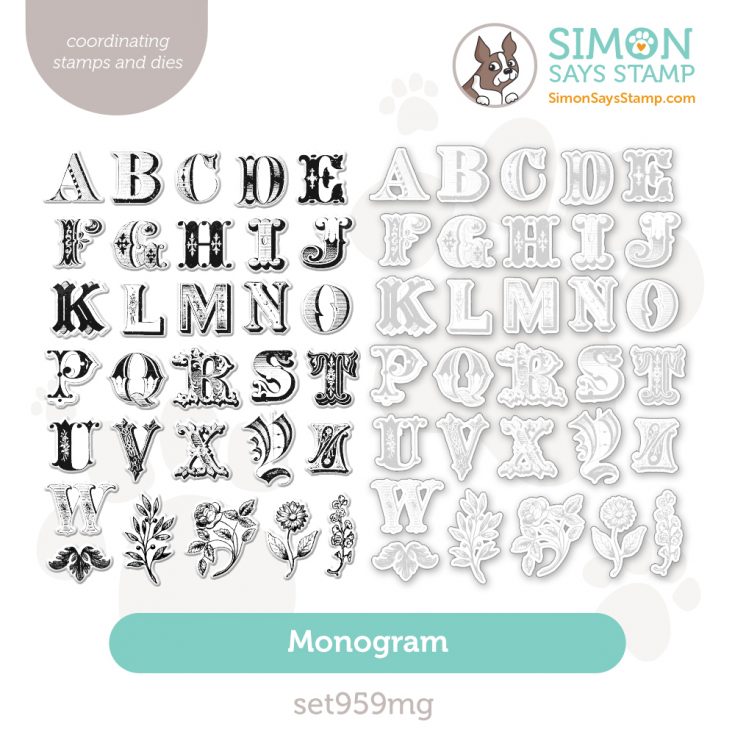
Bonus coordinating items!
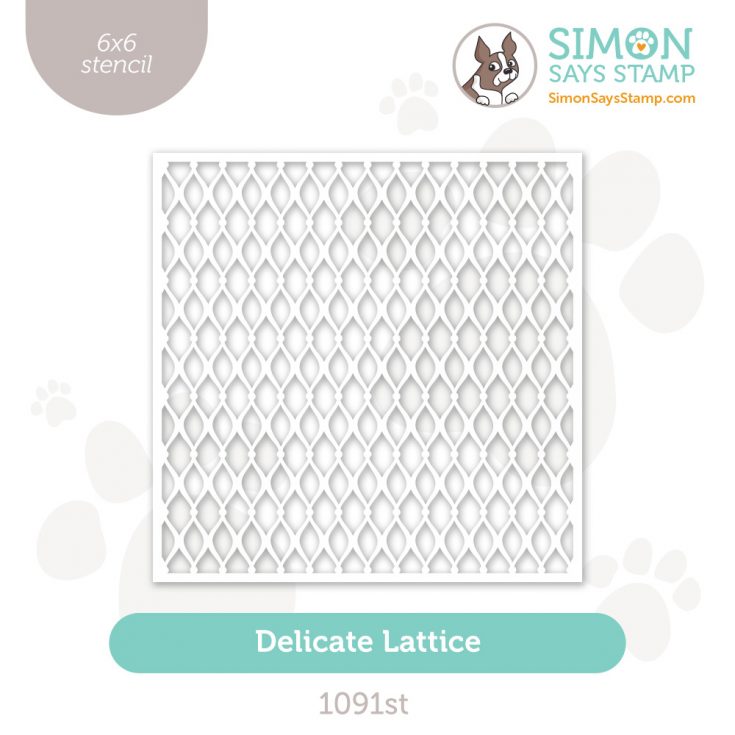
We were SO inspired by this May 2025 card jutm we couldn’t stop designing! Pick up these coordinating bundles and/or stencils to maximize your creativity with this kit! (sold separately)

Our Simon Says Stamp Mesh Zipper Storage Bags are the PERFECT solution for taking your entire card kit on-the-go or for storage! (sold separately!)

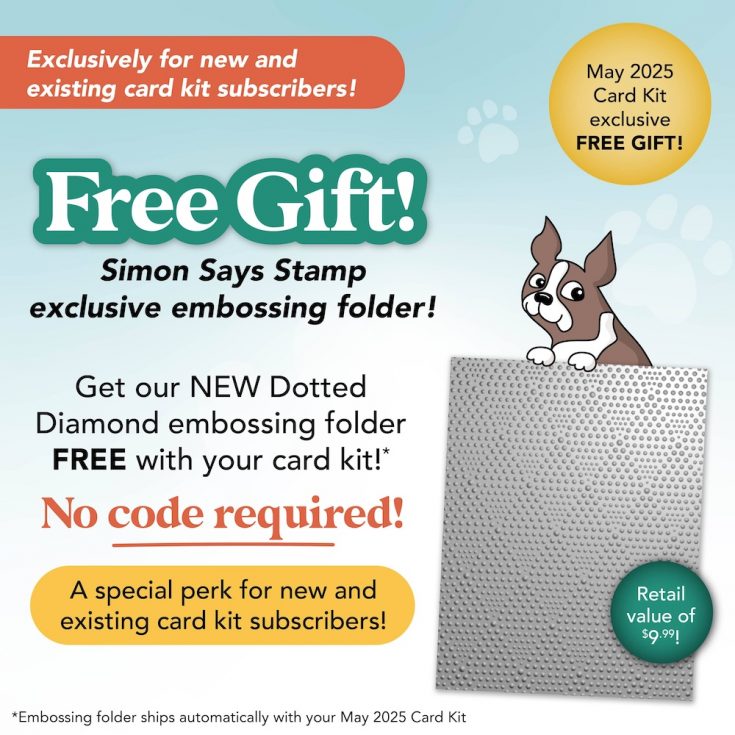
Did you know?! We’ve made our card kit subscription BETTER THAN EVER!
Special May 2025 Subscriber PERK!
Learn more:

Here’s what makes our new service a crafting paradise:
Exclusive Access: As a subscriber, you get first dibs! Each month, you’ll get an exclusive sneak peek at our new kit, with the option to add more coordinating items to your cart, including handy replenishable supplies, all shipped together for your convenience.
Hassle-Free Payments: Say goodbye to monthly billings! Our automated system smoothly charges your preferred card, ensuring an uninterrupted flow of crafty goodness – unless you decide to pause, of course!
$5 Off Magic: Enjoy a special $5 discount off our kit’s retail price, exclusive to our beloved subscribers – no codes needed, just automatic savings!
Crafting Inspirations: Dive into a sea of creative ideas monthly, all tailored around your kit, to keep your inspiration flowing endlessly.
Flexibility First: Fear of commitment? Not here! Our subscription is as flexible as it gets – pause or cancel anytime, no strings attached.
Why wait? Step into the realm of our NEW Simon Says Stamp Monthly Card Kit service. Welcome a box full of crafting marvels, right to your doorstep. Craft with ease and let creativity come to you!
Ready to elevate your craft? Subscribe Now and open the doors to boundless creativity!
We’re thrilled to have you in our crafting community and can’t wait to embark on this renewed creative adventure together!
Mark your calendar!
Join us live TODAY April 14th at 12 PM ET! Click or tap the bell by ‘Notify Me’ to be notified when we begin on TODAY, April 14th at 12 PM ET!

Bunny Games Easter Trio by Emma Williams
Hi friends! Happy Sunday! I’m SO delighted to welcome back special guest Emma Williams to our blog today with the most adorable inspiration!! Be sure to read on to learn all of the sweet details and enjoy!

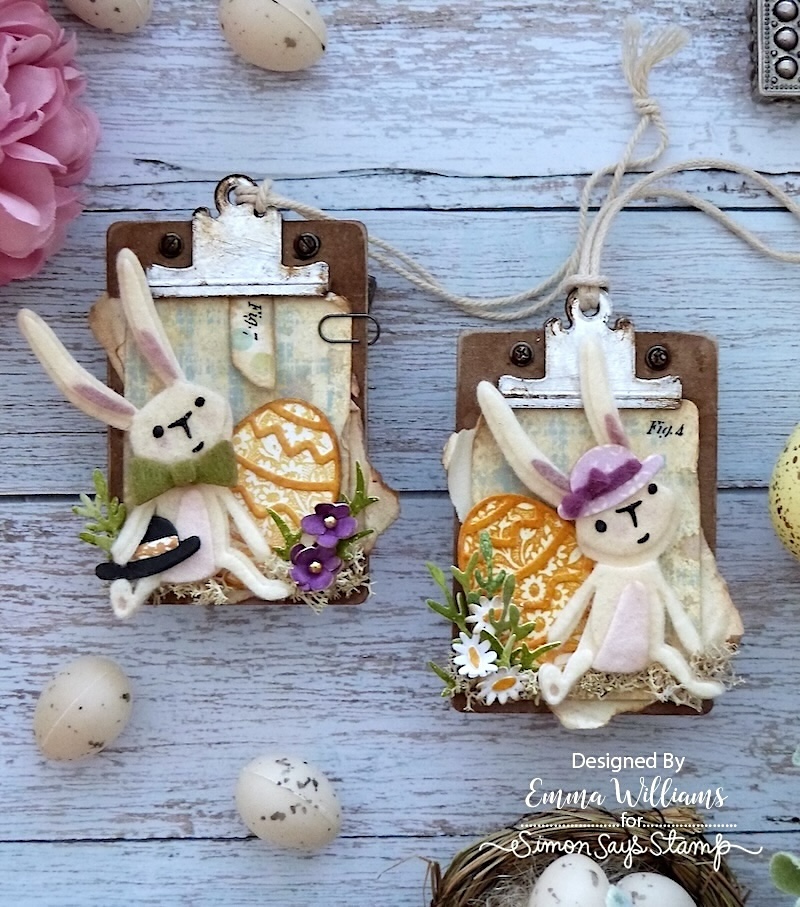
I’m so happy to be back on the SSS blog today and I can’t wait to share all the details of my latest project. With Easter just around the corner, I thought it would be nice to create a gift box, with a hidden surprise and matching gift tags. So with this in mind, and because I wanted to have some bunnies that had character and attitude, I chose to use the Bunny Games Die Set by Tim Holtz and Sizzix and combined them with other dies from Tim.
So, let’s get started and I began by making the tags and box, using a couple of Tim Holtz Sizzix dies ~ Vault Noteworthy Thinlits Die Set and the Curio Box Die Set.
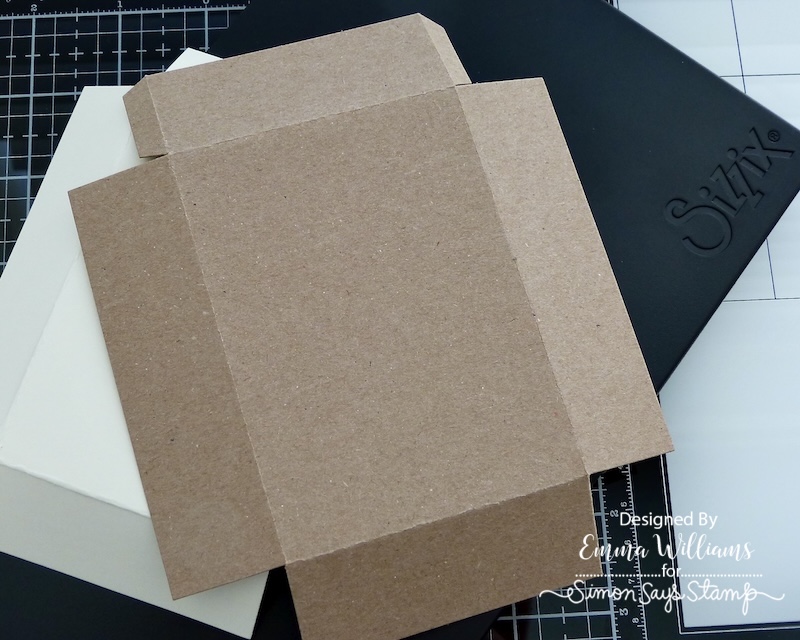

To begin with I made the treat box and started by cutting the lid from Kraft card and the base from Mixed Media Heavystock card. Fold along each of the scorelines on the base and the lid, and then attach the tabs on the lid using red line tape.
With the box complete, I moved onto the panels that will decorate the lid. For this I cut a piece of Mixed Media Heavystock, which I lightly misted with water and then spritzed with Antique Linen Distress Spray Stain to knock back the colour of the card and create a more shabby, vintage feel as a background. Heat dry the card.
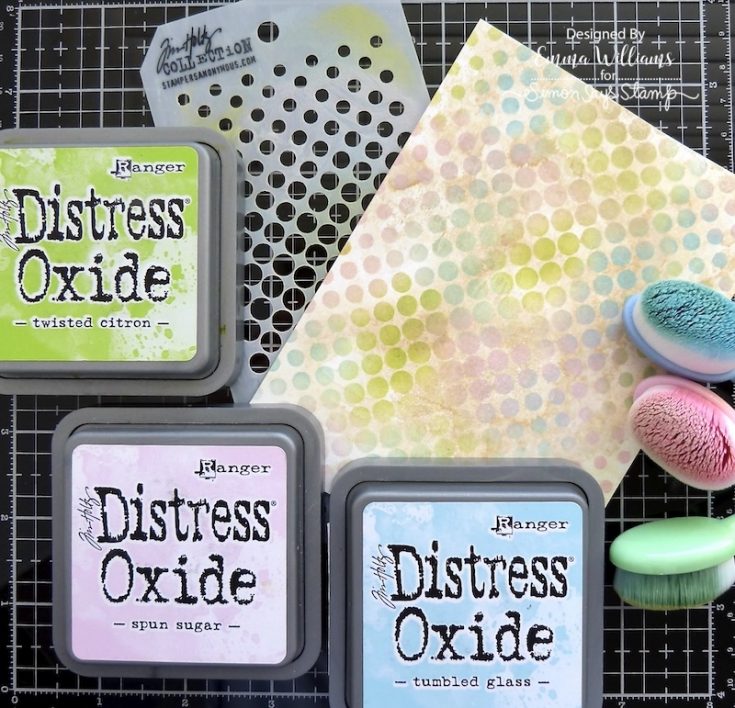
Taking the Gradient Dot Layering Stencil, I placed this over the ink stained background and used blending brushes to apply the following Oxide Inks through the stencil ~ Spun Sugar, Twisted Citron and Tumbled Glass.
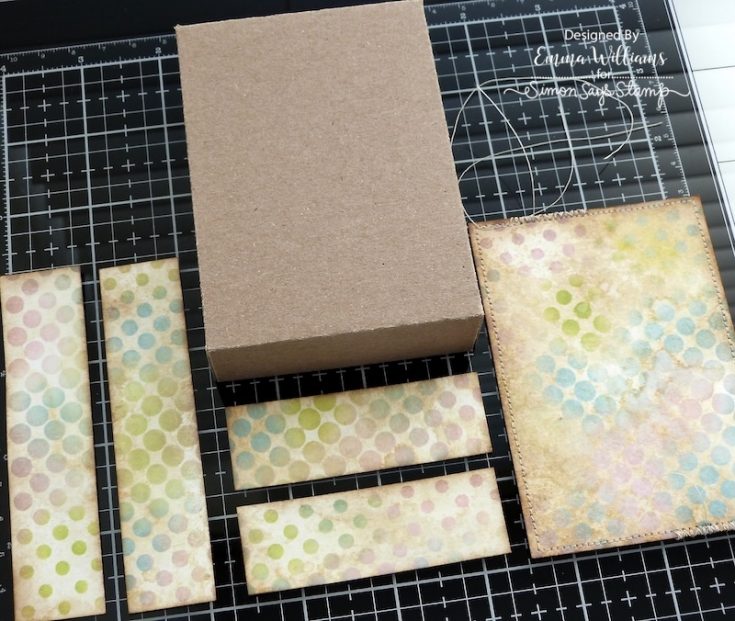
Once I was happy with the blend, I cut the inked card into 5 panels, four side panels for the lid and a panel to fit the top. After inking the edges of the panels with Walnut Stain Distress Ink, I machine stitched a border around the top panel.
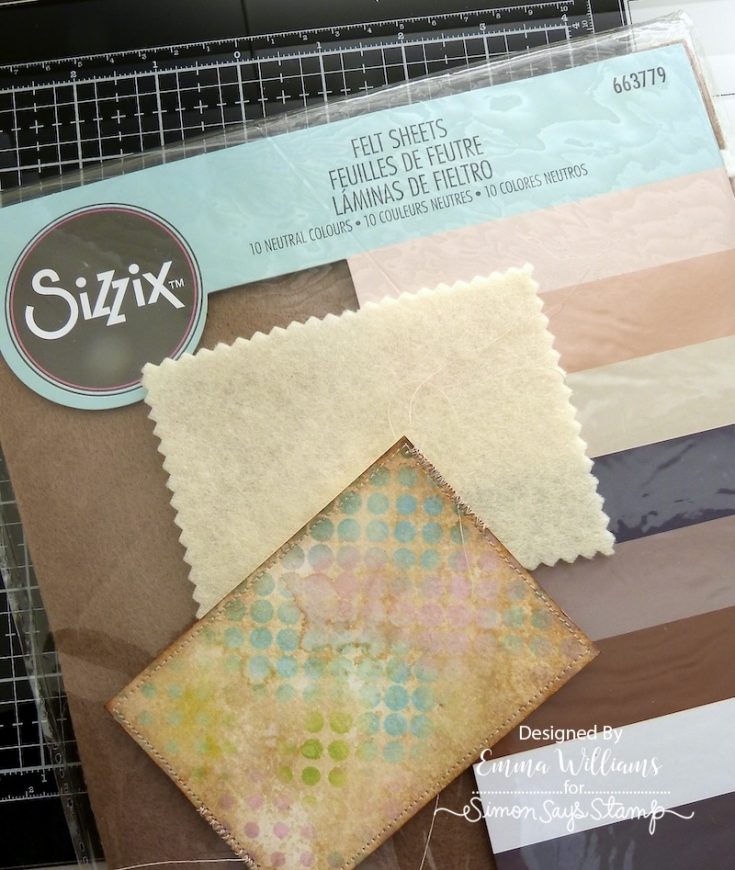
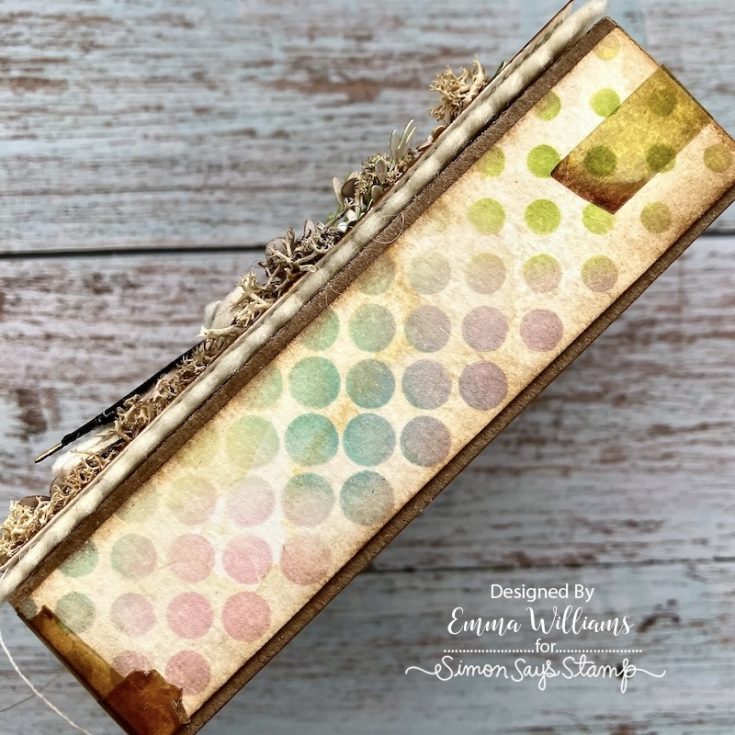
I attached the side panels to the lid with Matte Collage Medium before I attached the top panel to a piece of felt, cut with pinking shears to form the decorative edge. I then adhered this panel to the lid of the box.
I added some Cello Stickers around the edges of the box as a small detail, and this helps to add another vintage touch to this piece.
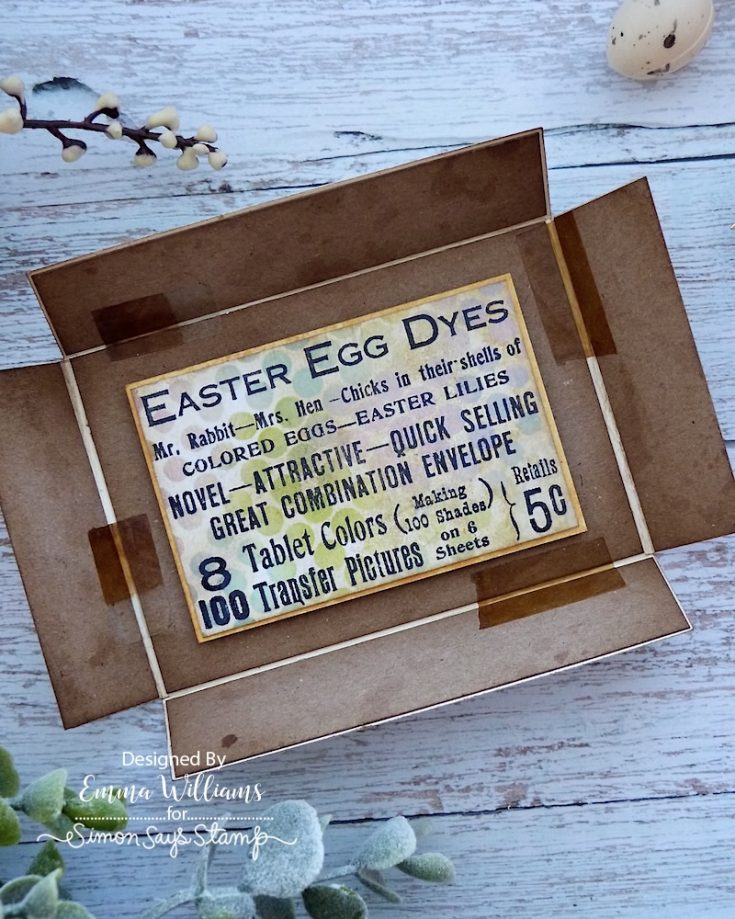
When you open the box, it contains a little surprise on the inside the box.
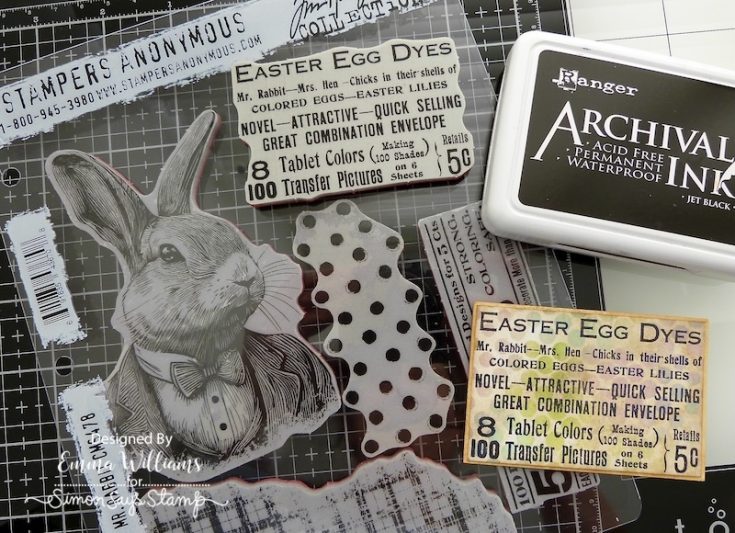
I covered each of the panels on the inside with Kraft card, inked them with Walnut Stain Distress Ink and then misted them with water to diffuse the inks. Ink the “Easter Egg Dyes” stamp from the Tim Holtz/Stampers Anonymous Mr Rabbit stamp set and stamp this onto a further panel of the stencilled card. Cut the panel to fit inside the box, ink the edges and then mount onto yellow card, before using foam pads to place it on the base of my covered box.
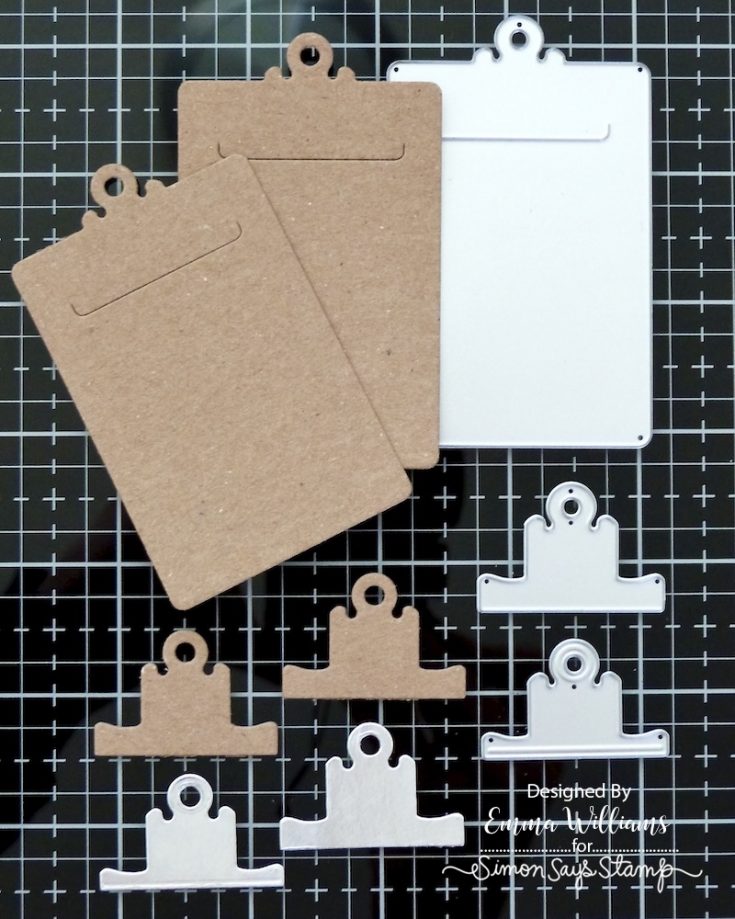
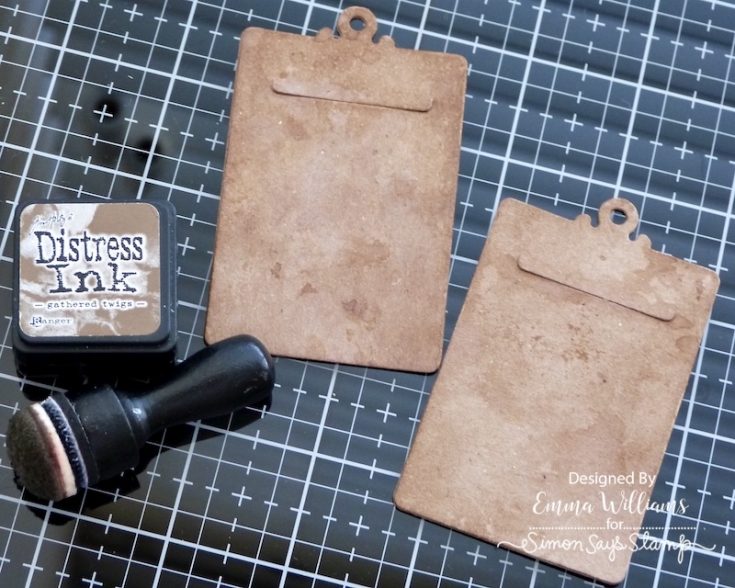
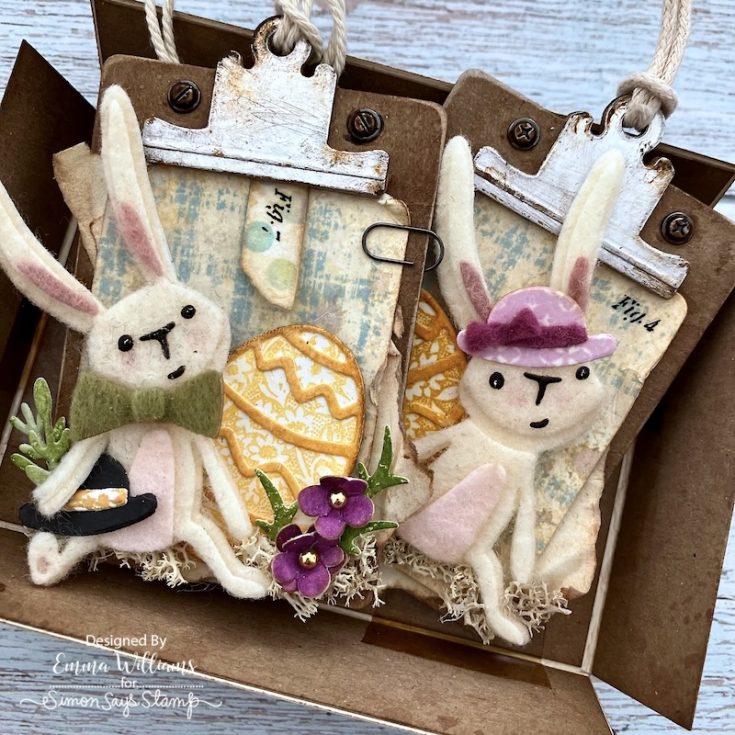
Moving onto the tags. For these I used the Clipboard die from the Vault Noteworthy Die Set andcut the bases twice from Kraft card. Adhere these die cuts over one another to form a thicker, more substantial die cut that resembles a clipboard base. For the clip, I cut two pieces from Kraft card, and two from silver metallic Kraft card. Once again, I layered these by placing the silver piece over the top of the Kraft card to form a thicker die cut.
After inking the Kraft card bases with Gathered Twigs Distress Ink, I spritzed them with water and heat dried the surface.
Use Matte Collage Medium to adhere the “metal” clips to the bases and then attach a Screw Head to either side. To create the rusty effect on the metal screw heads, I applied a little Black Soot and Crackling Campfire Distress Paint to the surface.
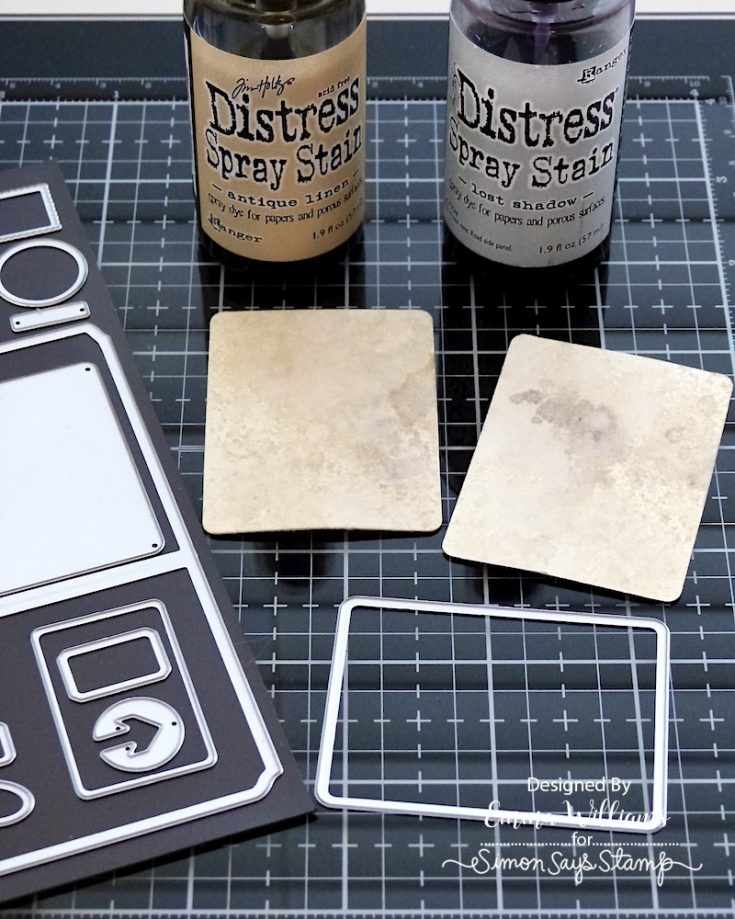
To complete the clipboards, I cut the card panel from more Mixed Media Heavystock Card, using the die in the Noteworthy set. Spritz the card with a light misting of water, and then with Lost Shadow and Antique Linen Distress Ink to add a hint of colour. Heat dry the surface.
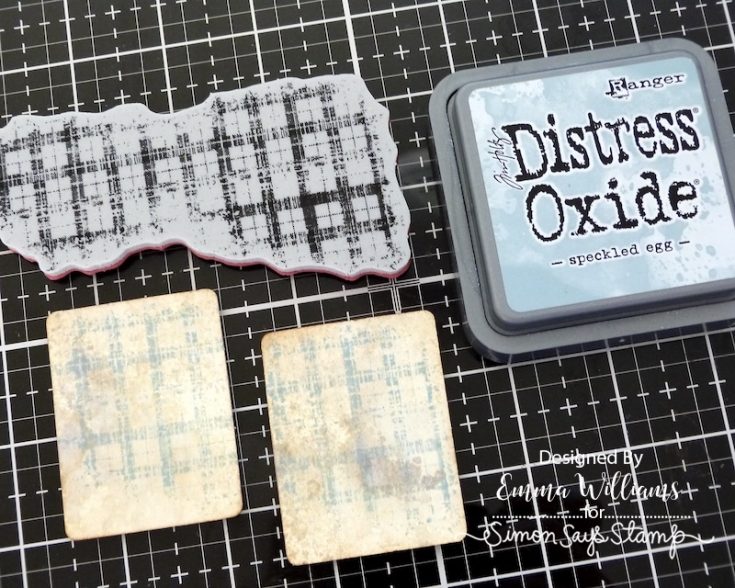
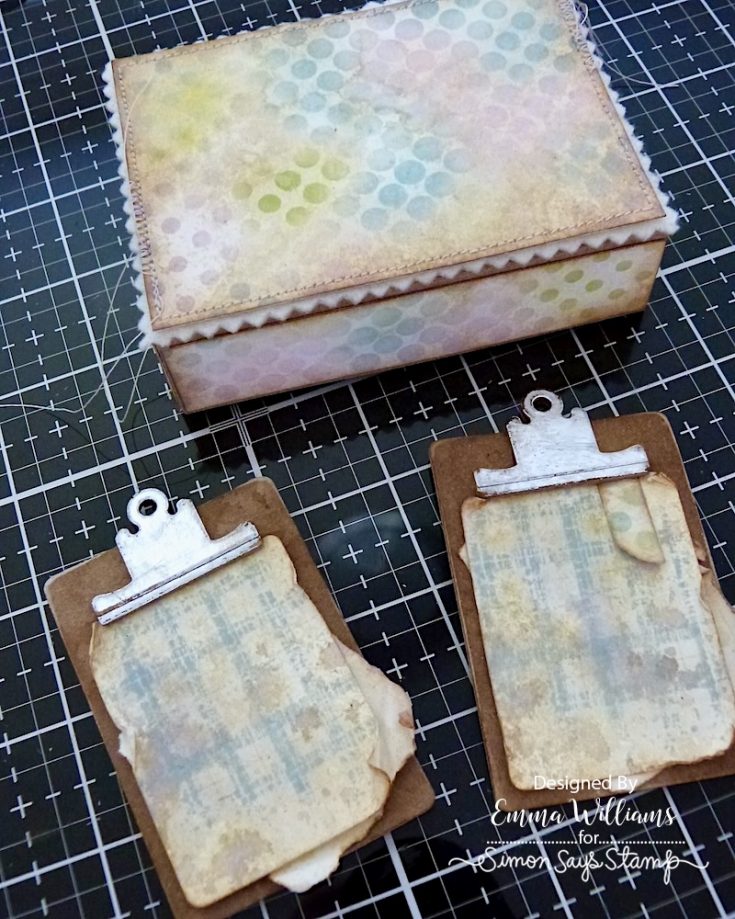
I stamped the die cut card panels with the plaid stamp from Mr Rabbit, inked with Speckled Egg Distress Oxide.
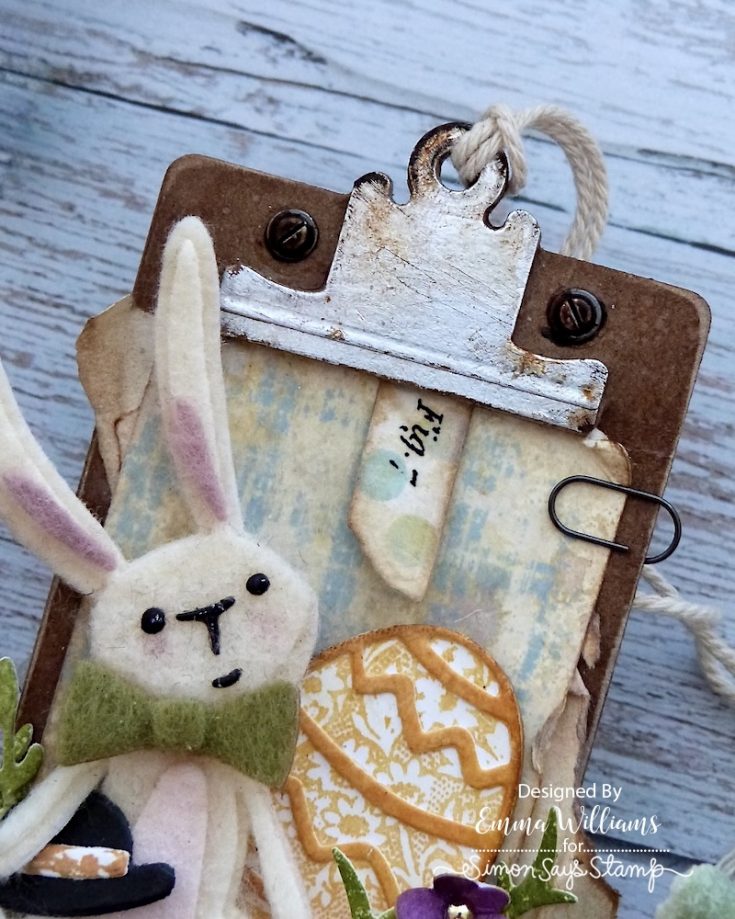
After inking the edges of the die cut with Walnut Stain Distress Ink, I attached these pieces to the clipboard, placing a piece of vintage writing paper underneath, adding some rips and tears to the edges to add more of a vintage touch. The bases are now complete and ready for the little Bunnies.
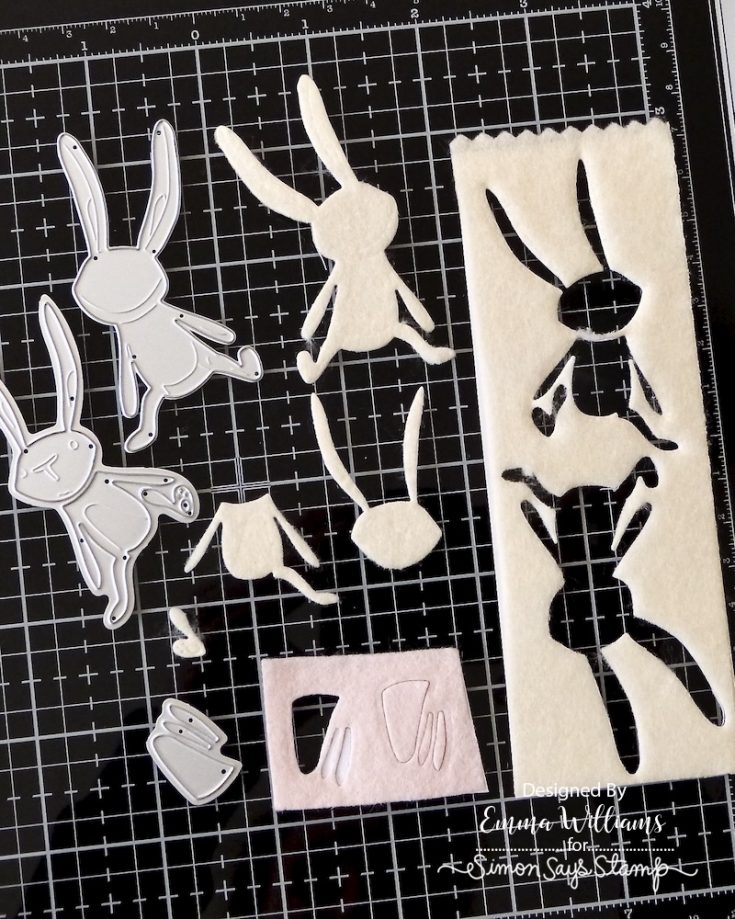
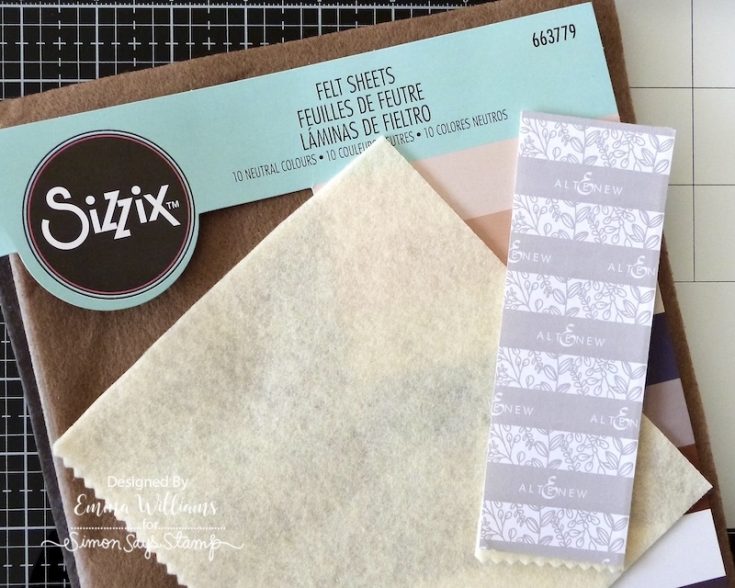

I selected the colours I wanted to work with for the bunnies from a pack of Sizzix Felt. If you prefer, you can create these from card. Before die cutting, I attached the felt to a self adhesive sheet as this will help when you attach each of the layers to build up the die cuts. The facial features are cut from Black Kraft Card, and stuck to the felt with Matte Collage Medium.
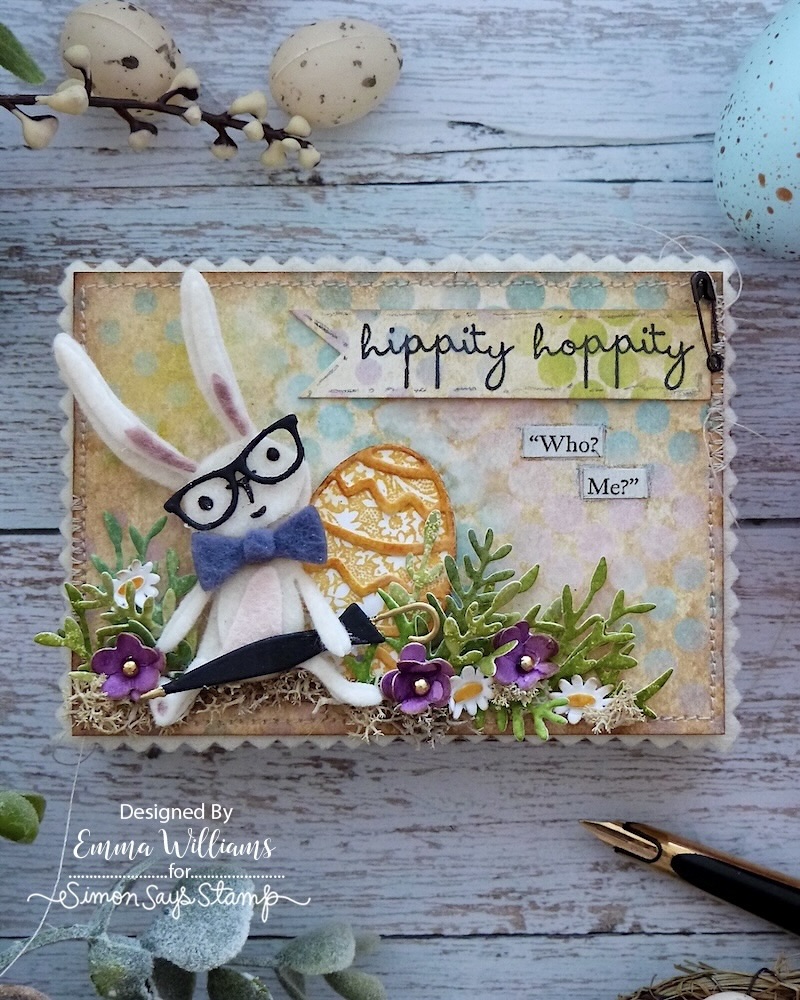
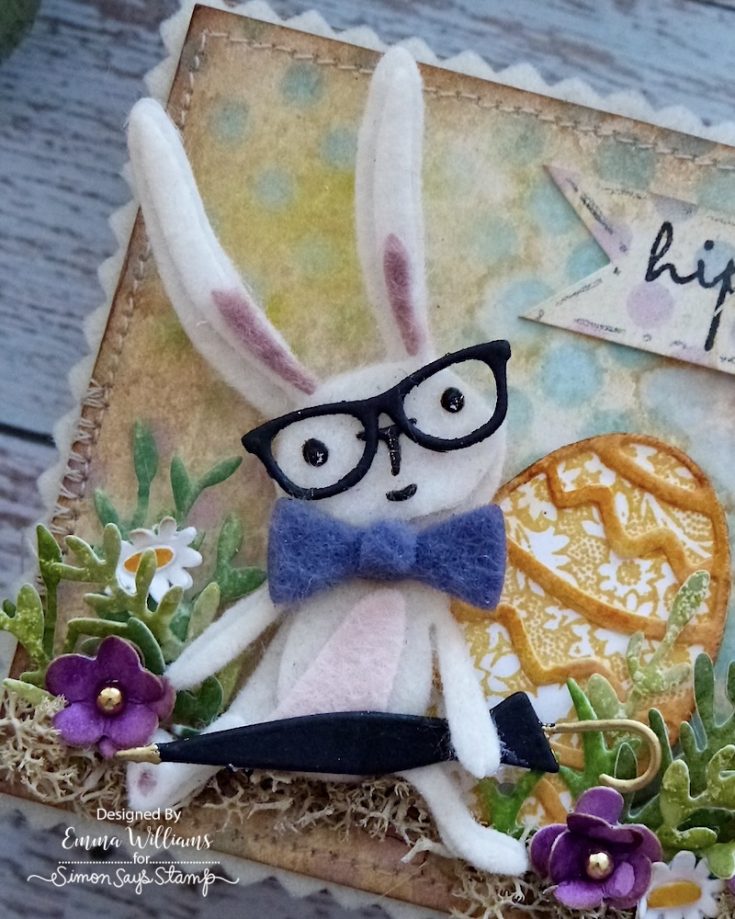
Once all the pieces are cut, I adhered each piece to form the three separate bunnies, all of which are now ready to have their accessories added. Starting with the tiny umbrella ~ I used a dies from The Park Die Set, and cut the pieces from black card. To create the gold handle and umbrella tip, I applied ink with a Versamark Mark Pen and then dipped the die cut into gold embossing powder, which I heat embossed until molten.
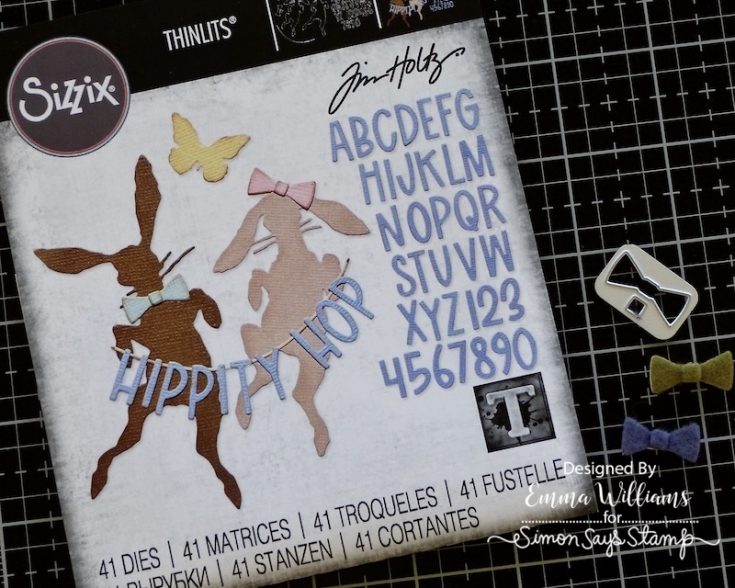
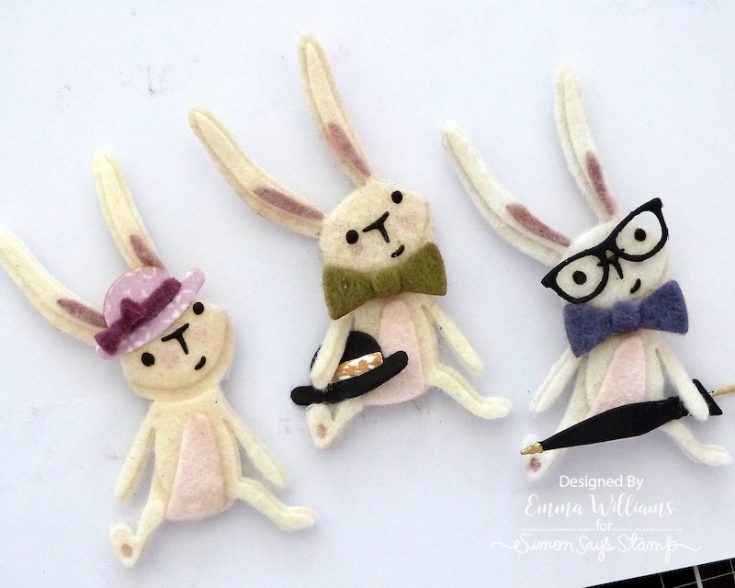
The tiny bows are cut from various colours of felt using dies from the Sizzix/Tim Holtz Hippity Hop Thinlits Die Set.
The glasses are cut from black Kraft card and the tiny hats are cut from patterned card stock in my stash ~ these are all cut using a discontinued die set that I have in my stash called, Hip Haunts but if you don’t have this die set, then the Simon Says Stamp Mini Things Wafer Dies are perfect for accessories that can be used on these bunnies and many other dies that Tim has released.
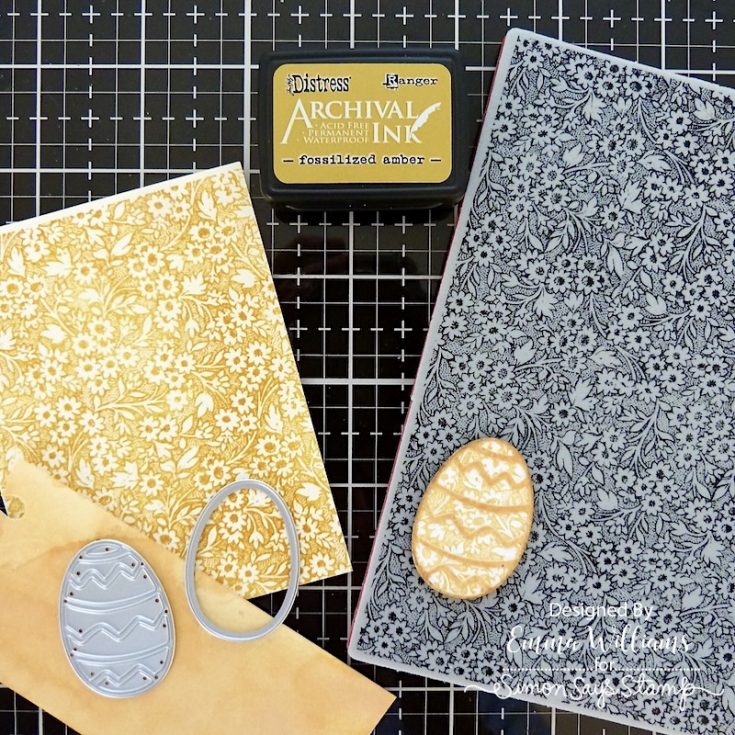
Placing the finished bunnies to one side, I moved onto die cutting the Easter Eggs. I cut three eggs from Mixed Media Heavystock card, that I stamped in Fossilised Amber Archival ink using the Stampers Anonymous Tiny Prints stamp set by Tim Holtz. I then used the smaller Easter Egg die in the Bunny Games set to die cut the solid section of the stamp, before taking the second corresponding die in the set to die cut a separate panel of card, inked with Fossilised Amber Distress Ink. Adhere this layer over the top of the solid egg to form one Easter Egg.
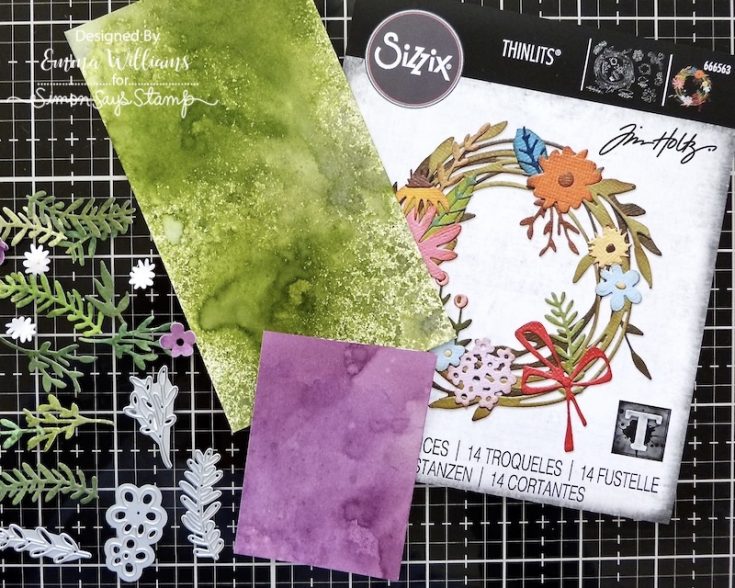
Finally, I cut some green foliage, the little daisies and some tiny purple flowers using a combination of dies from the Bunny Games Die Set and the Vault Funky Floral Wreath Die Set. (If you don’t own this die, then there are many other dies from Tim, that can be used to create the leaves and flowers). All my card stock is inked with Distress Inks.
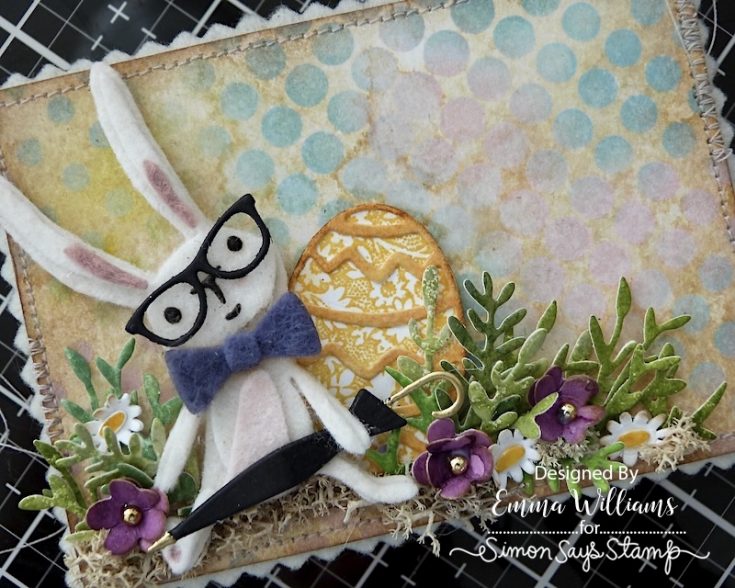
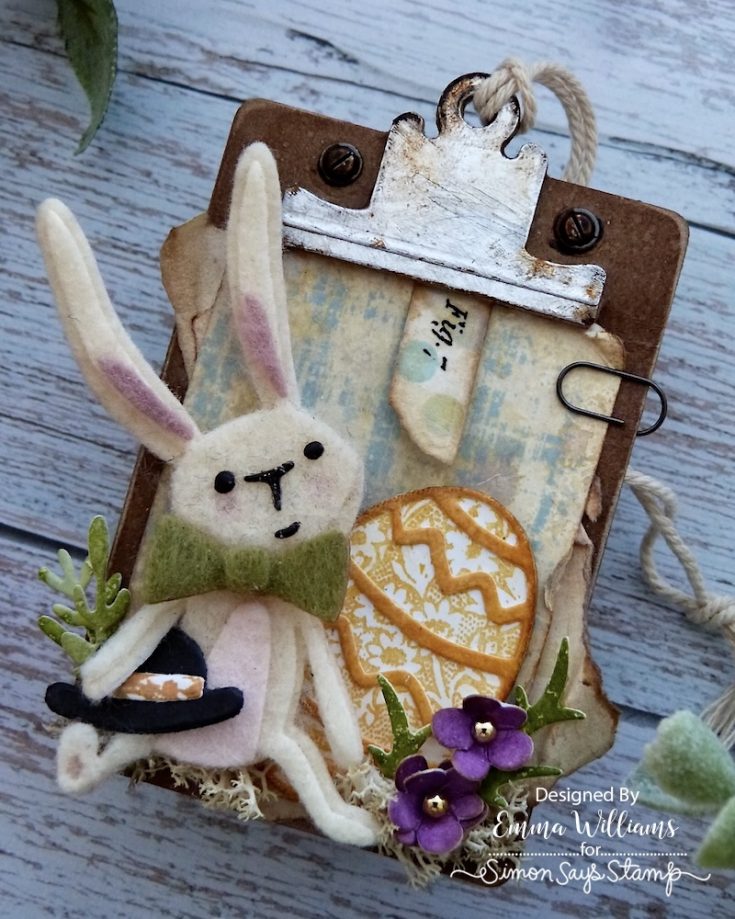
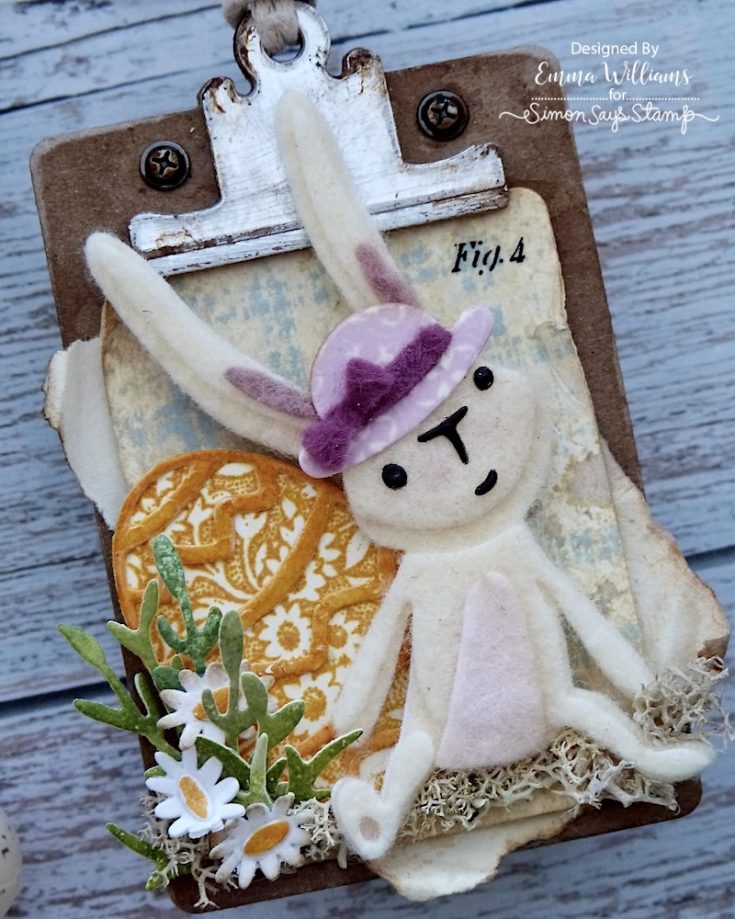
With all the pieces ready, I created the scenes on the box and the tags and this is where the fun begins. I arranged each of the bunnies in their individual scenes and of course, at this stage, you can choose exactly how you want these to look ~ you can add different accessories, different foliage and change the colours of the eggs ~ it’s entirely up to you. To complete the scenes on each piece, I added some moss.
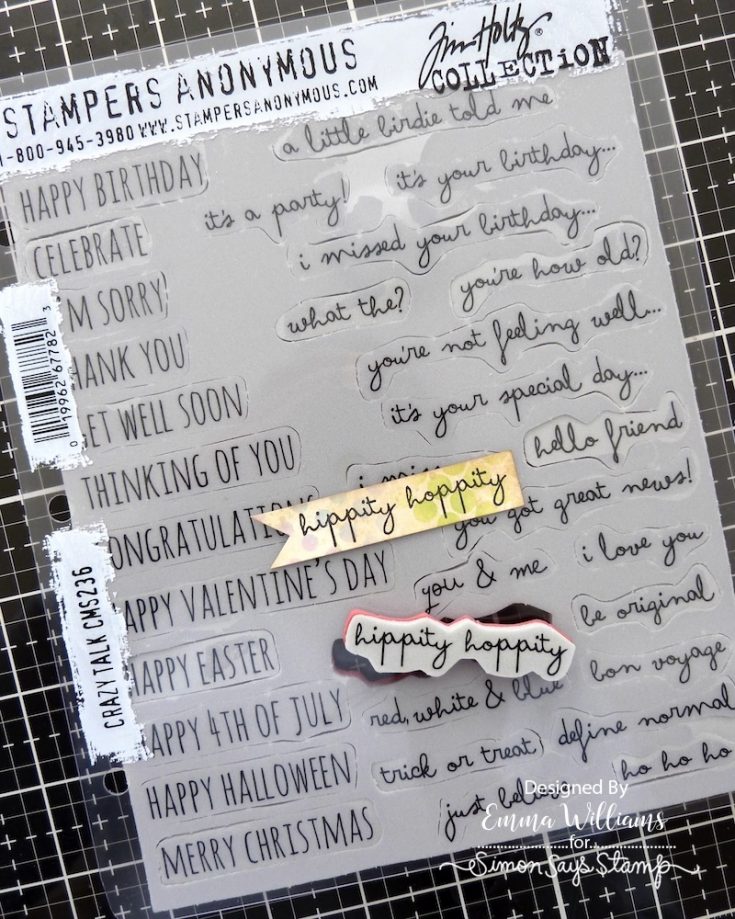
All that’s left now is to add the sentiment to the box, and for this I inked up ‘hippity hoppity’ from the Crazy Talk Stampers Anonymous stamp set, and stamped it in Jet Black Archival Ink, onto a piece of the leftover card that I had inked for the box. I cut an inverted ‘v’ into the strip to form a banner, which I attached to the box, securing a tiny pin into the stitching on the box itself.
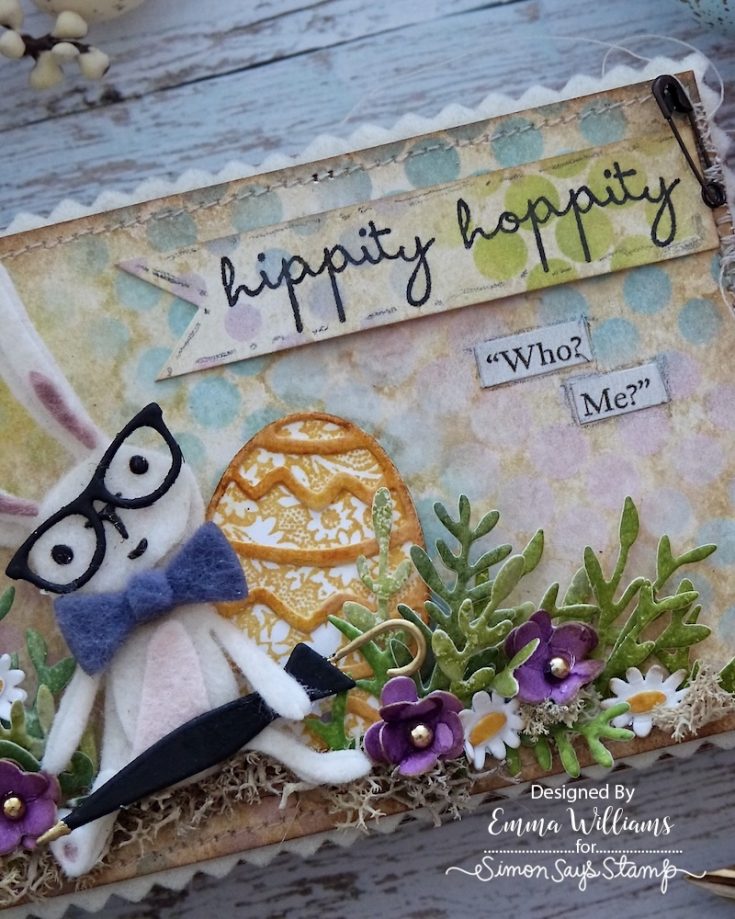
Finally, I chose a Clippings Stickers from the Sticker Book, and added the “Who? Me? Underneath the sentiment.
The You can either fill your box with candy, or if you want to gift this piece, then the tags fit in the box perfectly.
So that’s my project complete and I really hope you enjoyed this tutorial and you’ve been I inspired by the pieces I’ve made. The ideas that I’ve shared can be used in so many different ways, on cards, home decor or just as I’ve done to create little Easter Gifts for loved ones and I can’t wait to see what you create.
See you all again very soon and Happy Crafting everyone…Emma x
SUPPLIES:
|


Thanks so much for stopping by, and thanks to Emma for being our guest!
Mark your calendar!
Join us live TOMORROW April 14th at 12 PM ET! Click or tap the bell by ‘Notify Me’ to be notified when we begin on TOMORROW, April 14th at 12 PM ET!
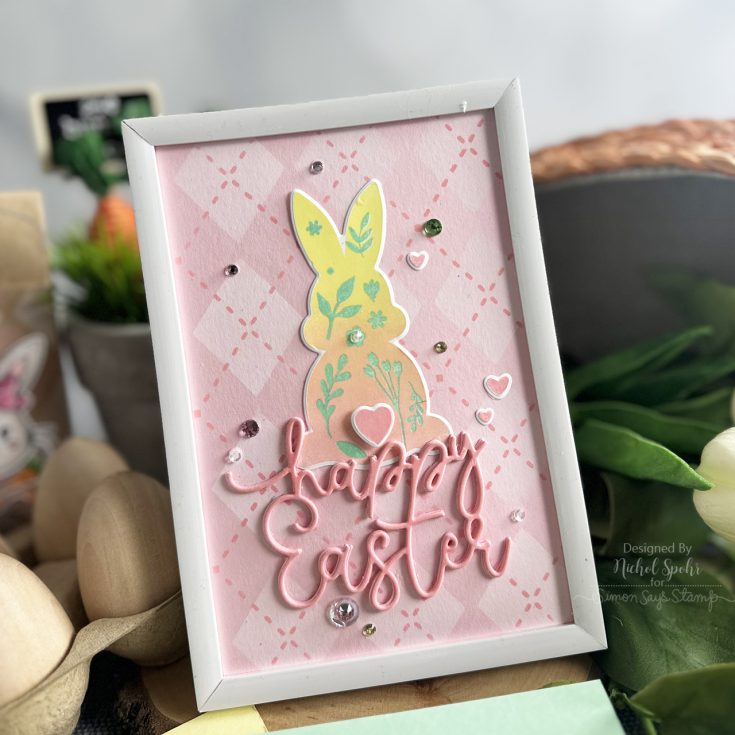
Make ADORABLE Easter Bunny Cards and Gifts Easily!
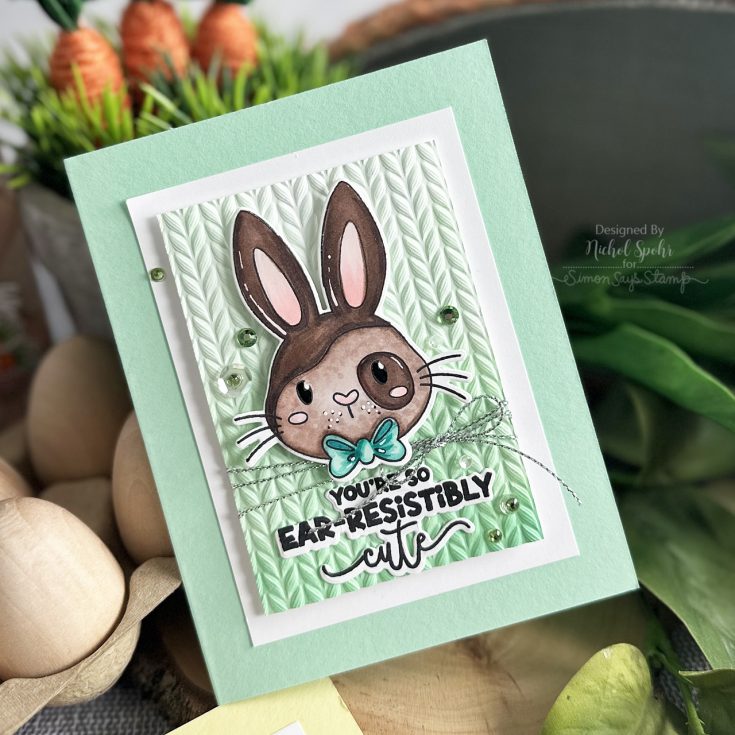

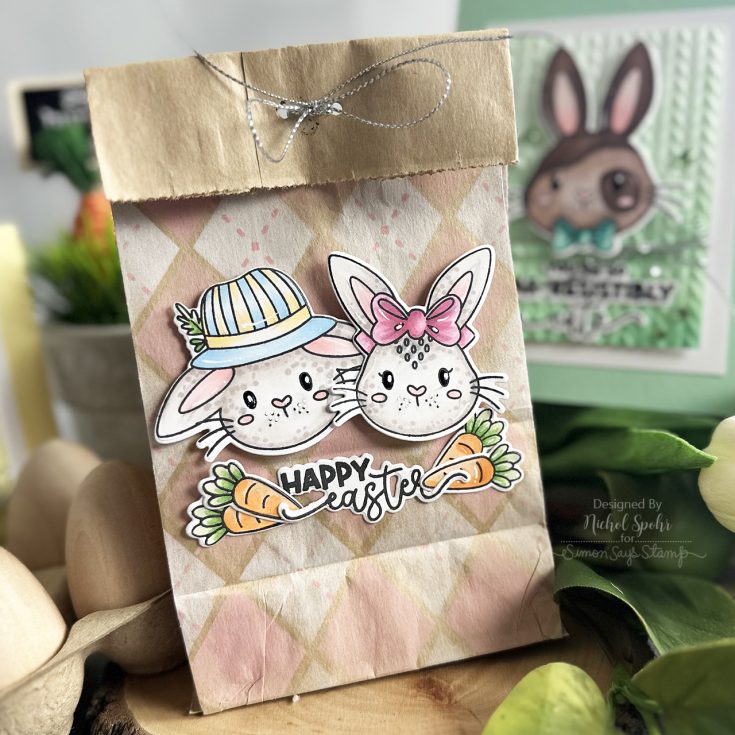
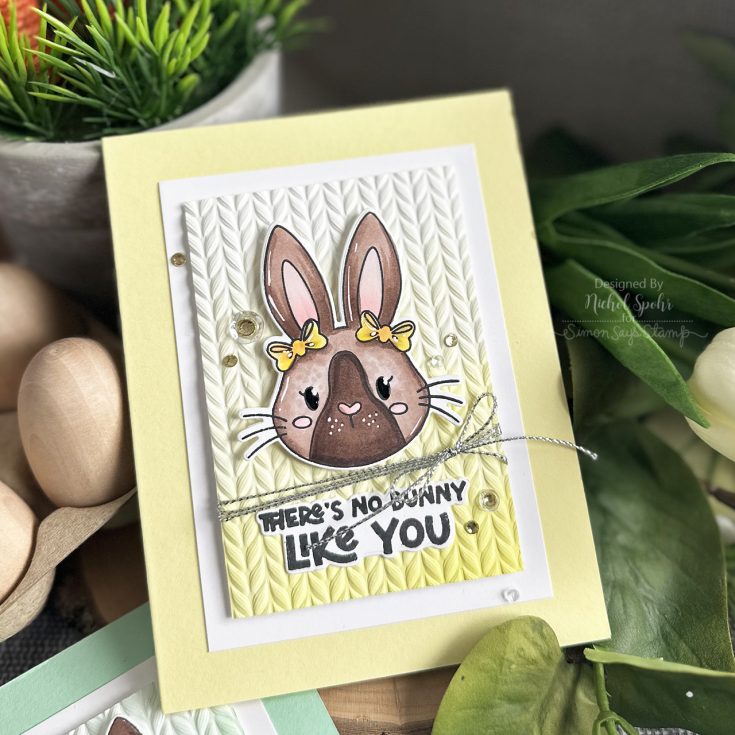
Hey friends! We’re back—just like we promised—with FOUR stunning brand-new ideas from the fabulous Nichol Spohr, all featuring our 2025 Easter Class Kit!
Even better? There’s a FREE Virtual Class that just dropped yesterday, and it’s packed with inspiration to help you get the most out of your kit! (if you missed our LIVE virtual class yesterday, click or tap HERE to rewatch all the FUN!)
Didn’t snag the full kit? No problem! Many of the goodies are available to purchase individually, so you can mix, match, and grab your faves.
Don’t miss the video below—it’s bursting with crafty magic!

WATCH THE VIDEO:

SUPPLIES:
|


Thanks so much for stopping by, and thanks to Nichol for being our guest! We hope you enjoyed this BONUS inspiration with our Easter kit!


