Hey friends! We’re back—just like we promised—with FOUR stunning brand-new ideas from the fabulous Nichol Spohr, all featuring our 2025 Easter Class Kit!
Even better? There’s a FREE Virtual Class that just dropped yesterday, and it’s packed with inspiration to help you get the most out of your kit! (if you missed our LIVE virtual class yesterday, click or tap HERE to rewatch all the FUN!)
Didn’t snag the full kit? No problem! Many of the goodies are available to purchase individually, so you can mix, match, and grab your faves.
Don’t miss the video below—it’s bursting with crafty magic!
Hey friends! We’ve got something extra special for you—it’s a double blog post Saturday! Two amazing artists are sharing their creative takes on how to get even more out of your Easter Card Kit!
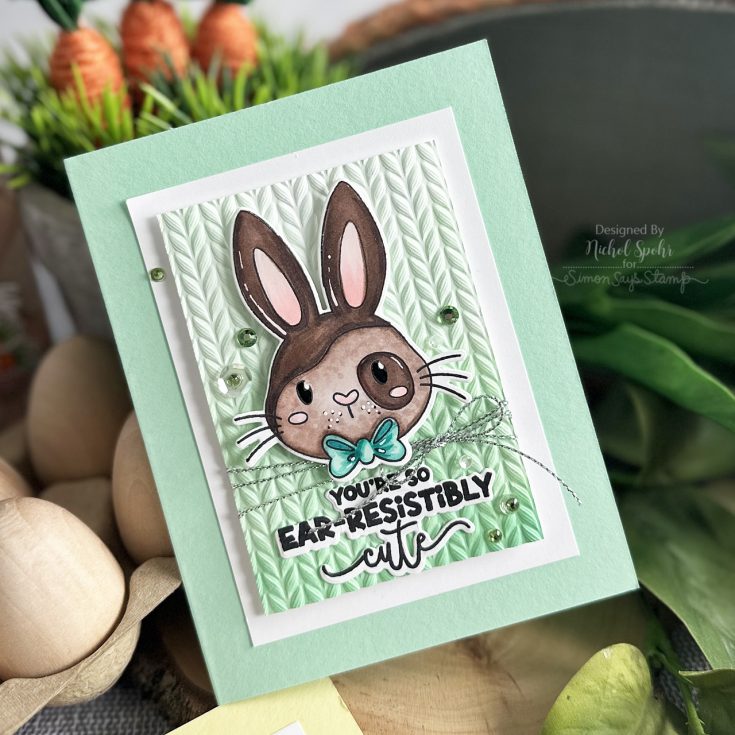
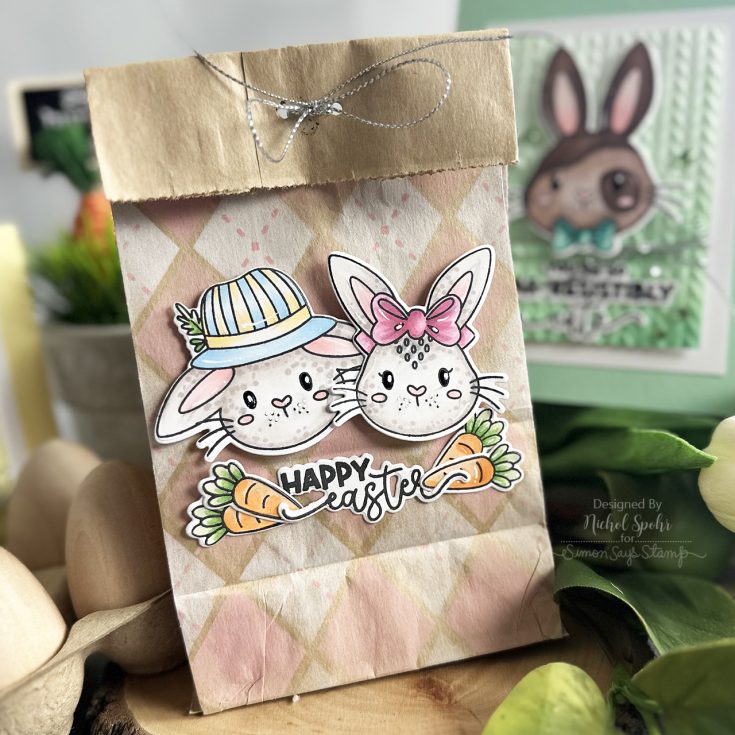
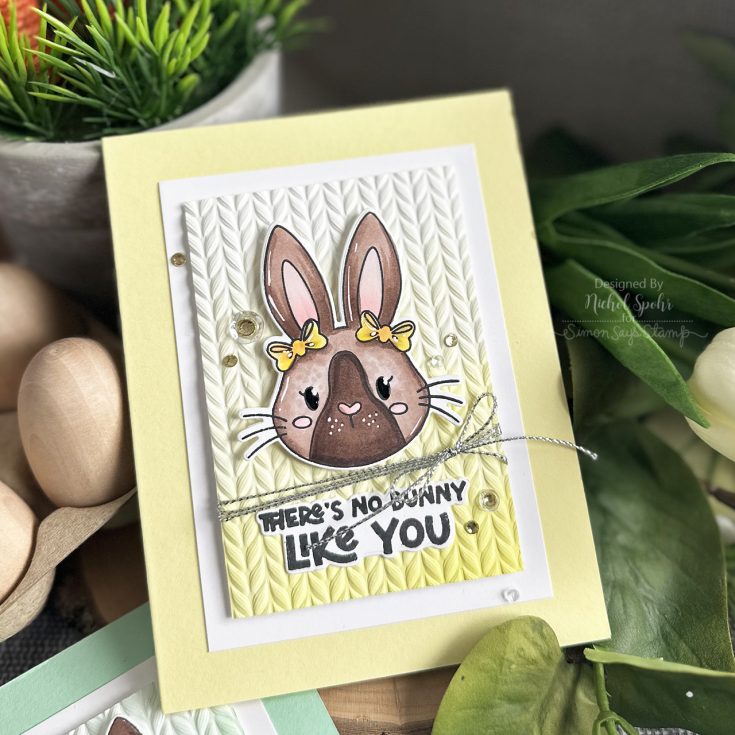
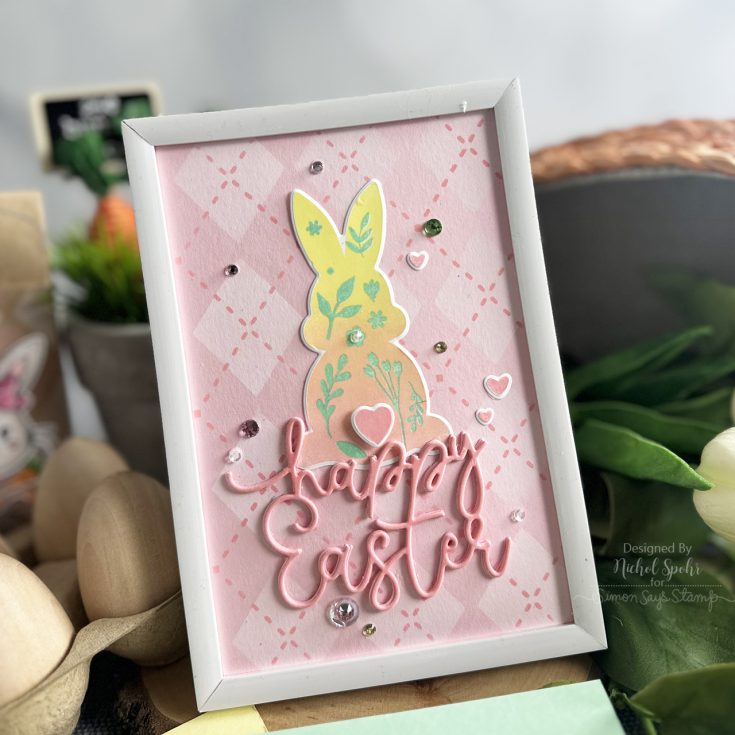
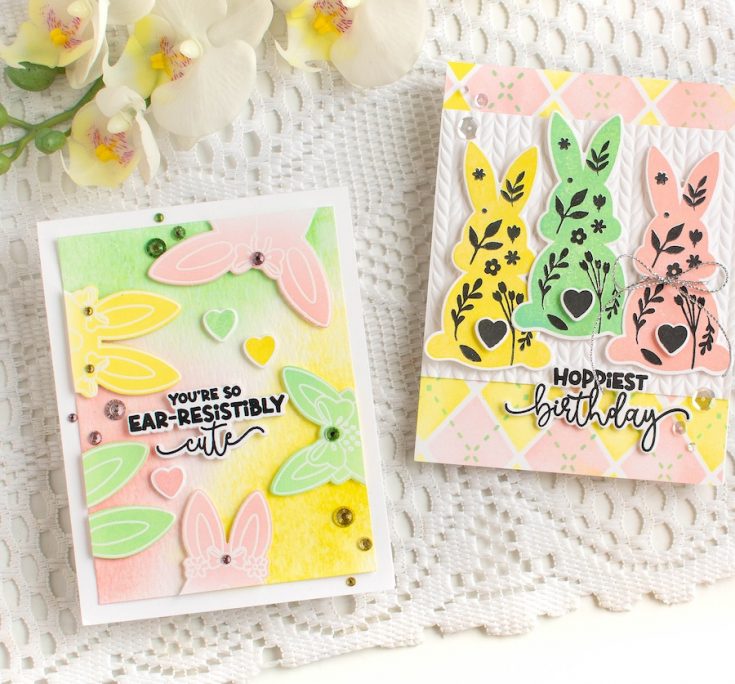
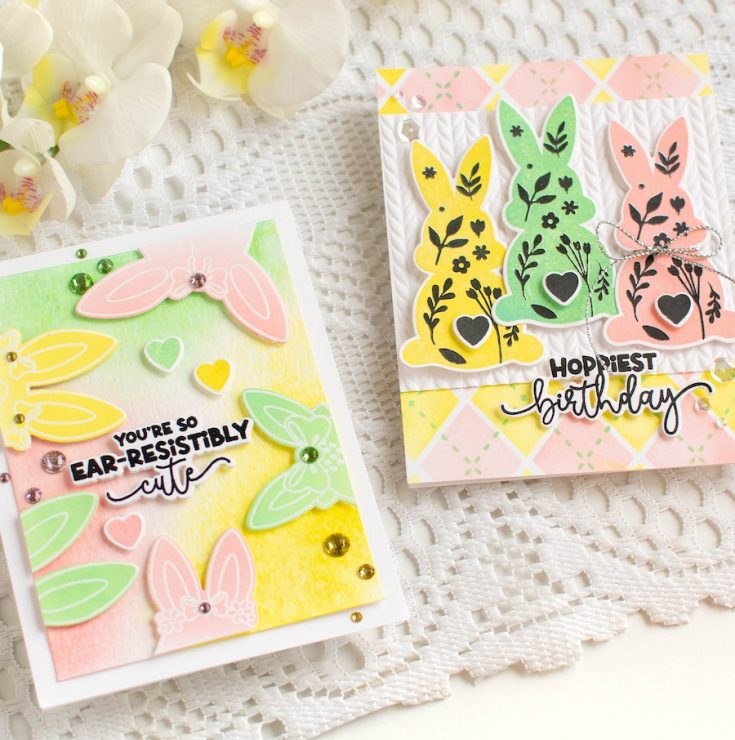
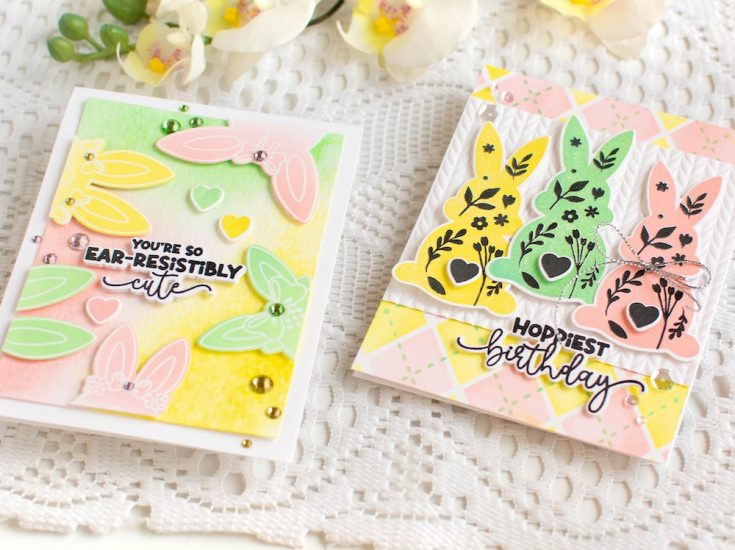
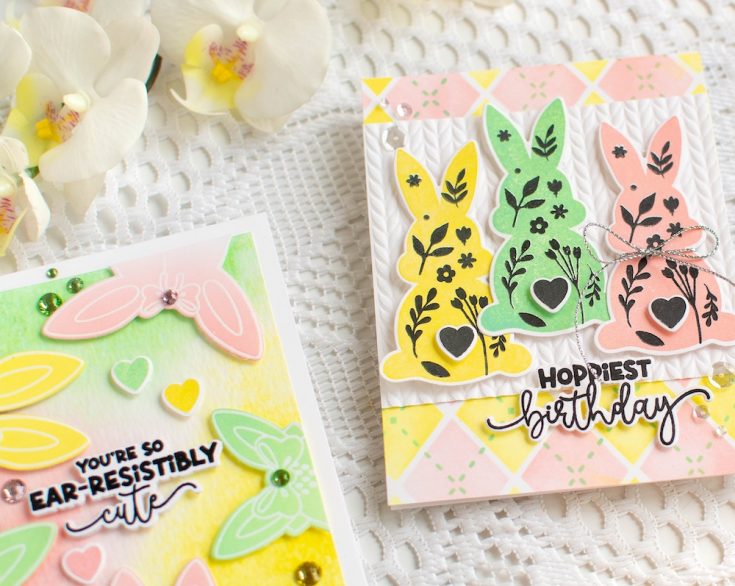
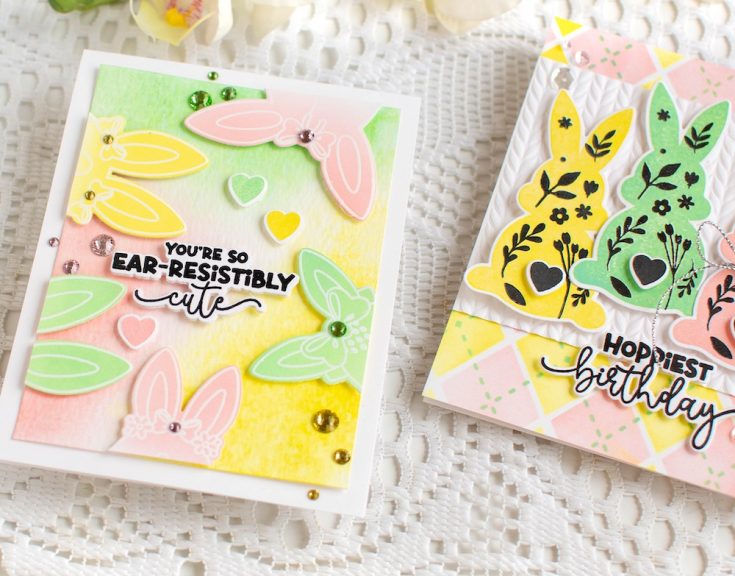
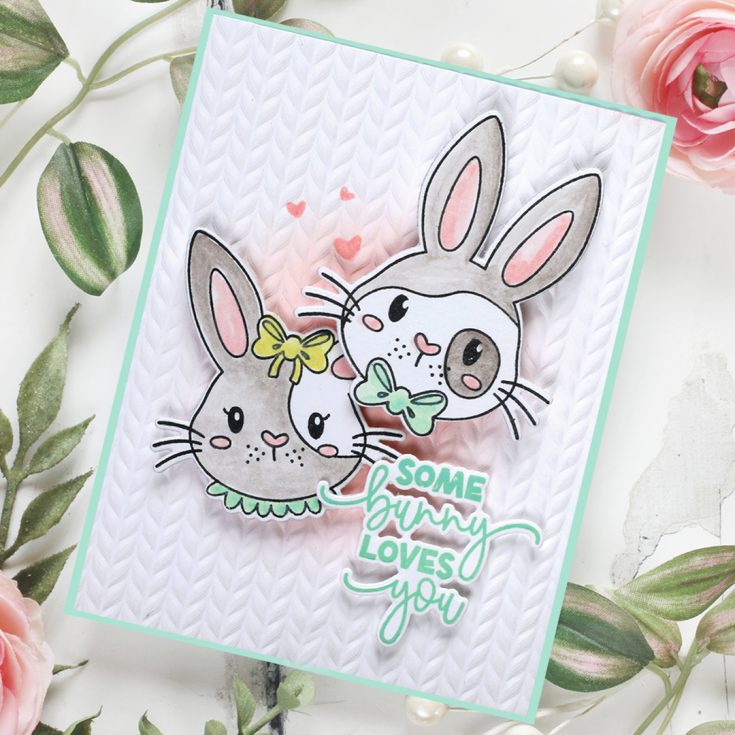
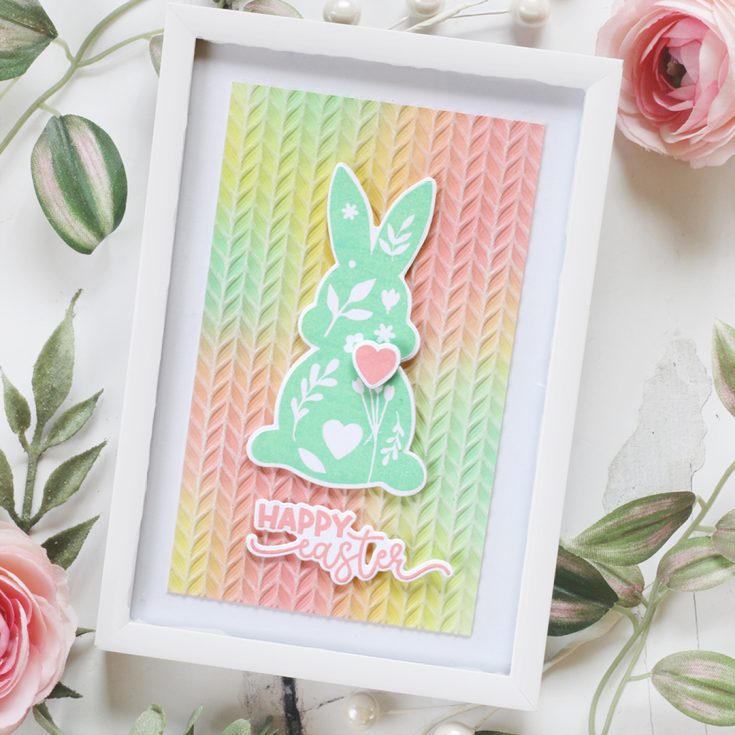
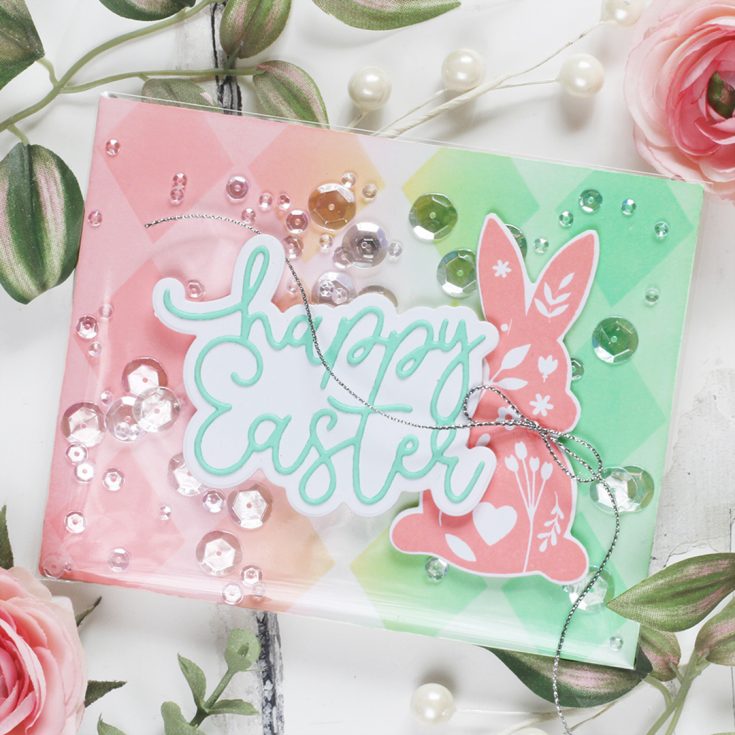
First up is Heather Hoffman, and she’s crafted two absolutely ADORABLE cards using a bunch of goodies from the kit!
Missed the class? No worries—you can rewatch it anytime for FREE! Just click or tap right HERE.
Thanks so much for stopping by, and thanks to Heather for being our guest!
Stay tuned! Coming up later today is ANOTHER artist showing more adorable ideas of ways you can create with the Easter 2025 Card Kit! Didn’t pick up a kit? No worries! Many components are available individually for purchase.
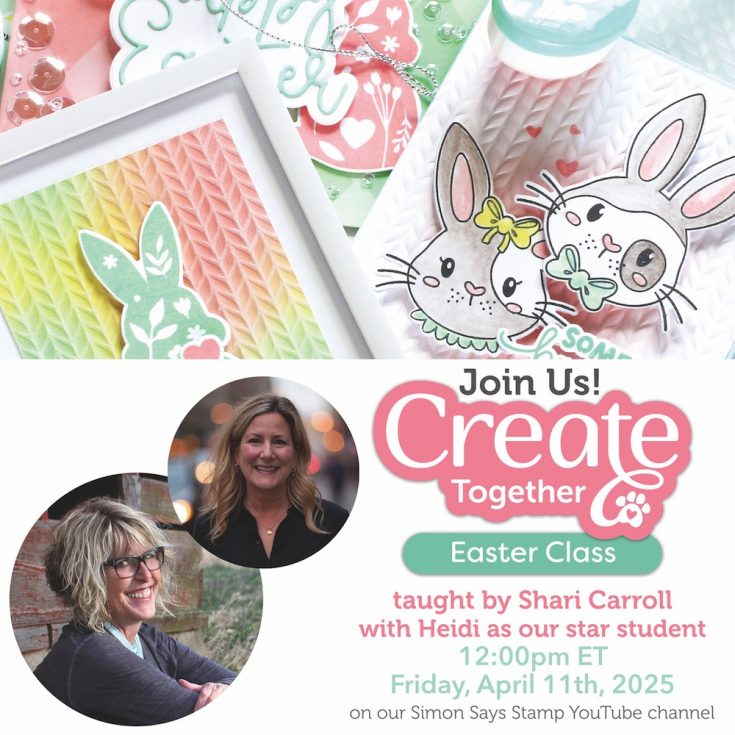
A Huge THANK YOU to Everyone Who Joined Us Live for Our Second Exciting Virtual Class of 2025!
We had an absolute blast Creating Together with all of you, and we hope you enjoyed it just as much as we did! Your energy, creativity, and enthusiasm made this class unforgettable, and we’re so grateful to have shared this special experience with such an amazing community.
Missed the class? No worries! You can catch all the fun whenever it’s convenient for you. Just click or tap the image above to watch the class on-demand—pause, rewind, and rewatch as much as you’d like to soak in every detail and technique!
Now, let’s dive right into the three fun projects we created together and the supplies you’ll need to bring them to life. Get ready to spark your creativity all over again—let’s keep the magic going!
Guess what? If you had a blast in this class, make sure you’re subscribed to our blog, newsletter, and SMS updates! You’ll be the first to know about our next fun-filled virtual class event and kit!
Welcome
In business since 2002, Simon Says Stamp is striving to offer you the best online selection of stamps, altered art, scrapbooking, mixed media, card making and paper crafting products in the world. We stock over 100,000 quality items in our warehouse so that we can offer you quick service and one stop shopping at a great price!