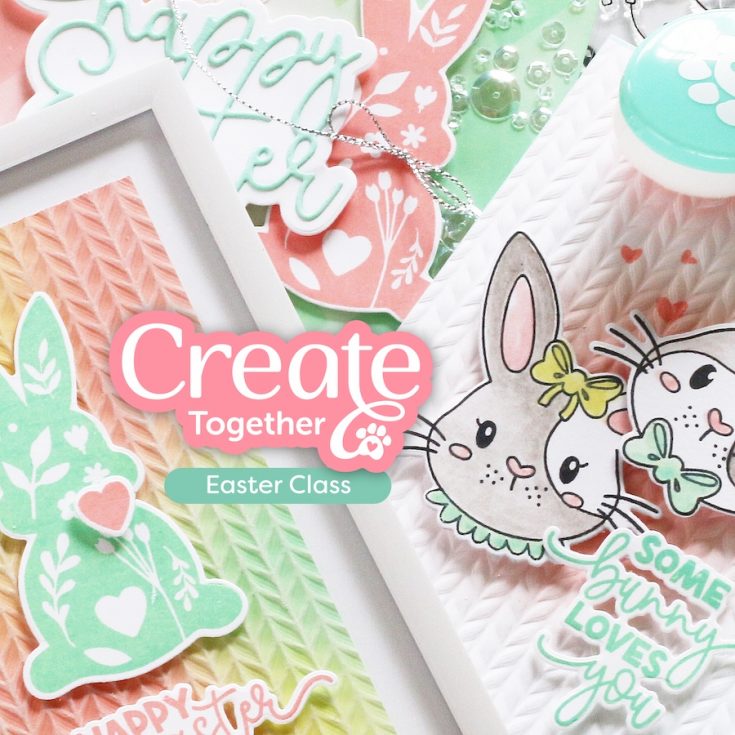
This Fabulous Easter kit includes a FREE CLASS!
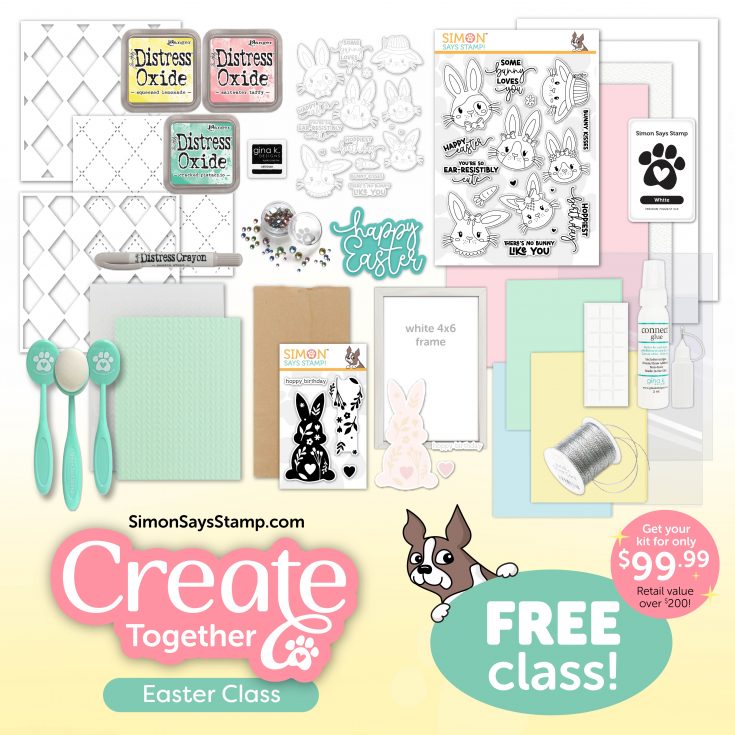
Hold onto your rabbit ears! Make beautiful Spring Cards with our Limited Edition Easter Kit!
Create together LIVE with Shari Carroll and Heidi using the kit. By purchasing this kit, you will receive exclusive, not yet released products.
Class is LIVE with on our Simon Says Stamp YouTube channel on April 11th at 12 PM ET. Not available at that time? No worries, this class will be available to you on YouTube to watch, rewatch, pause, and play again!
As a special BONUS, Saturday, April 12 we will feature 2 additional teachers making even more projects on our youtube channel.
Purchase your kit now and be ready to join us LIVE in class!
Missed our live announcement? Catch the rewatch below!

Kit contents include:
- Simon Says Stamp Exclusive Ear-resistibly Cute Stamp Set
- Simon Says Stamp Exclusive Ear-resistibly Cute Coordinating Die Set
- Simon Says Stamp Exclusive Bouncy Happy Easter Die
- Simon Says Stamp Exclusive Hoppy Birthday Stamp Set
- Simon Says Stamp Exclusive Hoppy Birthday Coordinating Die Set
- Simon Says Stamp Exclusive Argyle Stencil
- Simon Says Stamp Exclusive Neatly Knitted 3D Embossing Folder
- Simon Says Stamp Exclusive Silver Metallic Cord
- Simon Says Stamp Exclusive White Ink Pad
- Simon Says Stamp Exclusive Moonshine Embellishment Mix
- Simon Says Stamp Exclusive Pastel Tones Pawsitively Dazzling Gems
- 3 Simon Says Stamp Exclusive Large Teal Blending Brushes
- Gina K Designs Connect Glue
- Gina K Designs Fine Tip Applicator Bottle
- Gina K Designs Obsidian Ink Cube
- Tim Holtz Distress Oxide Cracked Pistachio Ink Pad
- Tim Holtz Distress Oxide Squeezed Lemonade Ink Pad
- Tim Holtz Distress Oxide Saltwater Taffy Ink Pad
- 4×6 Inch White Picture Frame
- Hero Arts Mini Watercolor Brush
- Small Kraft Treat Bag
- Tim Holtz Distress Pumice Stone Crayon
- Assortment of Adhesive Foam Squares
- 2 Clear Bags for Making Edge to Edge Shaker Cards
- 1 Sheet of 8.5 x 11 Inch Watercolor Cardstock
- 2 Sheet of 8.5 x 11 Inch Hammermill 100 LB Cardstock
- 1 Sheet of Simon Says Stamp Exclusive 8.5 x 11 Inch Cotton Candy 100 LB Cardstock
- Simon Says Stamp Exclusive A2 Card Base in Sea Glass
- Simon Says Stamp Exclusive A2 Card Base in Lemon Chiffon
- Simon Says Stamp Exclusive A2 Card Base in Mint
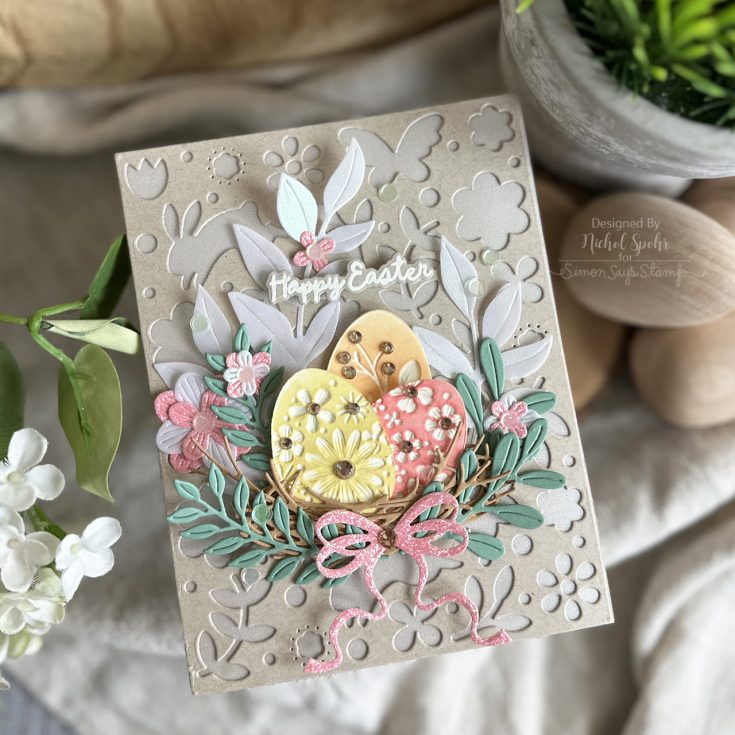
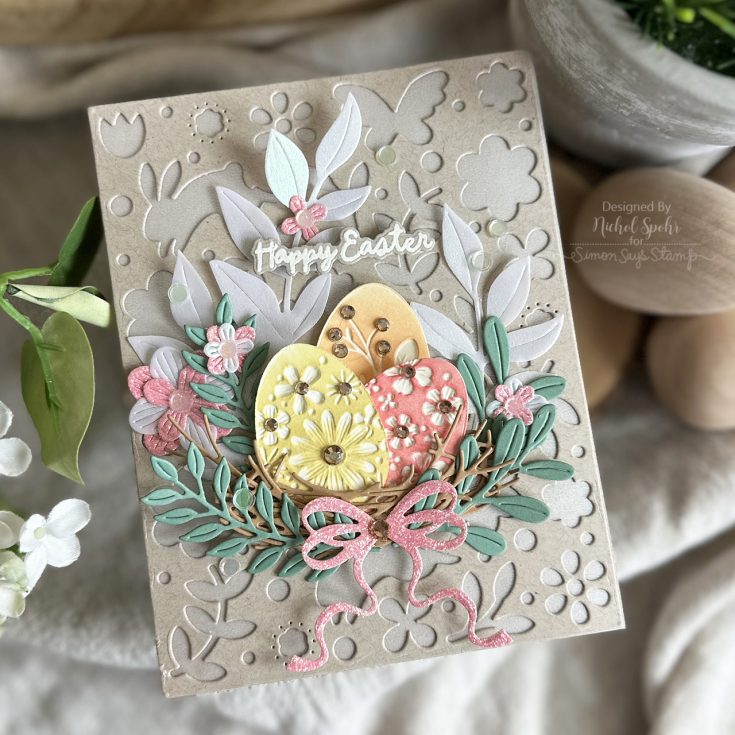
Create an ELEGANT Easter Egg Nest Handmade Card: Making the Cut

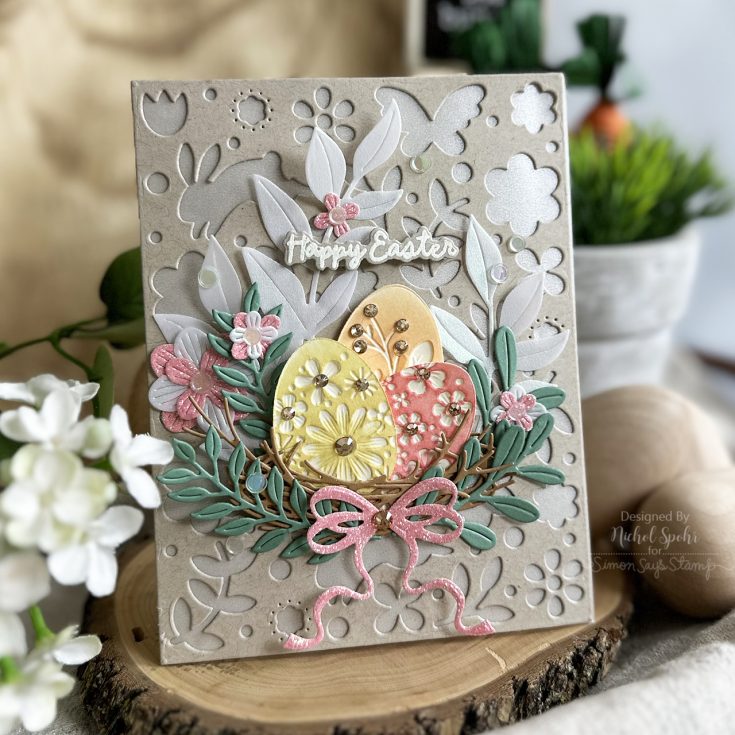
Hi friends! Happy Thursday! We’re delighted to welcome back special guest Nichol Spohr in our monthly Making the Cut series where we share the love of all things die cutting! In this gorgeous card Nichol is showcasing our Springtime Celebration Plate, Lush Leaves, Hanging Leaf Ring, Pretty Bows, Rustic Nest, and Floral Easter Eggs embossing folder and die! Be sure to watch the video for all the details, and enjoy!
WATCH THE VIDEO:

SUPPLIES:
|
Thanks so much for stopping by, and thanks to Nichol for being our guest!
Mark your calendar!
Join us live TODAY at 10 AM ET! Click or tap the bell by ‘Notify Me’ to be notified when we begin on Thursday, March 13th at 10 AM ET!

Vignette Tray Using NEW Tim Holtz idea-ology from the vault paper collection!
Hi friends! Happy Wednesday! Please join me in welcoming back special guest Paula Cheney to the blog today! Read on to learn all the details of this incredible tray and enjoy!
I’m so excited to be using one of Tim Holtz’s six classic idea-ology paper collections in today’s project! Each collection offers something special, and today, I’m diving into Abandoned—one of my personal favorites. The six collections—Abandoned, Correspondence, Dapper, French Industrial, Memoranda, and Wallflower—are available in both 12” x 12” and 8” x 8” paper packs (not pads, so no gummed edges to worry about!).
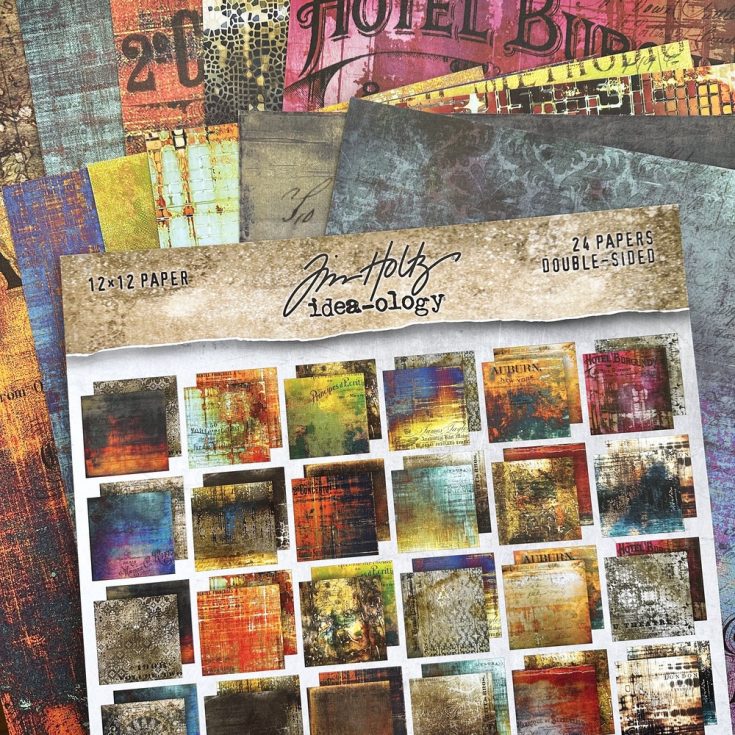
What makes Abandoned particularly unique is that it was never released in the 12” x 12” size, which is why I’m thrilled to showcase the bold, vibrant colors of this collection in today’s project. The combination of visual textures and rich tones in Abandoned makes it perfect for a variety of creative endeavors. Let’s dive in and explore how these papers can add depth and character to your crafting projects!
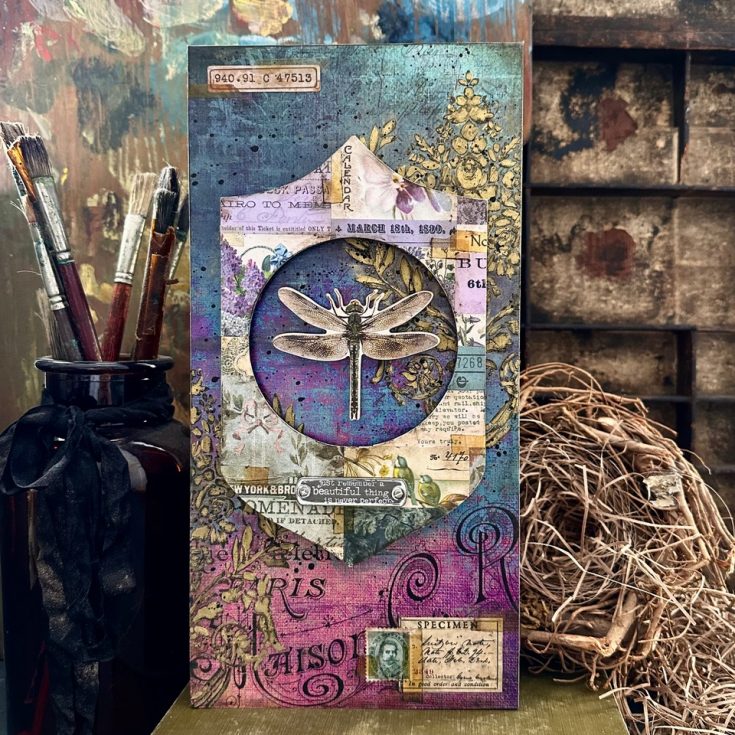
Vignette Tray
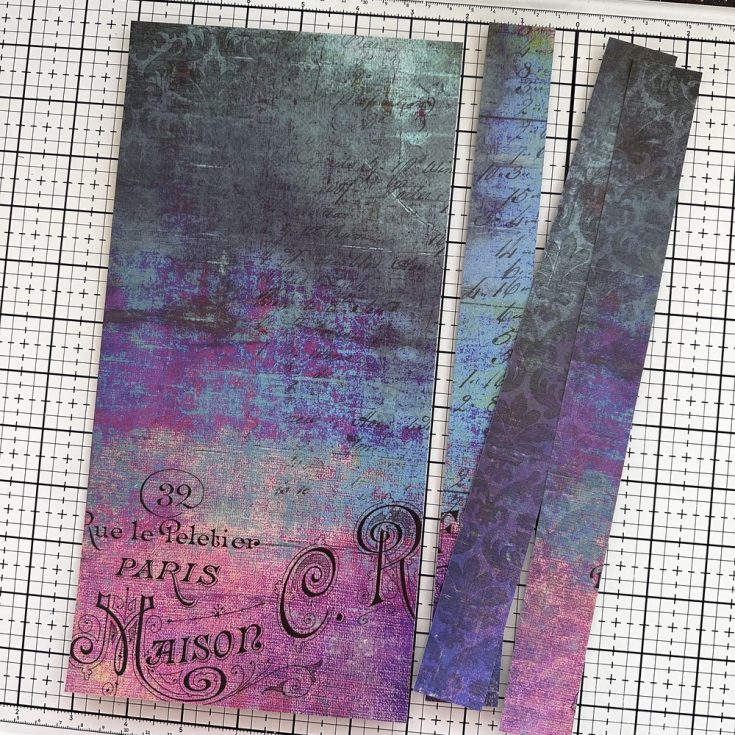
The Vignette Tray I am using is 6 x 12”. One of the advantages of choosing the Vignette Tray is that I can use the entire 12” length of paper and not worry about piecing. I also get the entire length of color variation from teal to raspberry. To get started, cut 4 pieces of paper: one – 6 x 12” and three –
1 1/4 x 12”. NOTE: Cut one of the skinny strips in half to cover the two short sides of the tray.
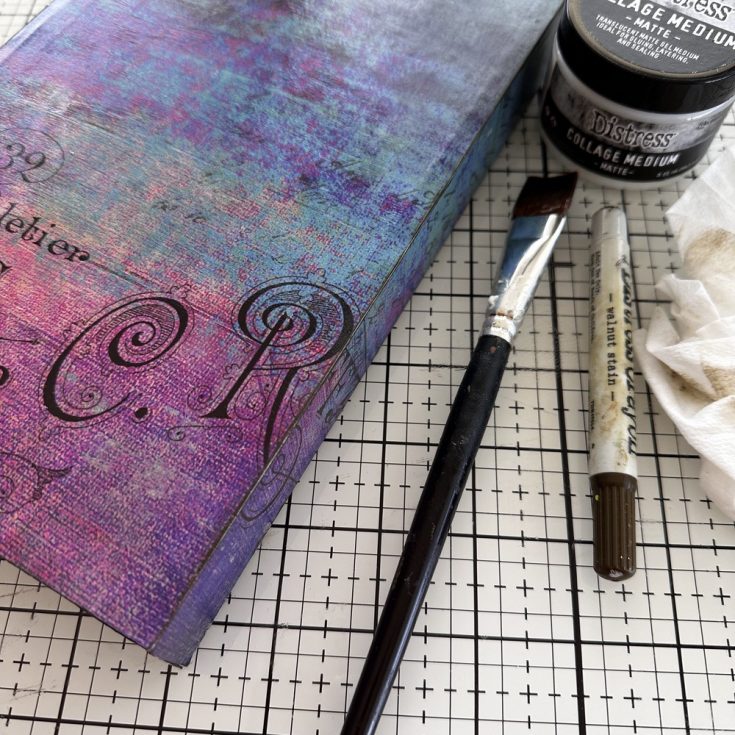
Adhere the cut pieces of Abandoned to the Vignette tray with Collage Medium. Add a layer of Collage Medium over the top of the paper to seal. Once the Collage Medium is dry, disguise the white edges of the cut paper with Walnut Stain Distress Crayon (like magic, they disappear!
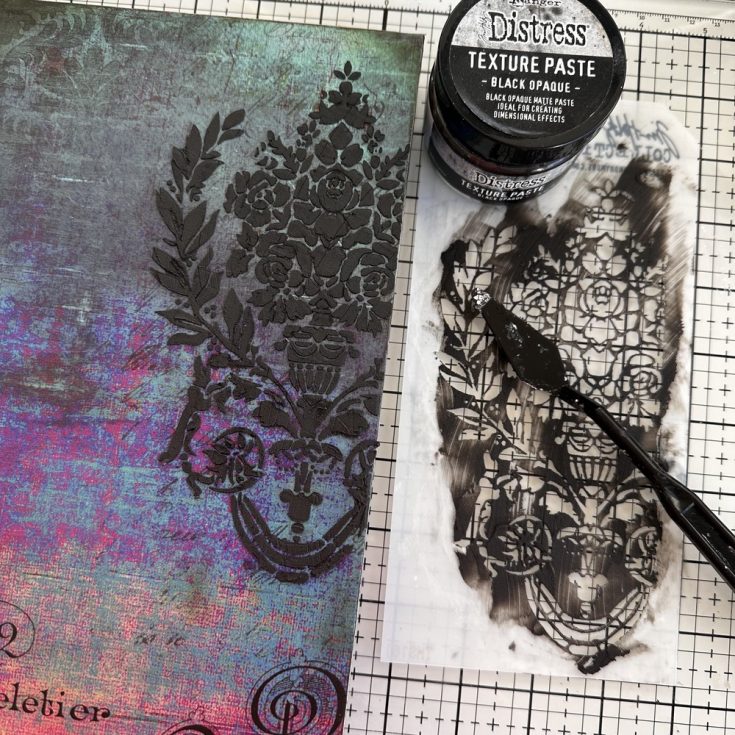
To add more detail to the background, I chose a favorite Tim Holtz Layering Stencil called Crest. I wanted the image on the right side, so I flipped the stencil over to have the leaves on the left. Using a Distress Palette Knife, spread Black Opaque Texture Paste over the stencil.

After a quick clean of the stencil with water, I repeated the image on the left, again flipping the stencil to the direction I wanted. Let the Texture Paste dry completely. Time can vary because of temperature and humidity, but I say a minimum of 30-40 minutes.
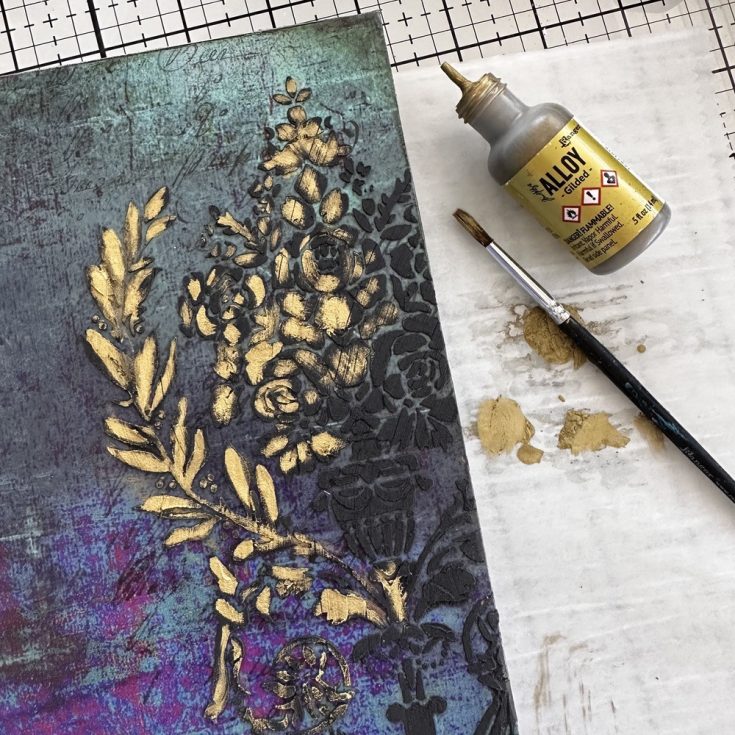
So I wanted to add a metallic over the black paste, but I did not want it super shiny like Foundry Wax. So I opted for the unique choice of Gilded Alloy. This product is usually used on Yupo or other non-porous surfaces but I found it remains a muted gold over the black Texture Paste…And that is exactly what I wanted. The Alloy does dry quickly so you have to work quickly, shaking and pouring out a dime size puddle at a time. I used a small Ranger paint brush to add the Alloy to the Texture Paste.
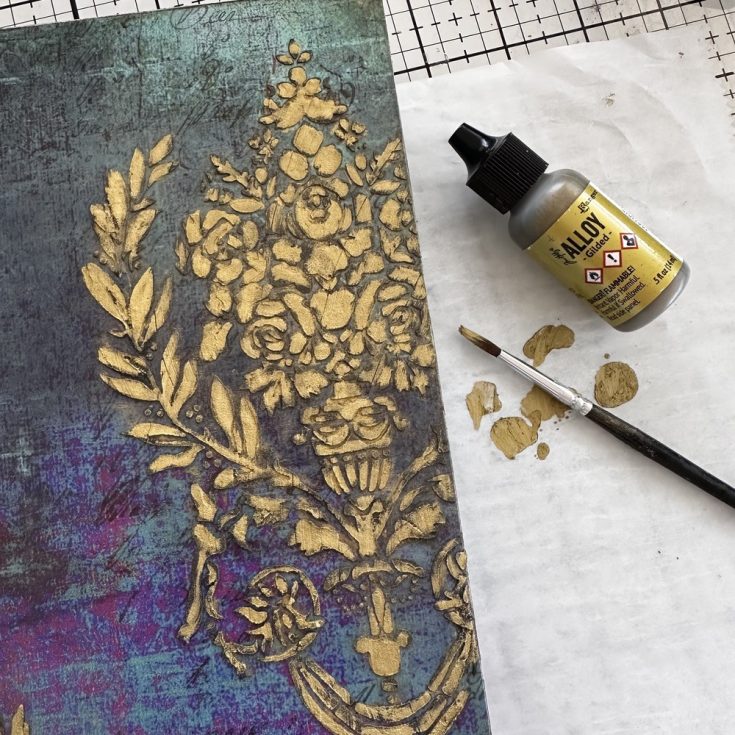
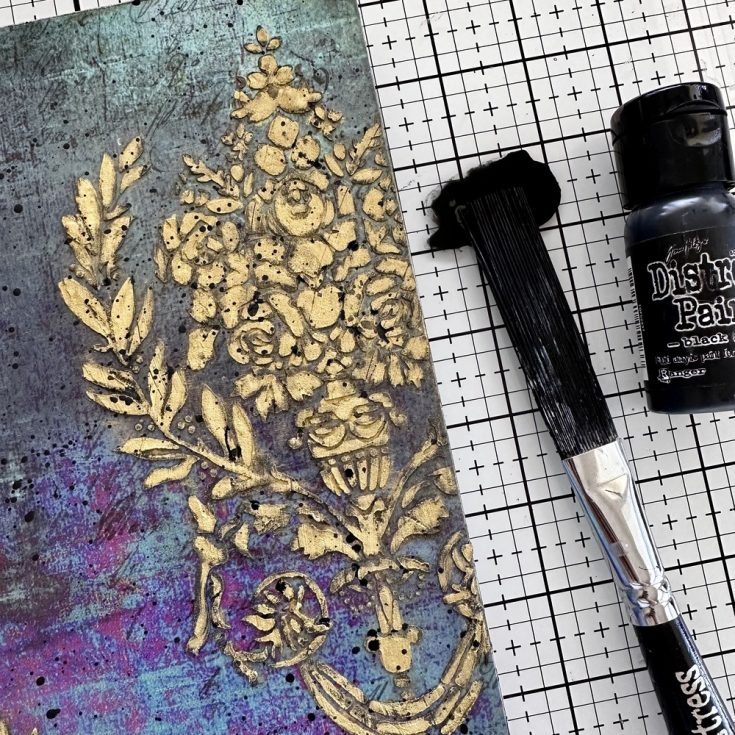
You can choose how much Alloy to add, how much black to let show through and if you want a second layer (which will make it more golden). I know it might sound like a lot of work, but it wasn’t, it took me a total of about 10-12 minutes to do both crests. NOTE: the paint brush can be easily washed with Isopropyl Alcohol.
Squeeze Black Soot Distress Paint onto a Studio Glass Mat or disposable paper. Use a Distress Splatter Brush to flick the black paint over the surface of the Vignette. Set aside to dry.
Etcetera Facade
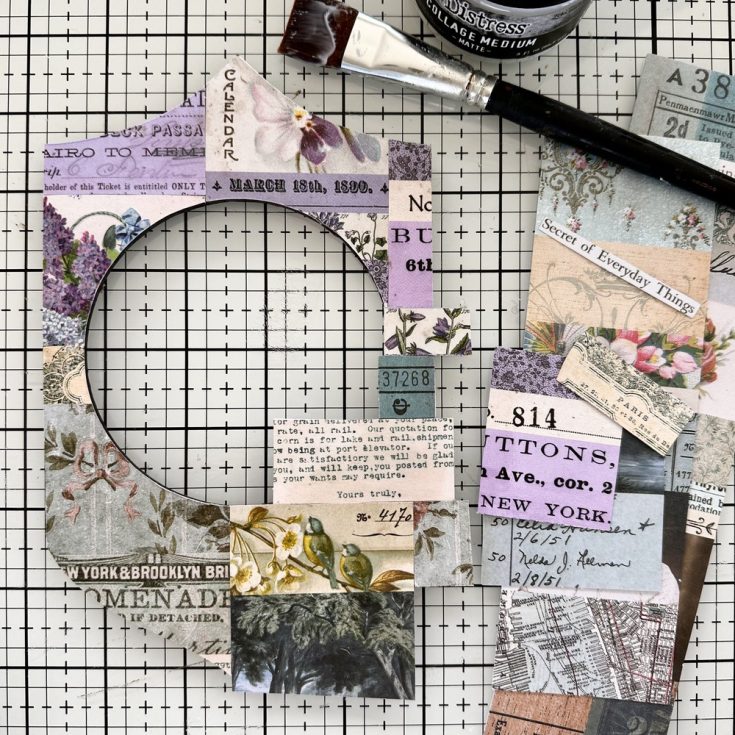
Use Collage Medium to adhere Large Collage Strips to the shield shape from the Etcetera Facades pack. The Collage Strips come in all the palette colors. I specifically chose purple and teal to mimic the colors in the Abandoned paper. I also chose to place the purple Collage Strips at the top of the shield and the teal at the bottom of the shield so they would be opposite of the Abandoned paper.
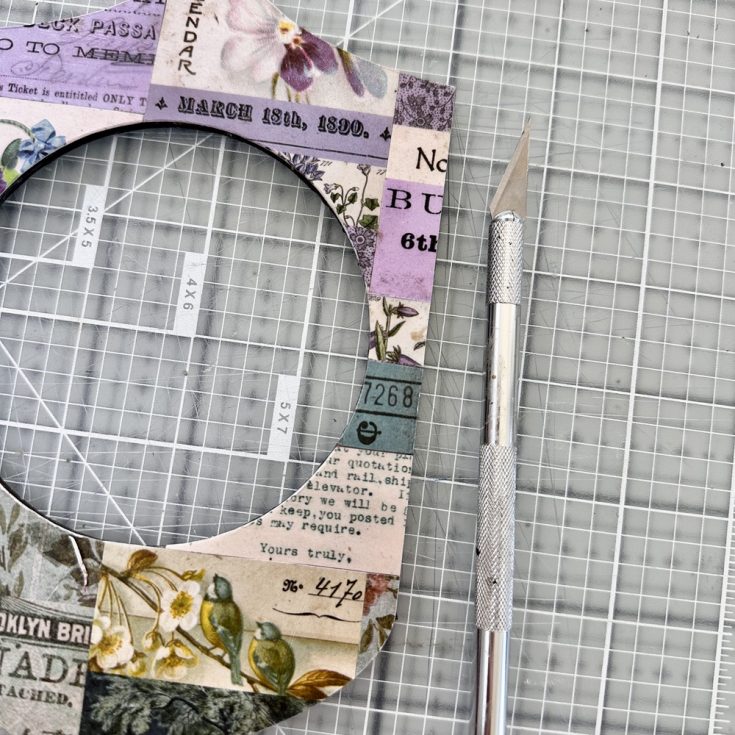
Use a cutting knife and a self-healing mat to cut out the center paper and around the sides. You can follow up with a sanding block if you wish.
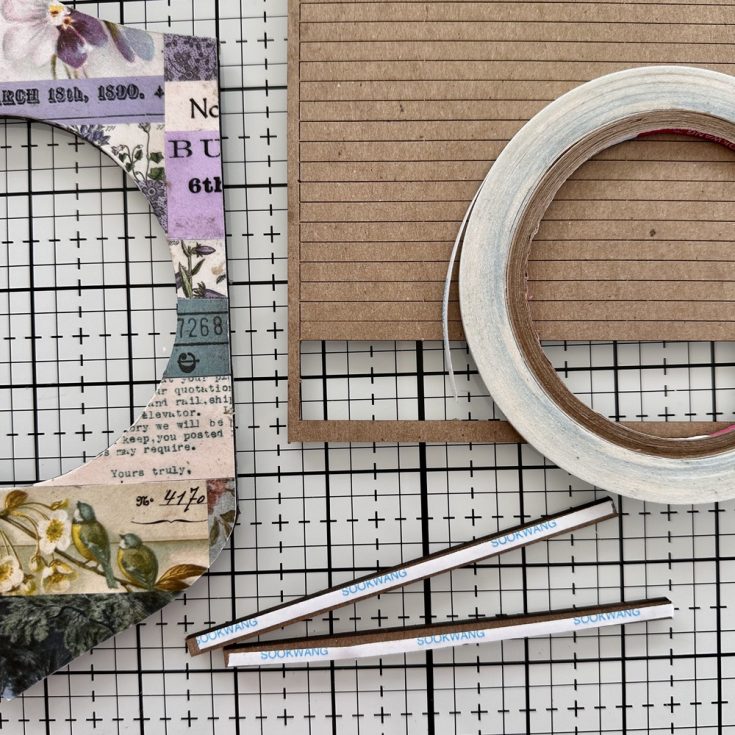
Each pack of Facades comes with a piece that is cut into tiny strips. The strips were specifically created to be used as risers for the Facade pieces. I punched out two strips and added 1/8” Scor-Tape. Then I added the risers to the right and left sides of the shield shape.

Before mounting the facade to the Vignette, I added Cello Sticker Tape to the shield, then used Walnut Stain Crayon to scribble around the tape so it would stand out.
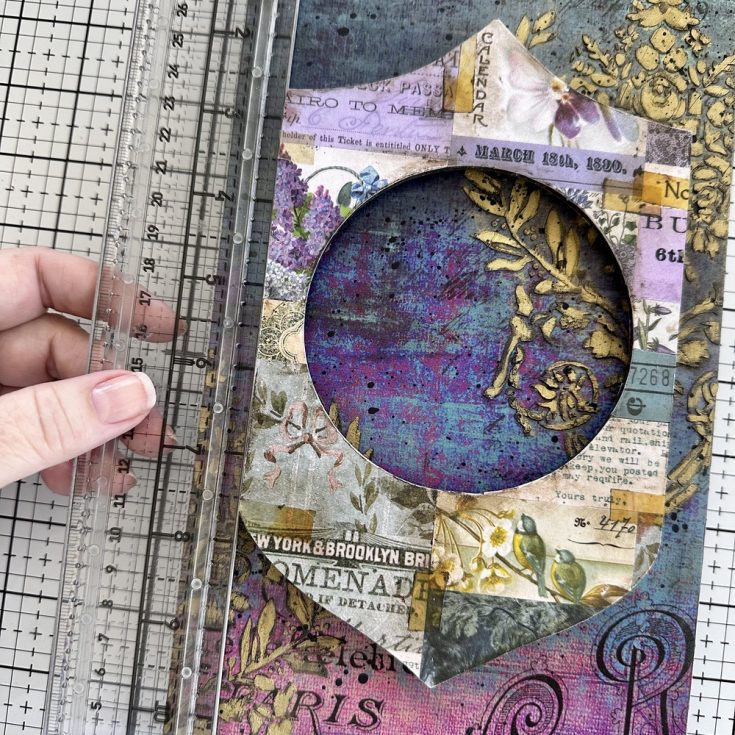
To make sure the Facade is straight, I used my clear Tonic Media Ruler to line it up before adding it permanently to the Vignette Tray.
Embellishments
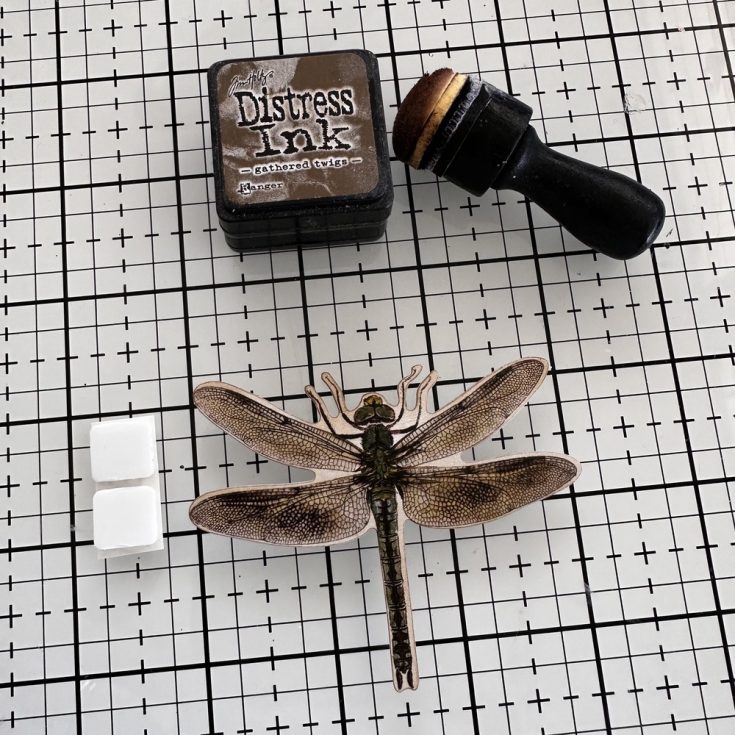
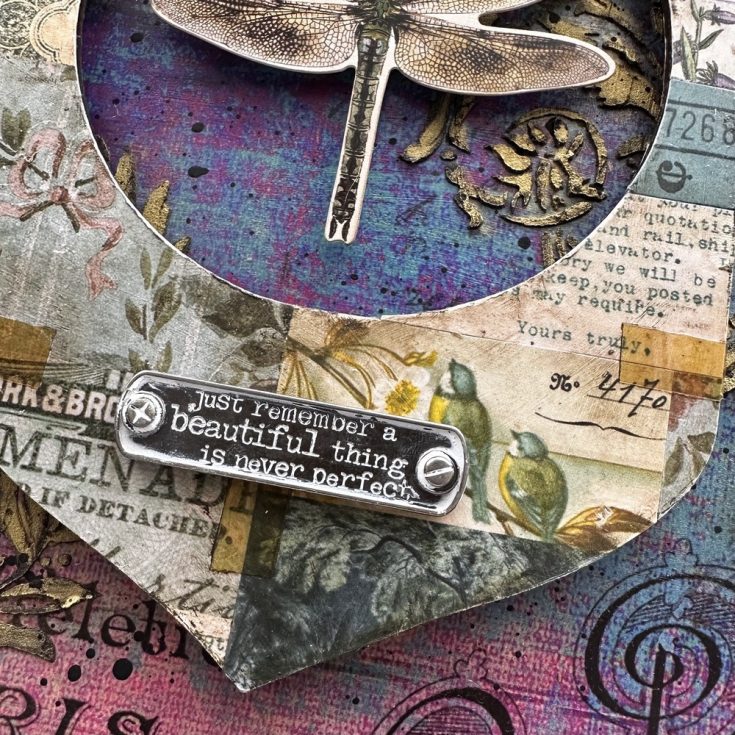
I chose the dragonfly from the Layers Organic pack for the centerpiece. I inked the white edges of the dragonfly so it would blend in with the background. I also added a double stack of 3D Foam Squares to the back.
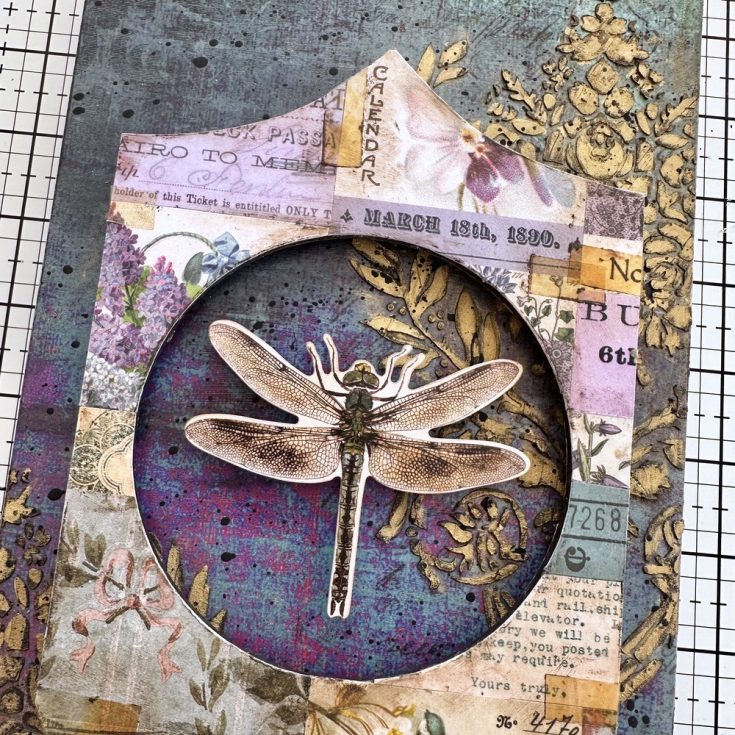
Adhere the dragonfly to the center of the circle with the Foam Squares.
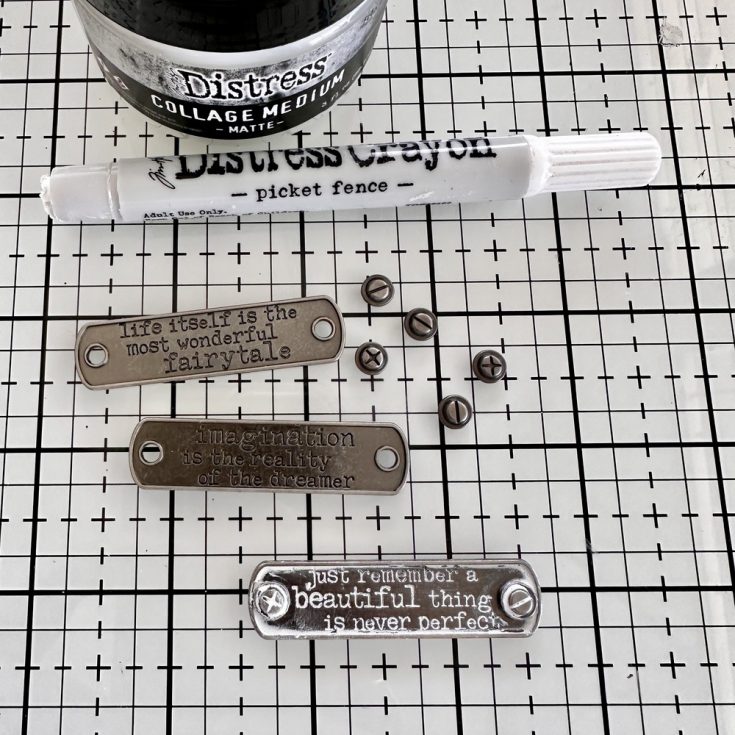
Add Screw Heads to each end of a Typed Tags. Once secure, scribble Picket Fence Distress Crayon over the Typed Tag and Screw Heads. Pick up and rub with thumbs until the crayon has been worked into the recessed areas.
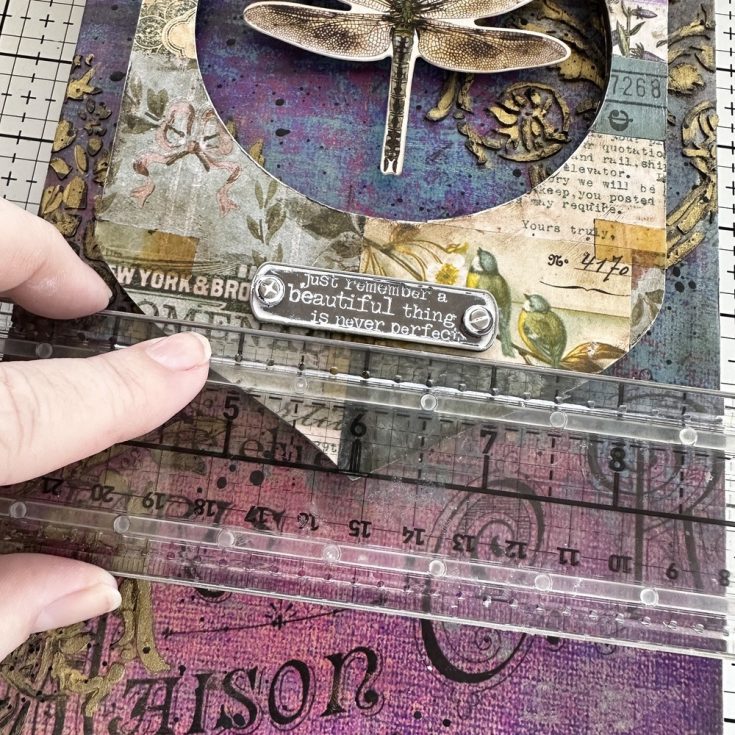
Use a Tonic Media Ruler to find the center mark for the Typed Tags.
Add two Thin 3D Foam Squares to the back of the Typed Tag and adhere to the Facade.
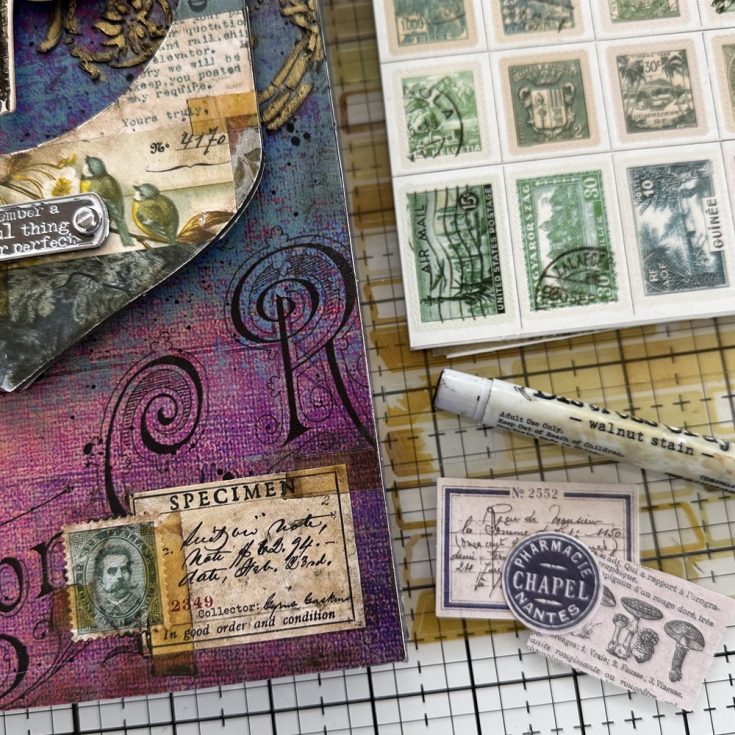
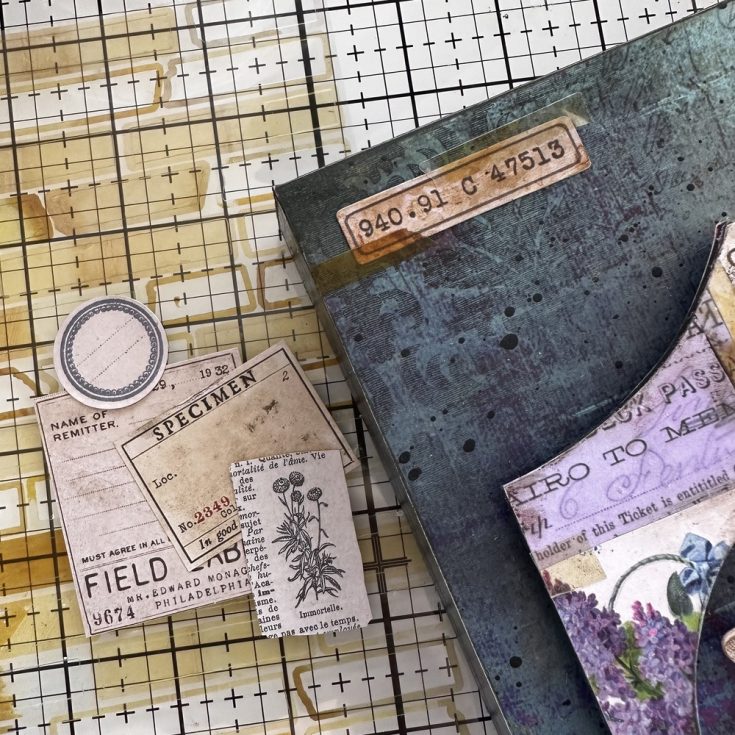
Use Collage Medium to adhere Field Notes ephemera. Add a stamp from the Postmarked Sticker Book and finish with Cello Sticker Tape.
Add more ephemera at the top left corner. Don’t be afraid to cut up the Cello Tape to get the size you want.
SUPPLIES:
|


Thanks so much for stopping by, and thanks to Paula for being our guest!
Mark your calendar!
Join us live TOMORROW! Click or tap the bell by ‘Notify Me’ to be notified when we begin on Thursday, March 13th at 10 AM ET!


