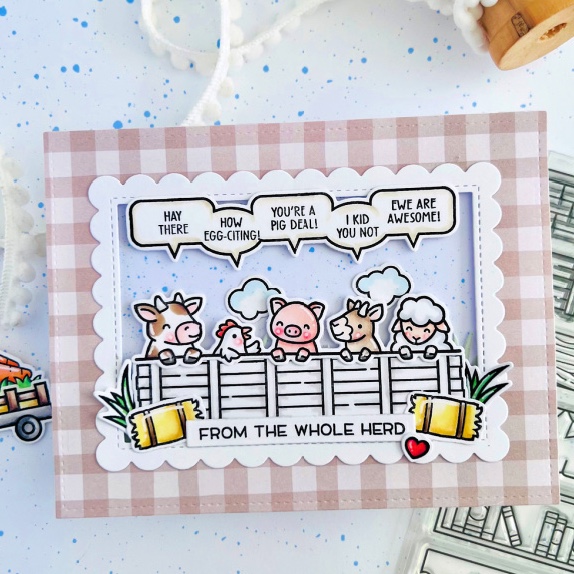
Can’t Miss NEW Lawn Fawn + NEW idea to inspire!
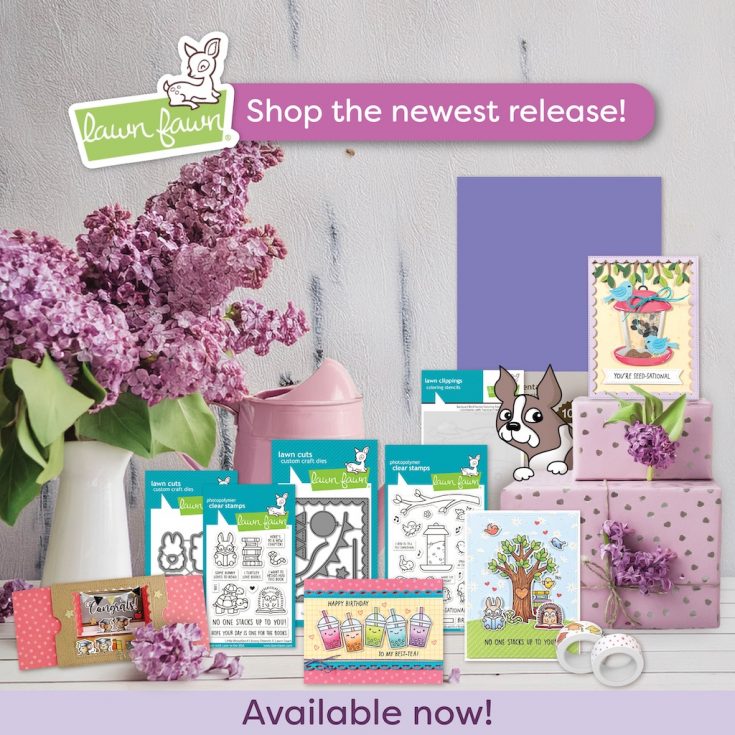
Hi friends! Happy Thursday! I’m delighted to share the brand new Lawn Fawn April 2025 collection that is in stock and shipping now! As a special bonus, keep scrolling to see brand NEW inspiration featuring this gorgeous collection by Chari Moss! Also, shop new bundles!


Also! Join me in a big welcome to special guest Chari Moss with an adorable card using new release items! Take it away, Chari!
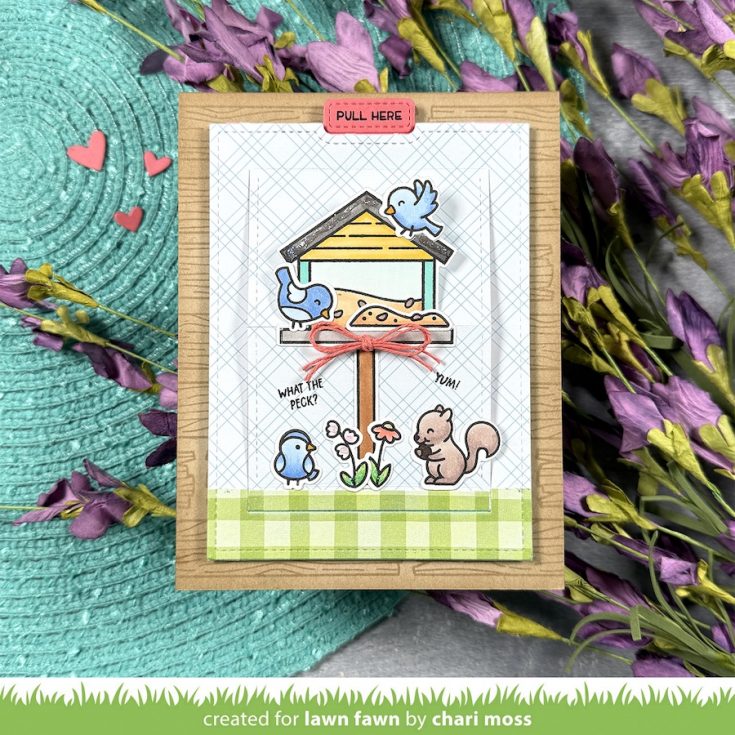
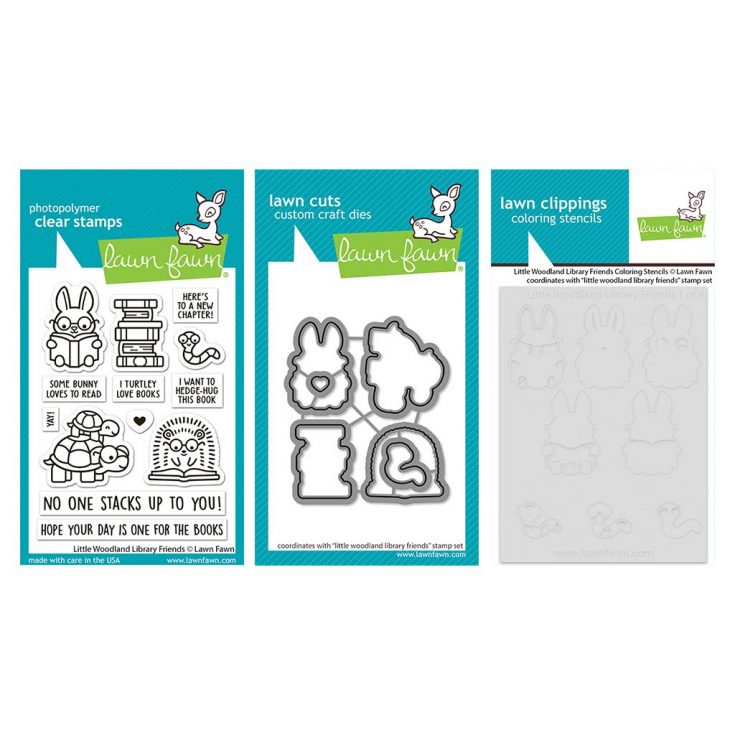
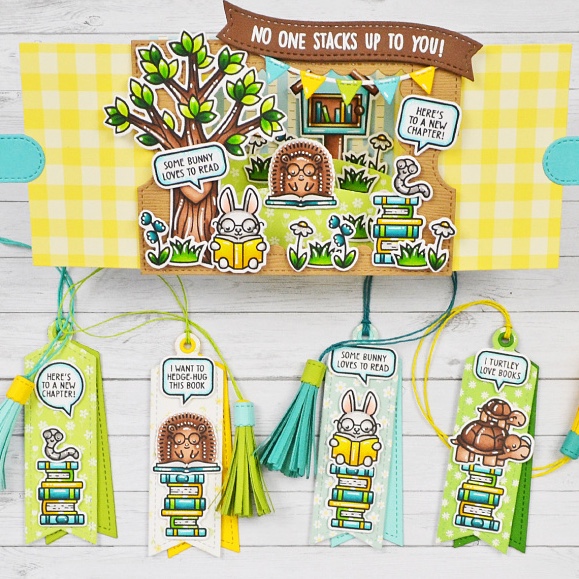
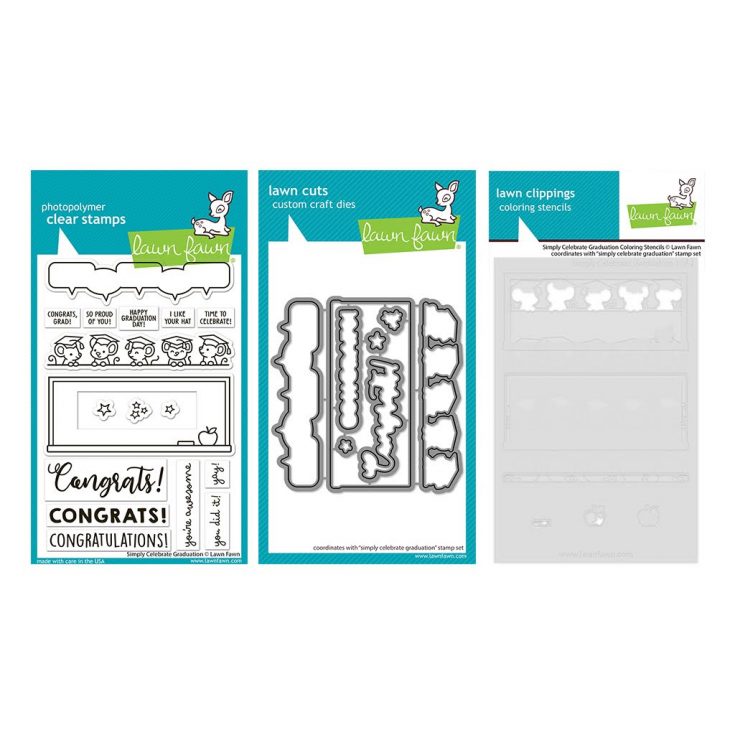
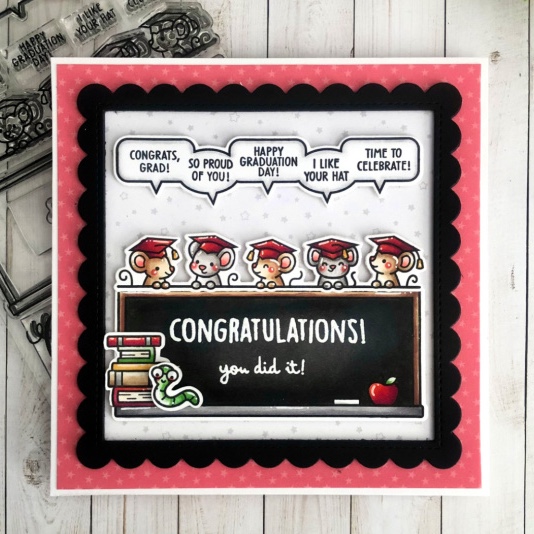
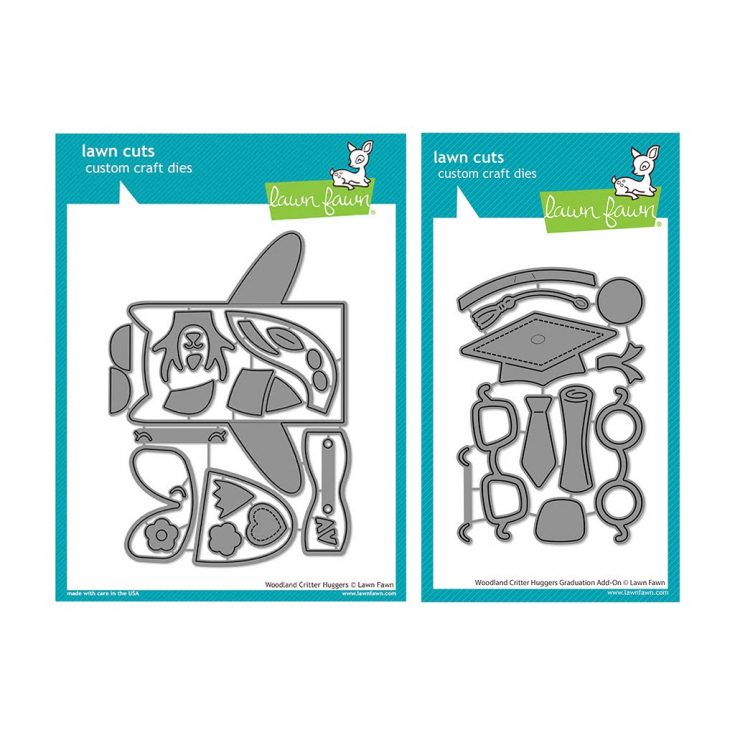
Hello Crafty Friends! Today I have a project to share using the brand new April Release from Lawn Fawn! This new release features fun spring goodies, graduation goodies and a new interactive die!
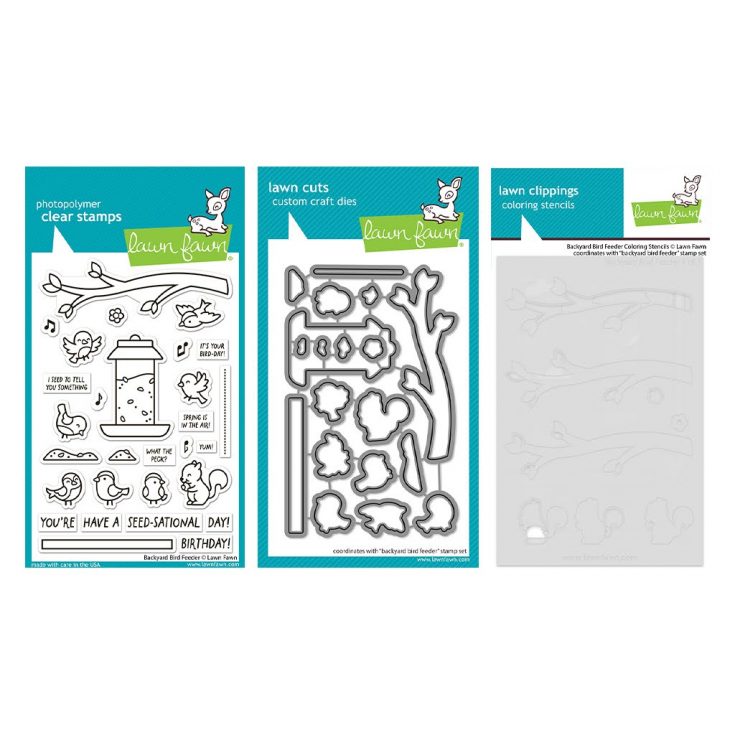
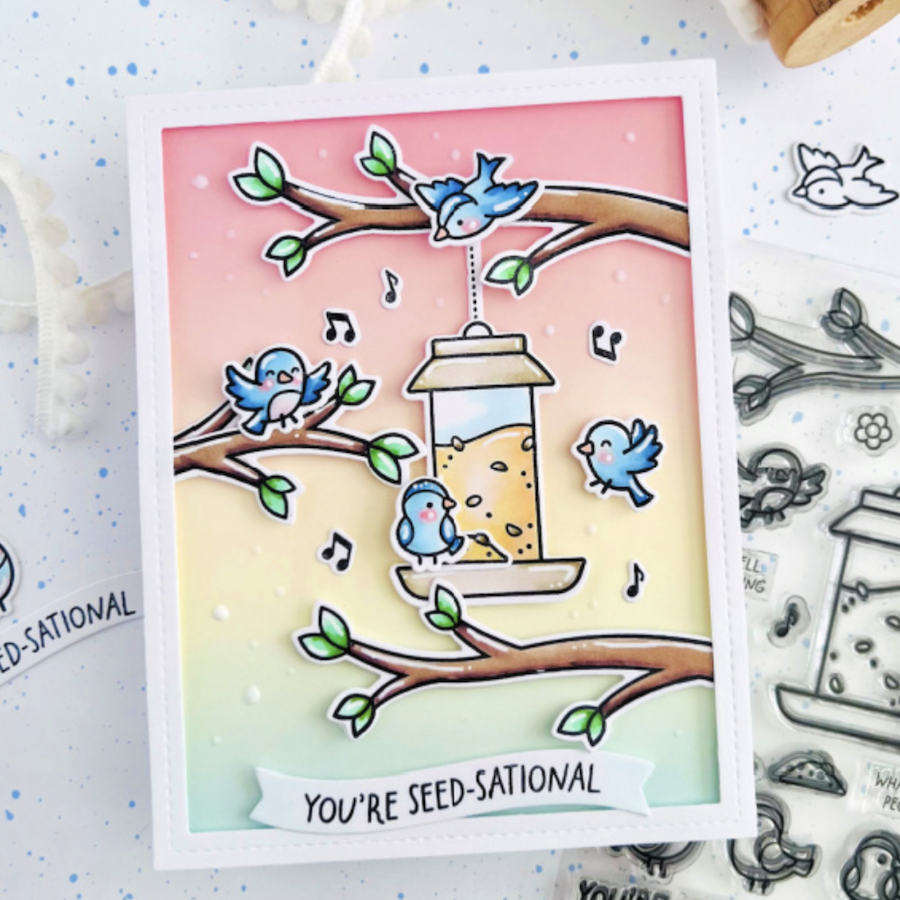
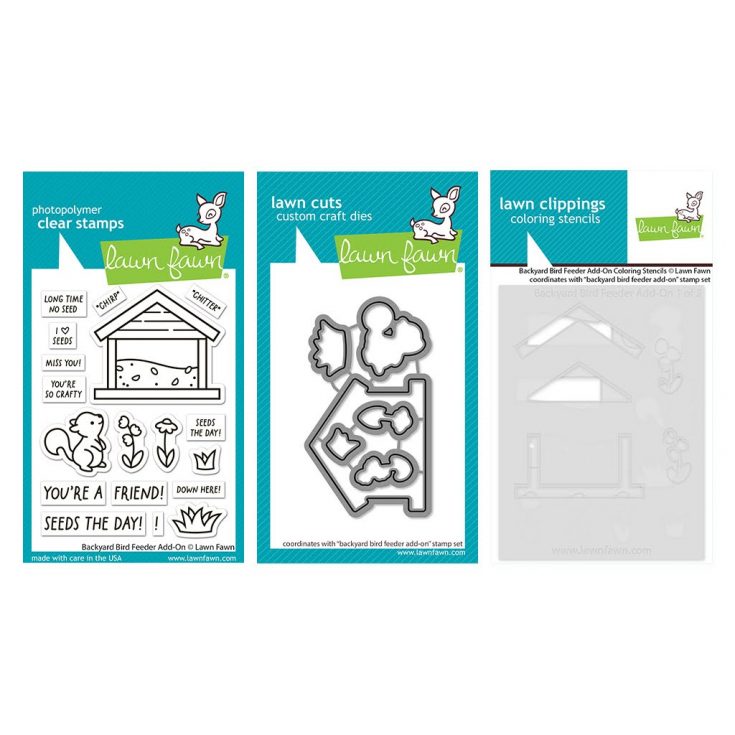
The Backyard Bird Feeder and Backyard Bird Feeder Add-on are perfect for creating cute little spring scenes. I love all the little birds and the squirrels stealing seeds. Seriously, how cute are the tiny punny sentiments? The little bird on the ground is not amused by the squirrel shenanigans.
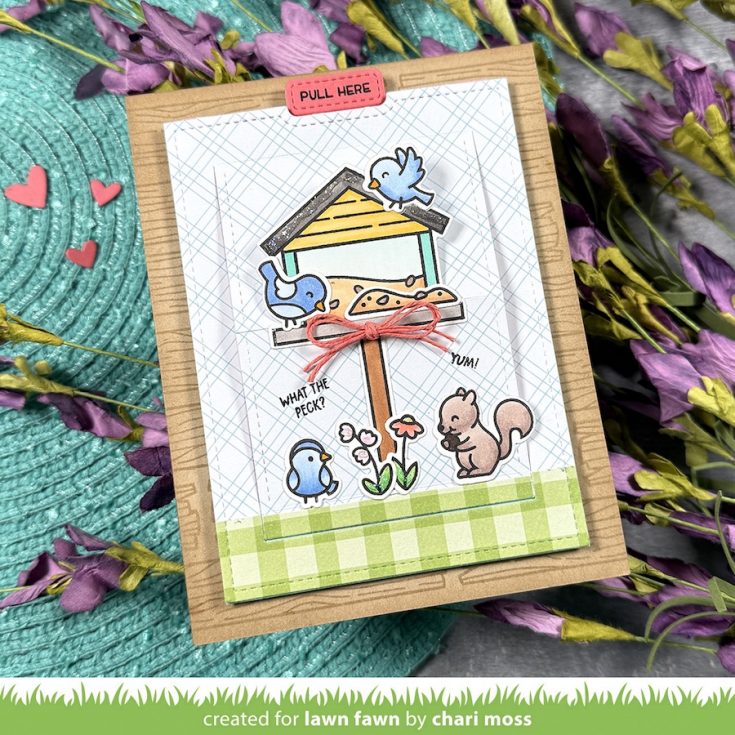
But this cards has a fun surprise. A Pull ’n Slide Surprise to be exact! This new interactive die transforms the front of the card in to a stand up scene while revealing a sentiment or gift card underneath…or both!
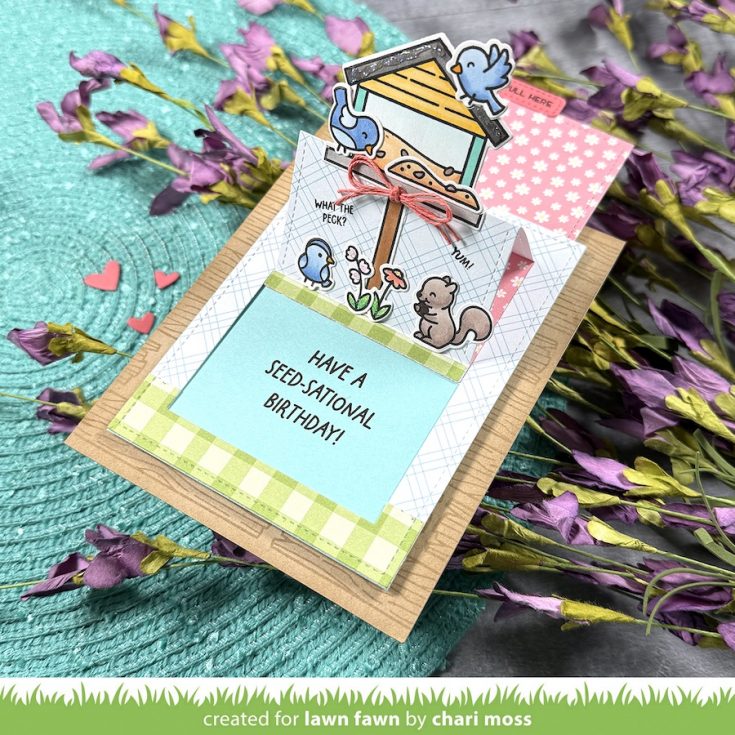
The Pull ’n Slide Surprise interactive die is very easy to construct and I love that you can totally change the look of the card by “hiding” fun papers, sentiments and gifts underneath.
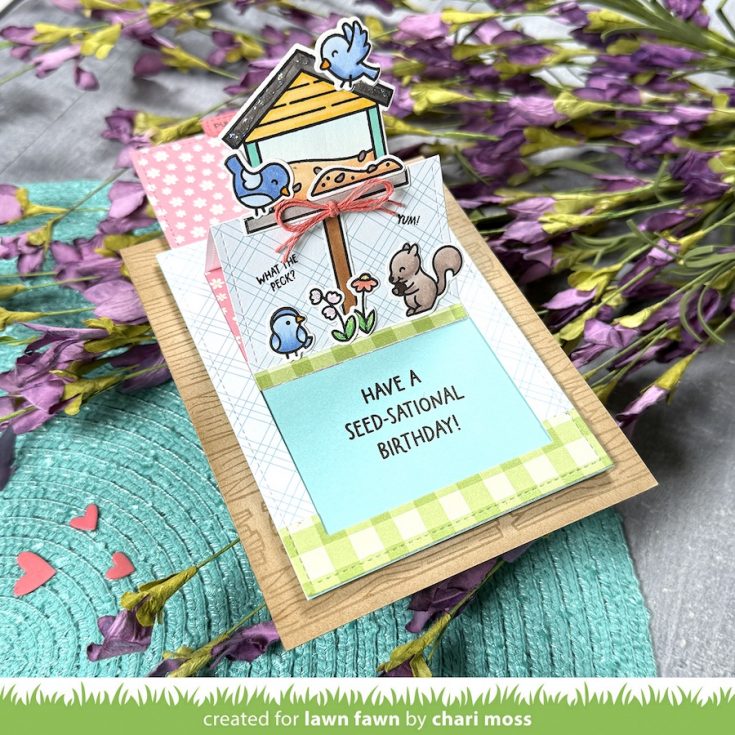
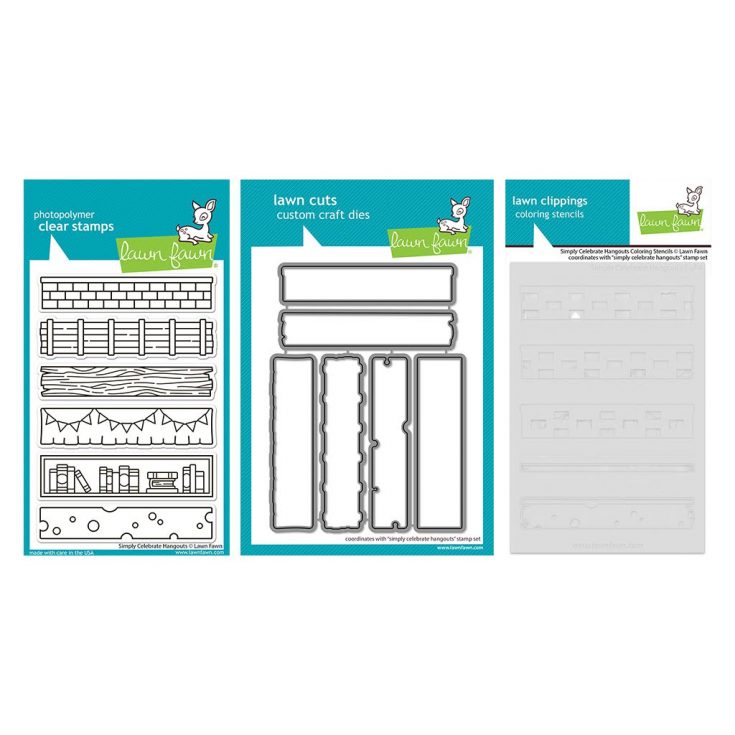
Another fun stamp set in this release is the Simply Celebrate Hangouts. These stamps are designed to compliment the Simply Celebrate Critters but for this card I used the wood log to create a stamped wood background on my card base. Just a fun subtle detail. I love when you can use a stamp set in multiple ways. We hope you love the April release as much as we do! – Chari
SUPPLIES:
- *NEW* Lawn Fawn Backyard Bird Feeder Bundle
- *NEW* Lawn Fawn Backyard Bird Feeder Add-On Bundle
- *NEW* Lawn Fawn Simply Celebrate Hangouts Bundle
- *NEW* Lawn Fawn Pull ’n Slide Surprise dies
|


Thanks so much for stopping by, and thanks to Chari for being our guest!
From Kit to Colorful Keepsake – Mixed Media Card Magic with Tina Smith
Hi friends! Happy Wednesday! I’m delighted to welcome back special guest Tina Smith to our blog today with fresh and gorgeous inspiration showcasing our brand new May 2025 Card kit! Be sure to watch the video for all the details, and enjoy!
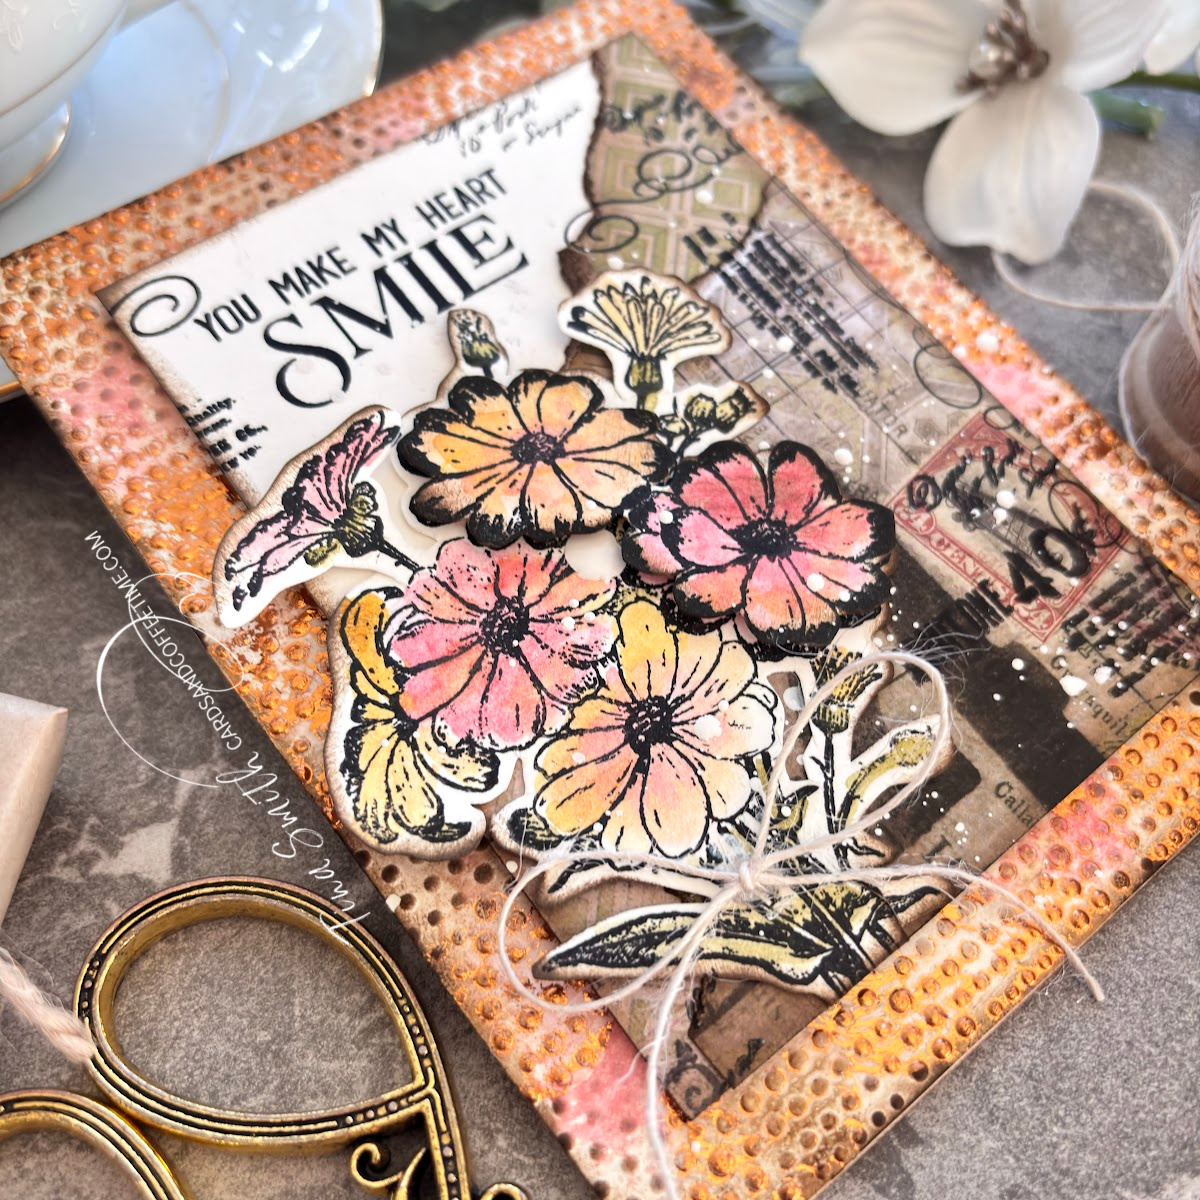
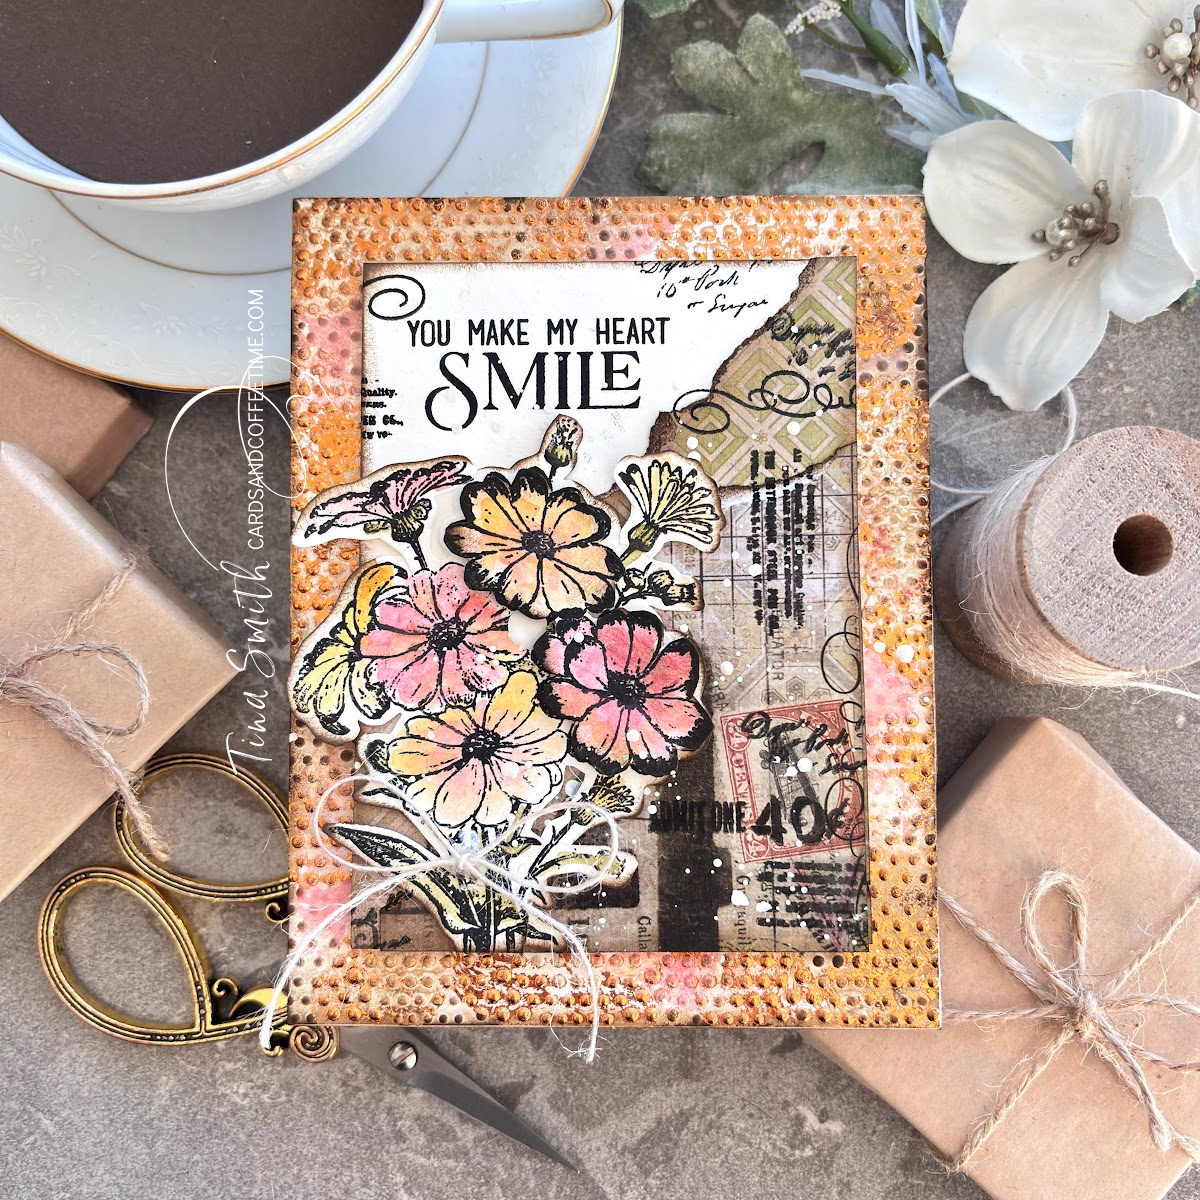
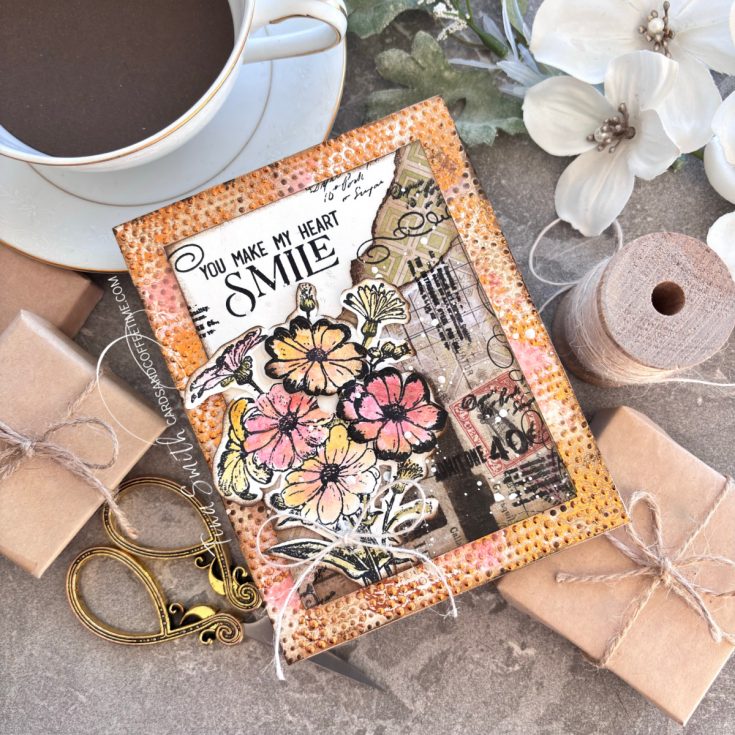
Hello, cardmaking friends! Tina here from Cards and Coffee Time. I hope your day is bursting with creativity! I’m absolutely thrilled to share a Just Because mixed media card featuring the Simon Says Stamp May 2025 Card Kit – Beautiful and Curious. We’re getting inky, tearing paper and doing a little bit of simple water coloring. Plus sharing a neat way to emboss and add distress foiling at the same time. No special tools needed for this extraordinary vintage effect. Enjoy the process! Hugs, Tina
WATCH THE VIDEO:

SUPPLIES:
|


Thanks so much for stopping by, and thanks to Tina for being our guest!
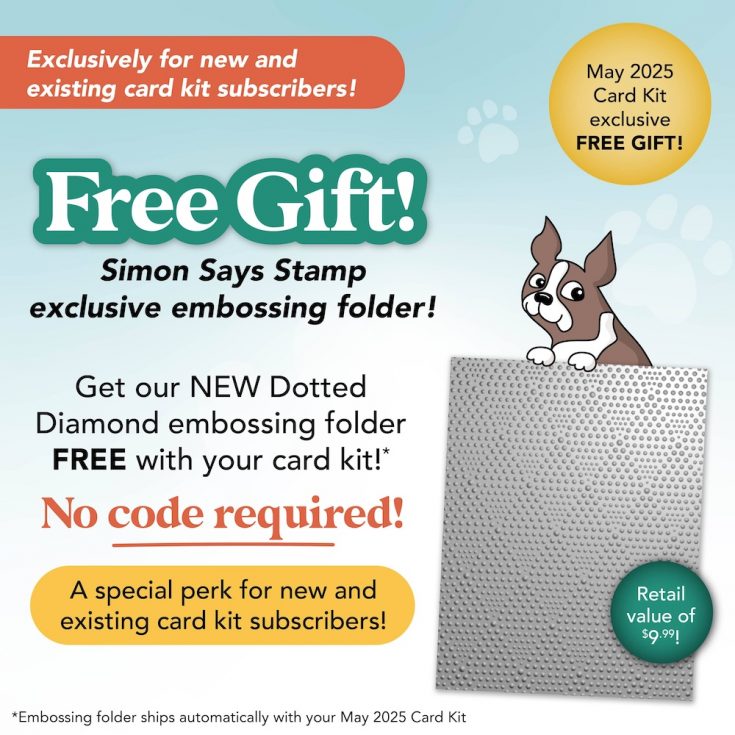
Did you know?! We’ve made our card kit subscription BETTER THAN EVER!
Special May 2025 Subscriber PERK!
Learn more:

Here’s what makes our new service a crafting paradise:
Exclusive Access: As a subscriber, you get first dibs! Each month, you’ll get an exclusive sneak peek at our new kit, with the option to add more coordinating items to your cart, including handy replenishable supplies, all shipped together for your convenience.
Hassle-Free Payments: Say goodbye to monthly billings! Our automated system smoothly charges your preferred card, ensuring an uninterrupted flow of crafty goodness – unless you decide to pause, of course!
$5 Off Magic: Enjoy a special $5 discount off our kit’s retail price, exclusive to our beloved subscribers – no codes needed, just automatic savings!
Crafting Inspirations: Dive into a sea of creative ideas monthly, all tailored around your kit, to keep your inspiration flowing endlessly.
Flexibility First: Fear of commitment? Not here! Our subscription is as flexible as it gets – pause or cancel anytime, no strings attached.
Why wait? Step into the realm of our NEW Simon Says Stamp Monthly Card Kit service. Welcome a box full of crafting marvels, right to your doorstep. Craft with ease and let creativity come to you!
Ready to elevate your craft? Subscribe Now and open the doors to boundless creativity!
We’re thrilled to have you in our crafting community and can’t wait to embark on this renewed creative adventure together!
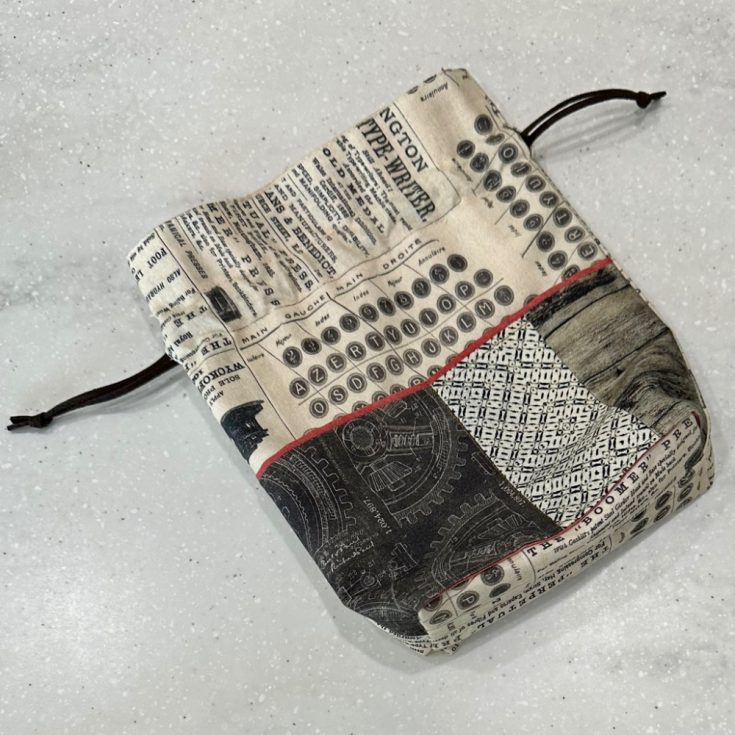
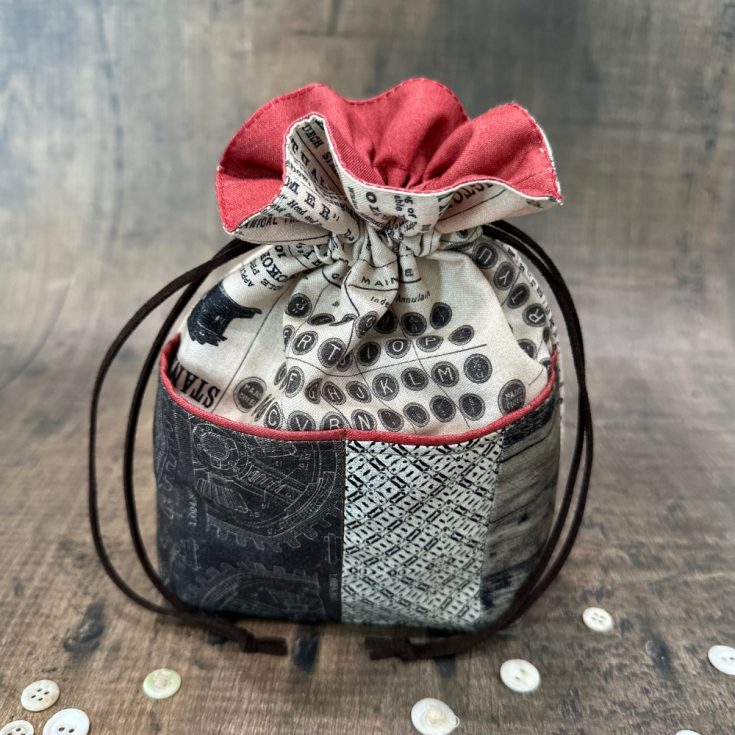
Art Meets Accessory: Pocketful of Sunshine Bag with Tim Holtz Fabric!
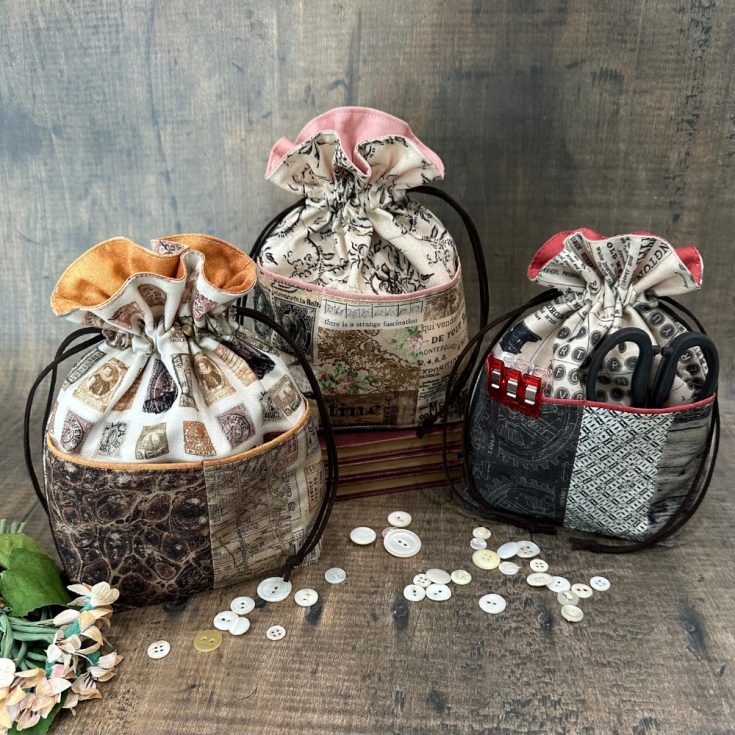
Hi friends! Happy Tuesday! Please join me in welcoming back special guest Richele Christensen to our blog for another gorgeous idea to bring this fabulous Tim Holtz Palette Fabric to life! Read on and enjoy!
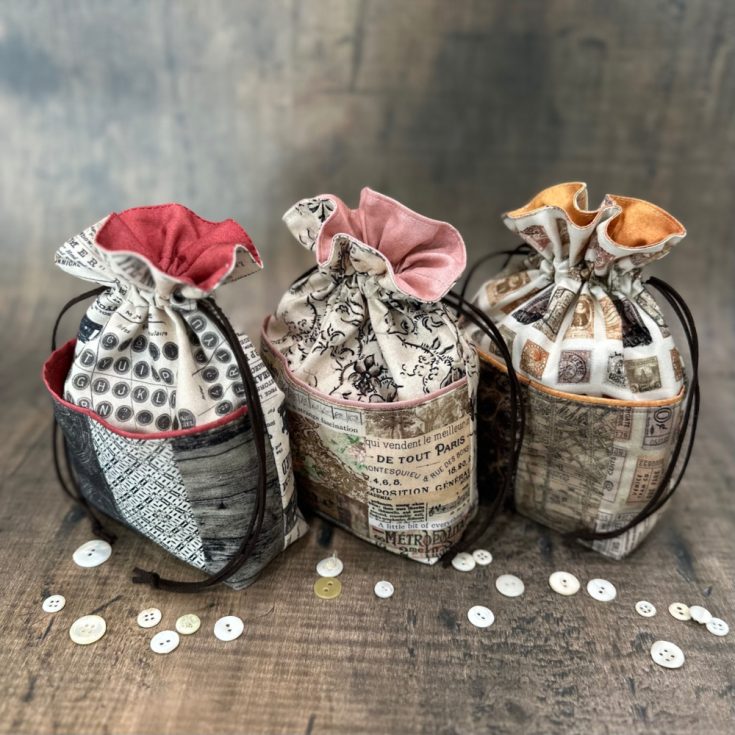
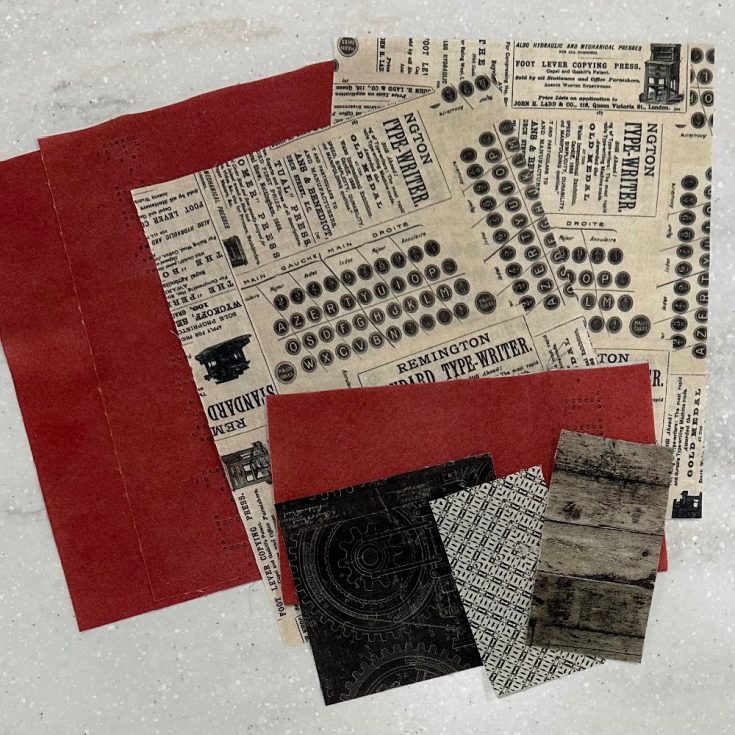
Hello friends! Richele here and I’m back with another sewing project. We will be using the Tim Holtz Palette Neutral for our Pocketful of Sunshine Bag by “a Spoonful of Sugar”. I really loved working with Neutral Palette but this project would be fun in any of the color from the Palette collection The drawstring bag features a cute divided pocket in the front for holding little things and would be great to use for a special gift, a snack bag, makeup, maybe some craft / sewing supplies or just for fun. Our project is Fat Quarter friendly and is good for the beginner to the expert sewist. I think it’s so fun that the lining is a pop of color.
Gather your sewing supplies and lets get started!

Instructions:
- Cut pieces out according to the instructions.
- Sew the pocket panels together.
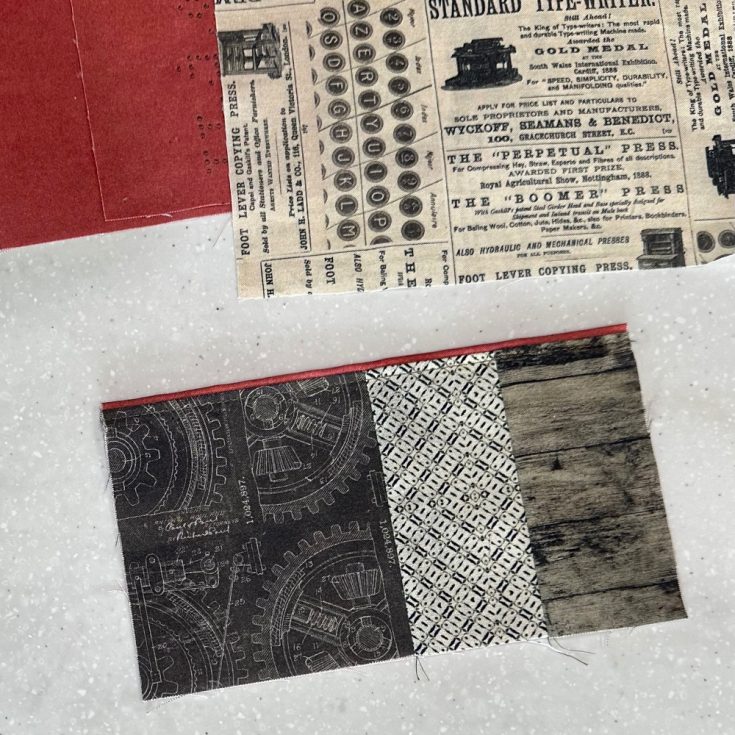
- Sew the top and bottom edge of the pocket lining to pocket panels rights sides together. Turn right sides out lining up the bottom edge and press. You should have a little reveal of the red at the top of the pocket. Top stitch at the top 1/8” from edge.
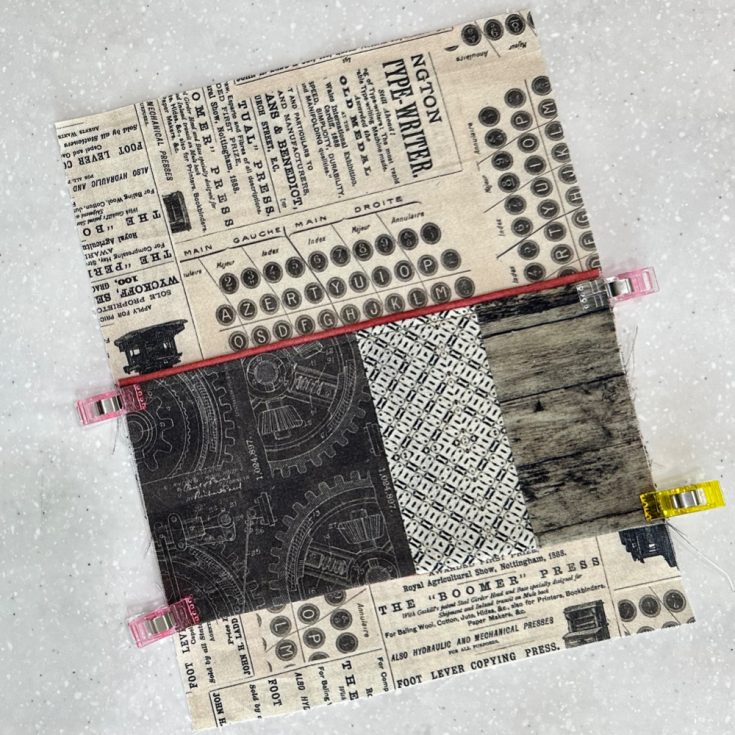
- Pin pocket panel to the front bag pieces as shown in instructions. Sew pocket to the front panel.
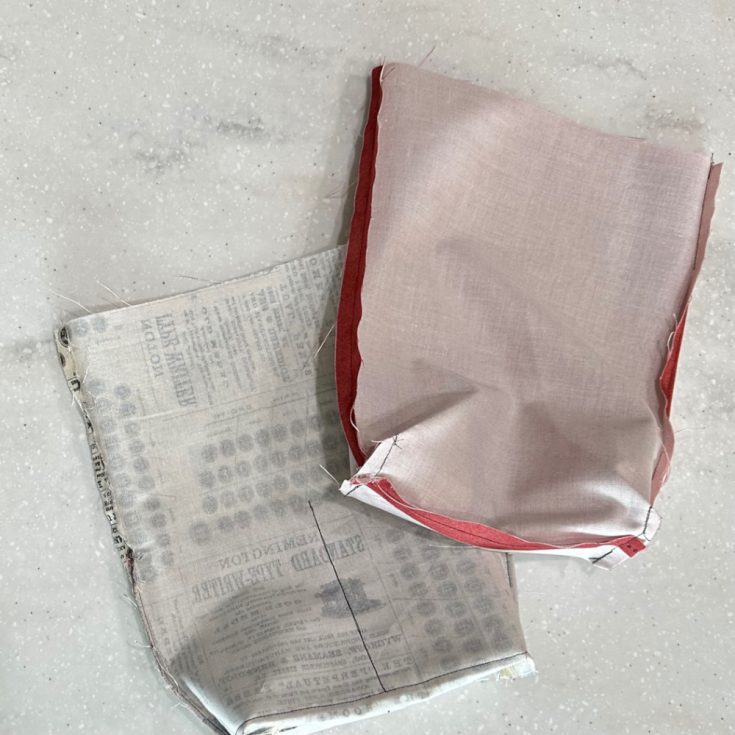
- Sew the bag exterior right sides together and the lining pieces right side together. Don’t forget to leave a little opening for turning. Press seams open.
- Pin the top edge right sides together and sew around the top edge. Turn right side out and press the top edge. Top stitch close the the top edge and the channel for the drawstring. Insert drawstring from either side and knot the ends.
- How cute is the little “Pocketful of Sunshine Bag”
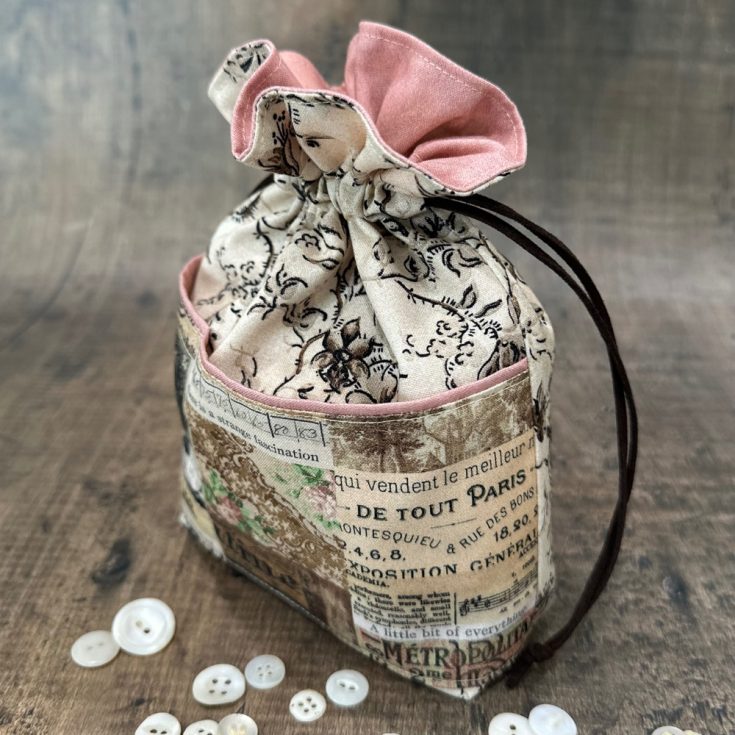
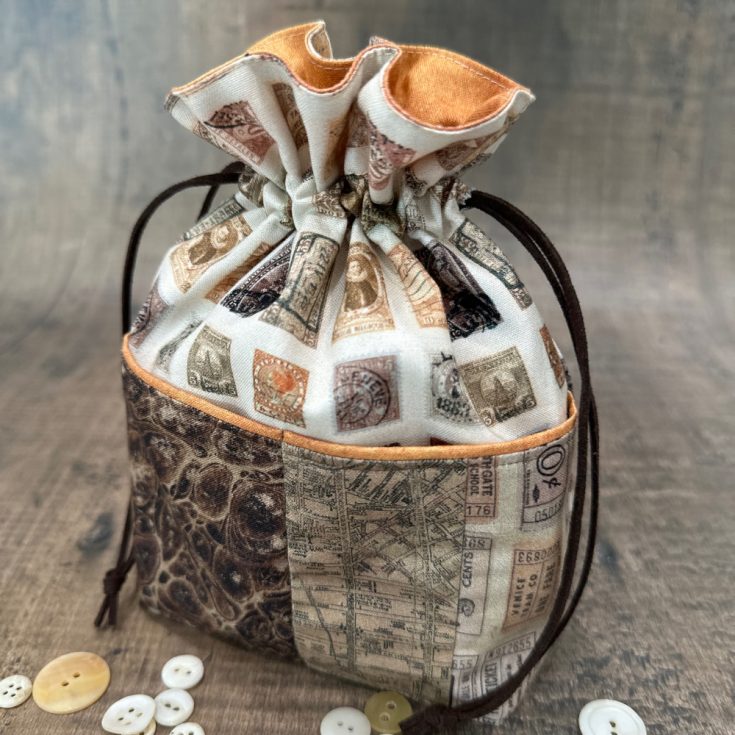
I plan on making more of these cute bags for gifts. How cute would they be with a gift card from Simon Says Stamp in the pocket and some fun craft supplies for your friend. Thanks for joining me today! What is your favorite color from the Palette release so far? -Richele
SUPPLIES:
|


Thanks so much for stopping by, and thanks to Richele for being our guest!


