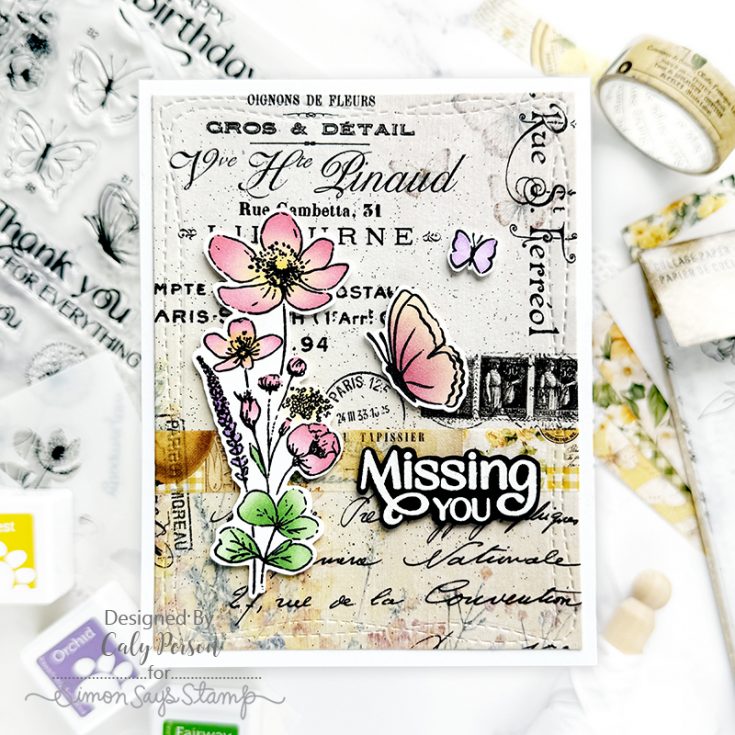
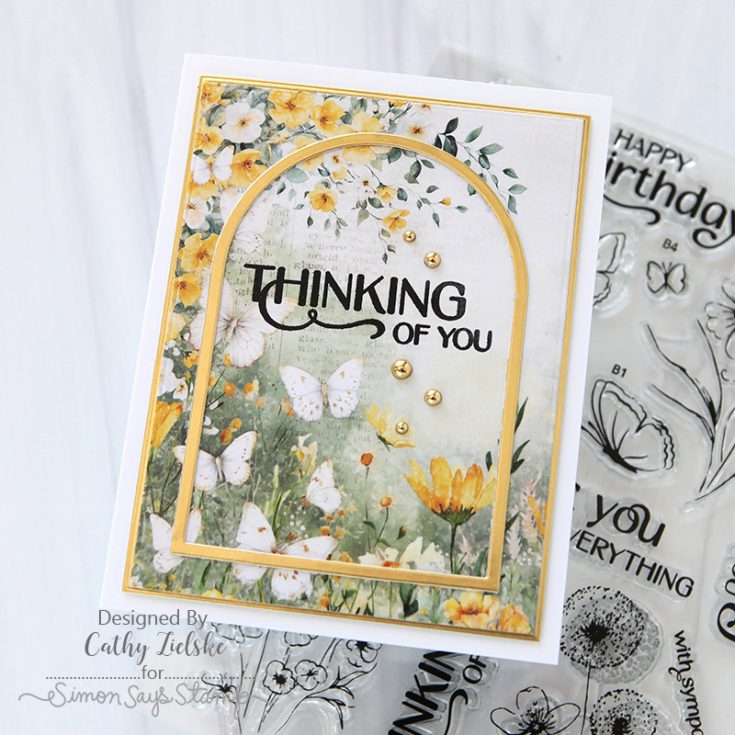
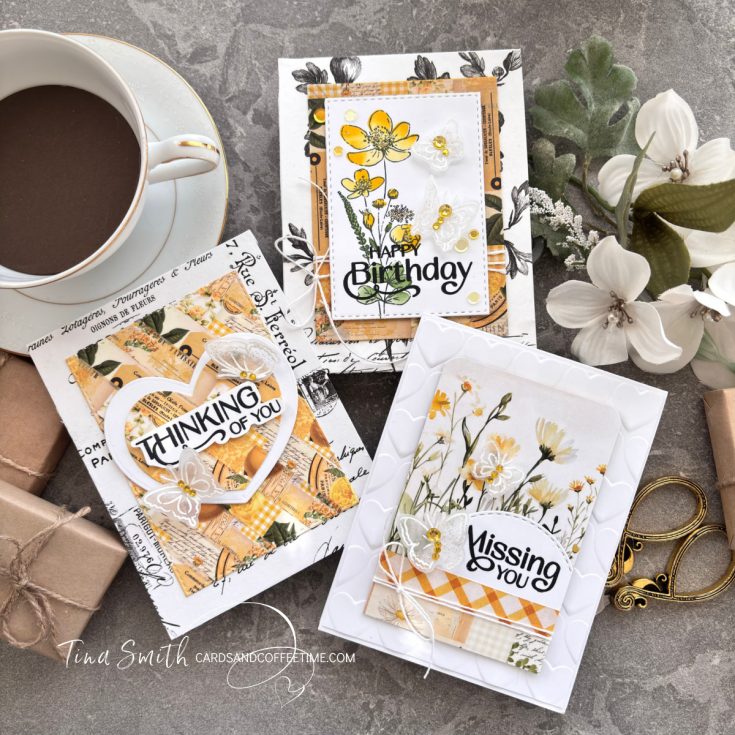
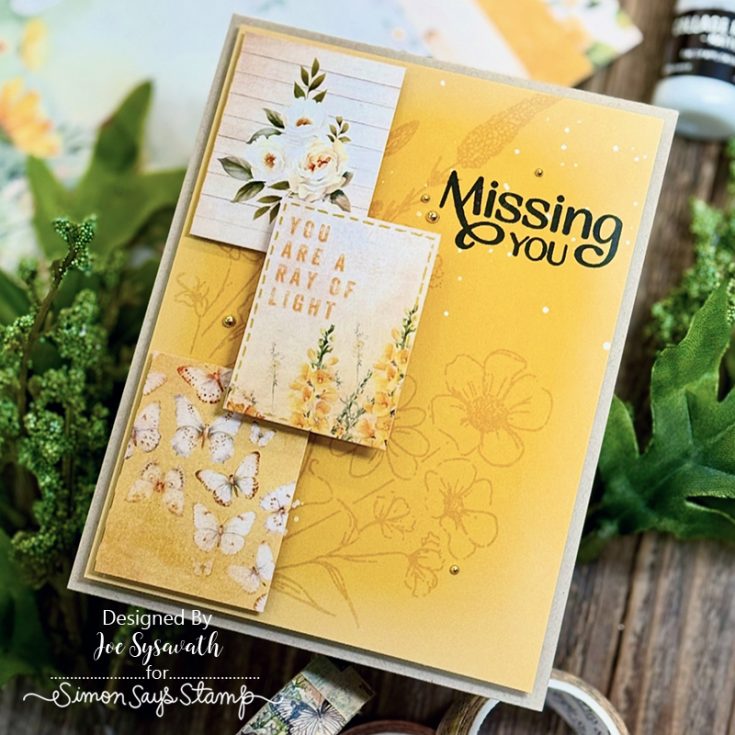
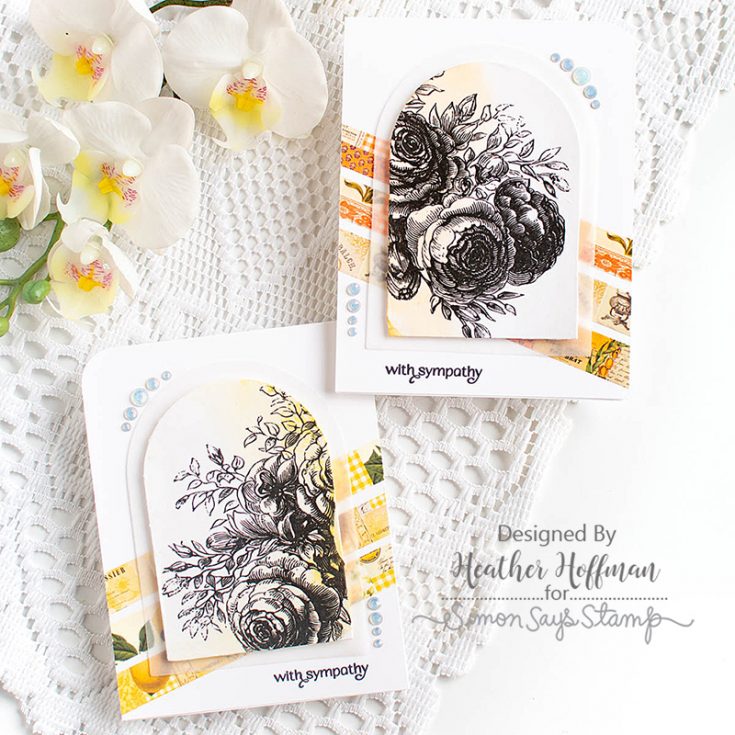
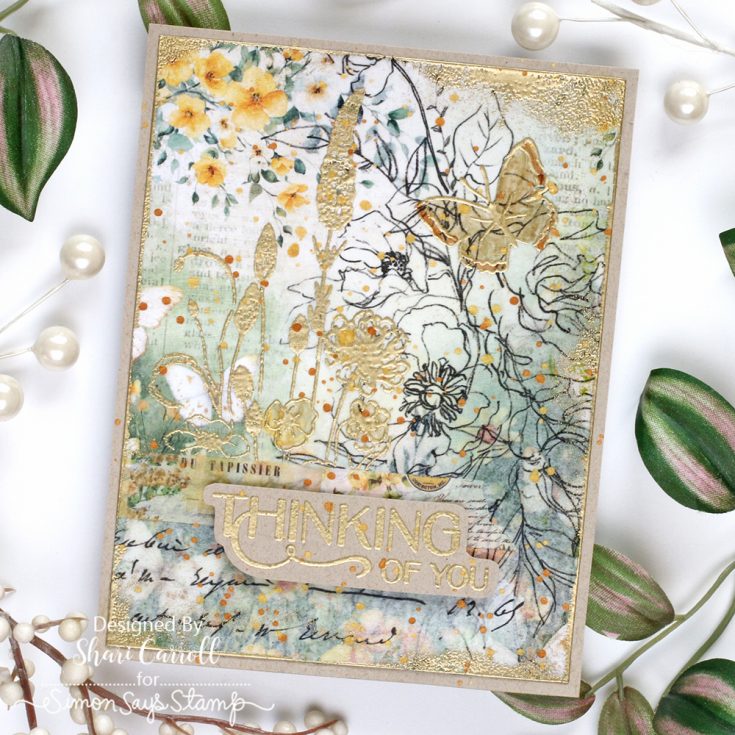
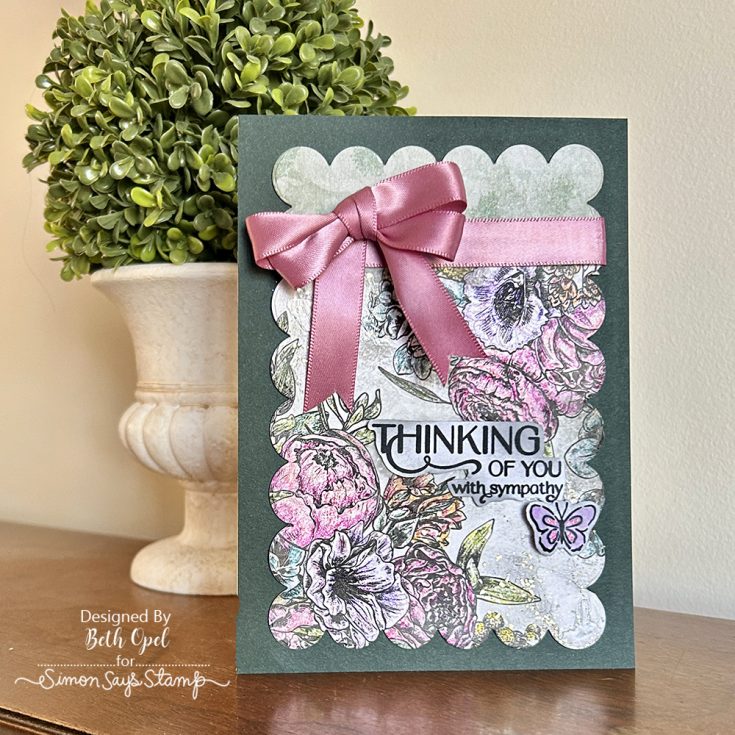
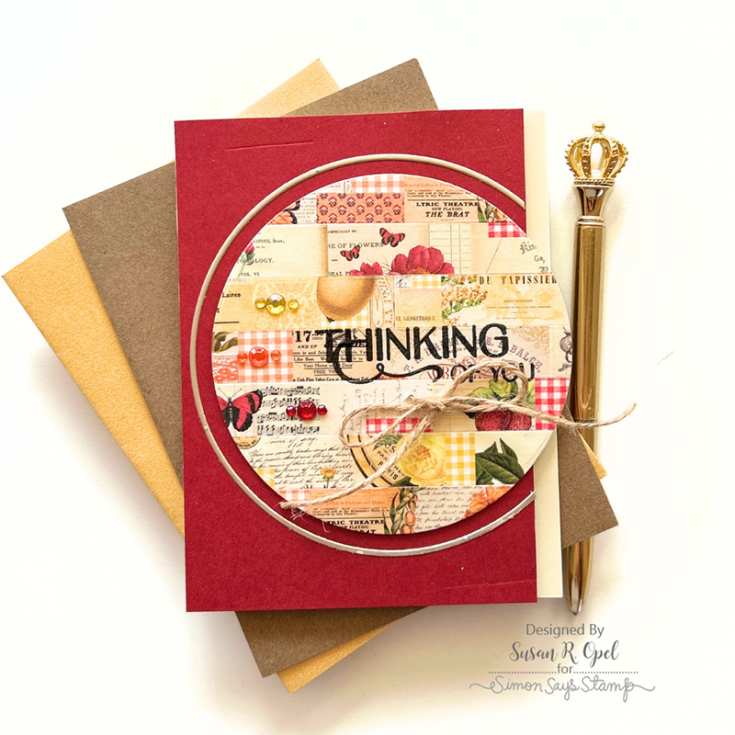
Card Kit Reveal and Inspiration: Butterfly Blossoms
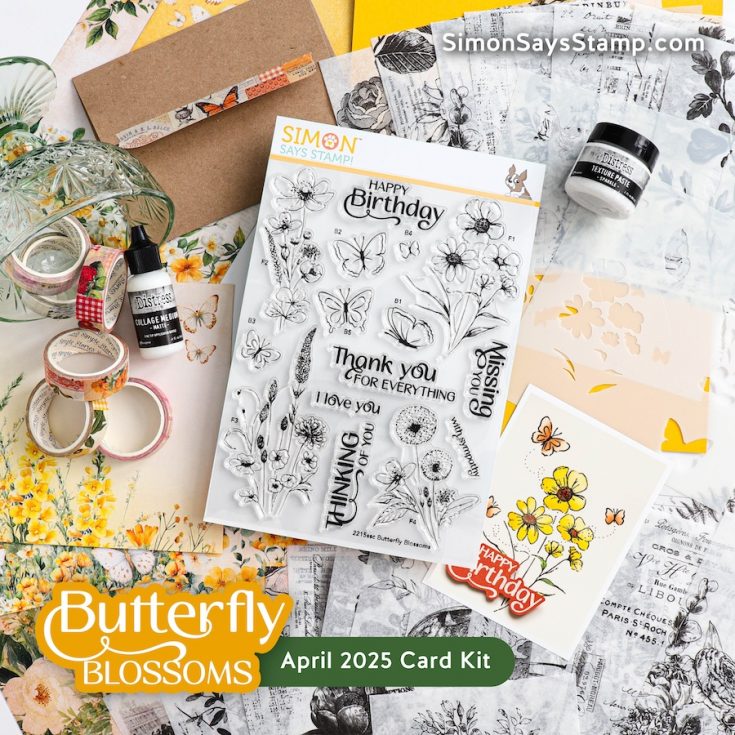
Let your creativity take flight with our April 2025 Card Kit—Butterfly Blossoms!
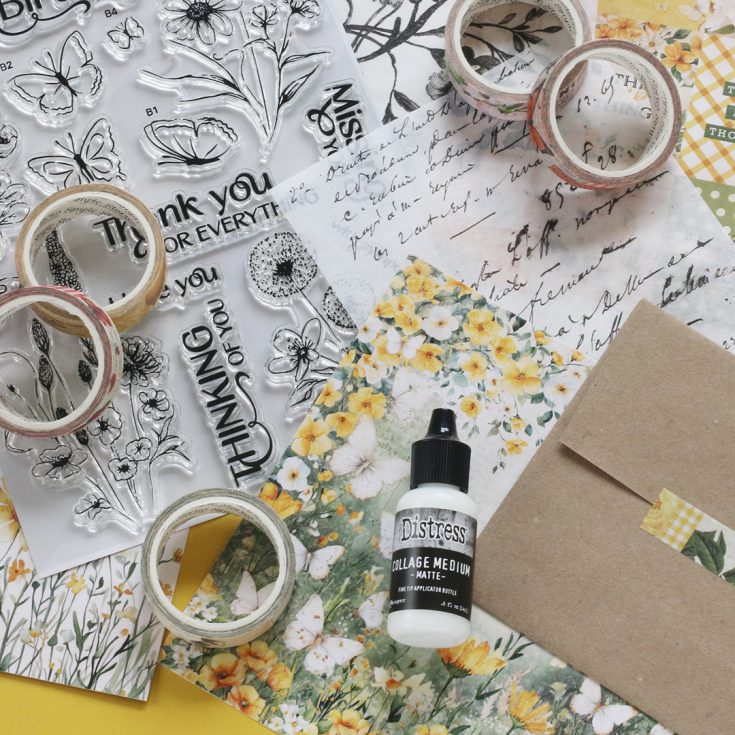
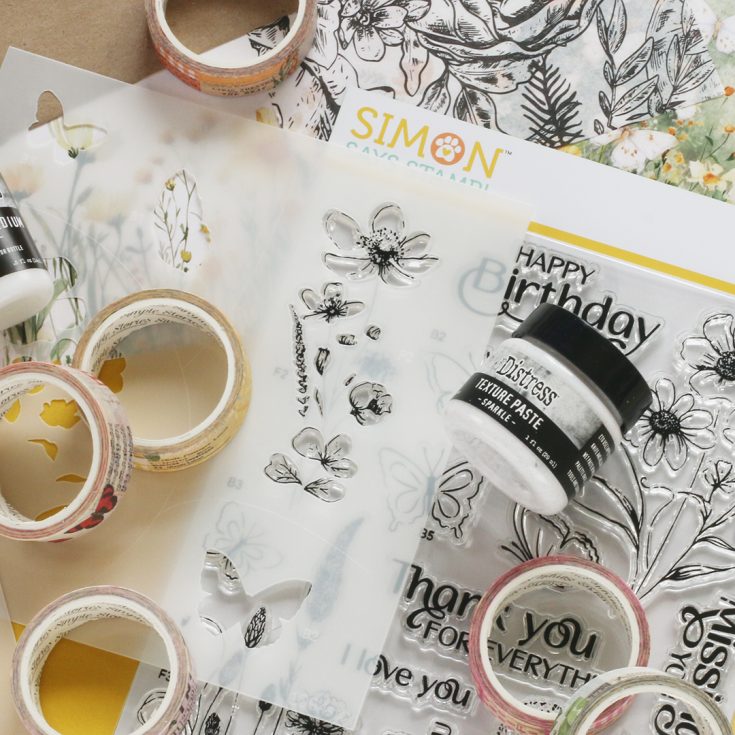
This fresh and springy kit is carefully curated with you in mind and includes amazing NEW exclusive products from Simon Says Stamp: Butterfly Blossoms 6×8 stamp set and coordinating stencil.
Enjoy these amazing and inspiring products from Tim Holtz: idea-ology collage paper, and Ranger Matte collage medium and Sparkle texture paste. In addition, we’ve included 6 sheets of lovely and delicate double-sided 6×6 patterned papers from Paper Rose Studio and 6 rolls of pretty washi tape from Simple Stories!
Rounding out this awesome kit is 1 sheet of Simon Says Stamp Honey cardstock, 1 sheet of Neenah Solar White cardstock, and an A2 Grocery Bag kraft envelope from Simon Says Stamp!
WATCH THE VIDEO:

Ideas to INSPIRE!
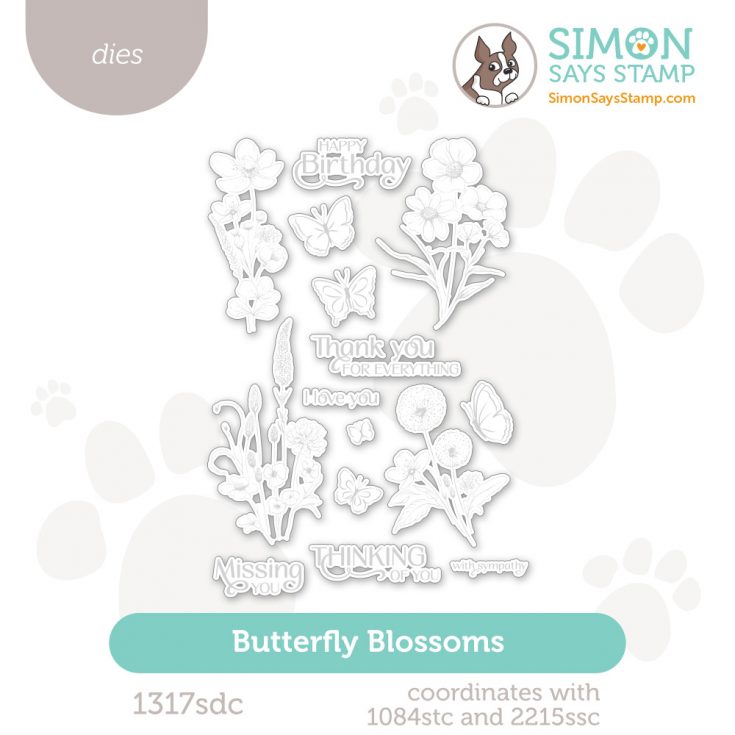
Enhance your kit with the coordinating die set (sold separately!)
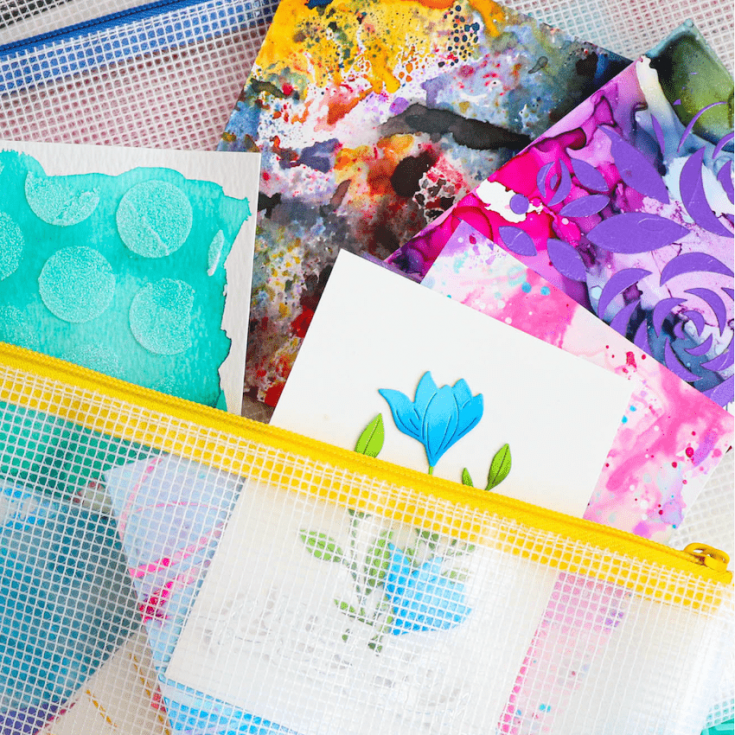
Our Simon Says Stamp Mesh Zipper Storage Bags are the PERFECT solution for taking your entire card kit on-the-go or for storage! (sold separately!)

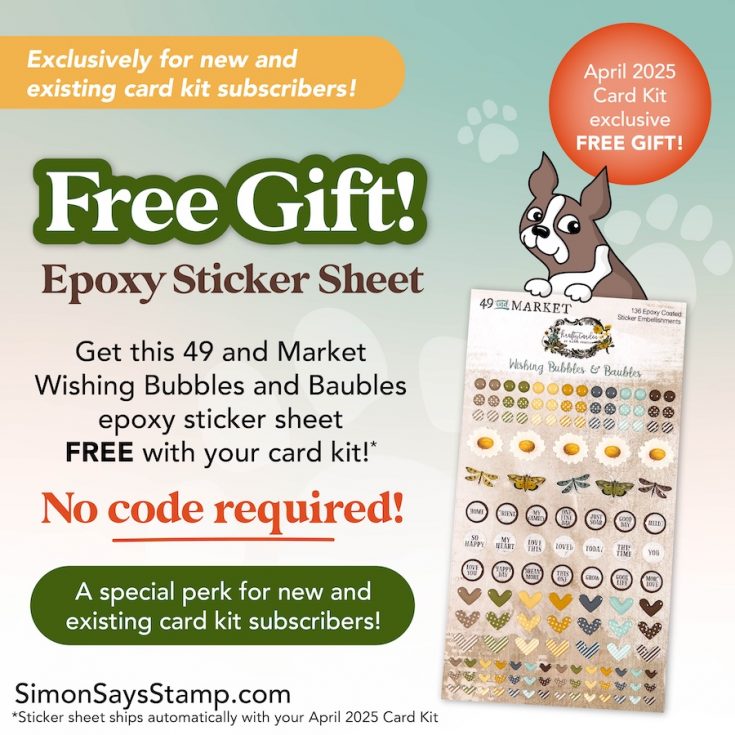
Did you know?! We’ve made our card kit subscription BETTER THAN EVER!
Special April 2025 Subscriber PERK!
Learn more:

Here’s what makes our new service a crafting paradise:
Exclusive Access: As a subscriber, you get first dibs! Each month, you’ll get an exclusive sneak peek at our new kit, with the option to add more coordinating items to your cart, including handy replenishable supplies, all shipped together for your convenience.
Hassle-Free Payments: Say goodbye to monthly billings! Our automated system smoothly charges your preferred card, ensuring an uninterrupted flow of crafty goodness – unless you decide to pause, of course!
$5 Off Magic: Enjoy a special $5 discount off our kit’s retail price, exclusive to our beloved subscribers – no codes needed, just automatic savings!
Crafting Inspirations: Dive into a sea of creative ideas monthly, all tailored around your kit, to keep your inspiration flowing endlessly.
Flexibility First: Fear of commitment? Not here! Our subscription is as flexible as it gets – pause or cancel anytime, no strings attached.
Why wait? Step into the realm of our NEW Simon Says Stamp Monthly Card Kit service. Welcome a box full of crafting marvels, right to your doorstep. Craft with ease and let creativity come to you!
Ready to elevate your craft? Subscribe Now and open the doors to boundless creativity!
We’re thrilled to have you in our crafting community and can’t wait to embark on this renewed creative adventure together!
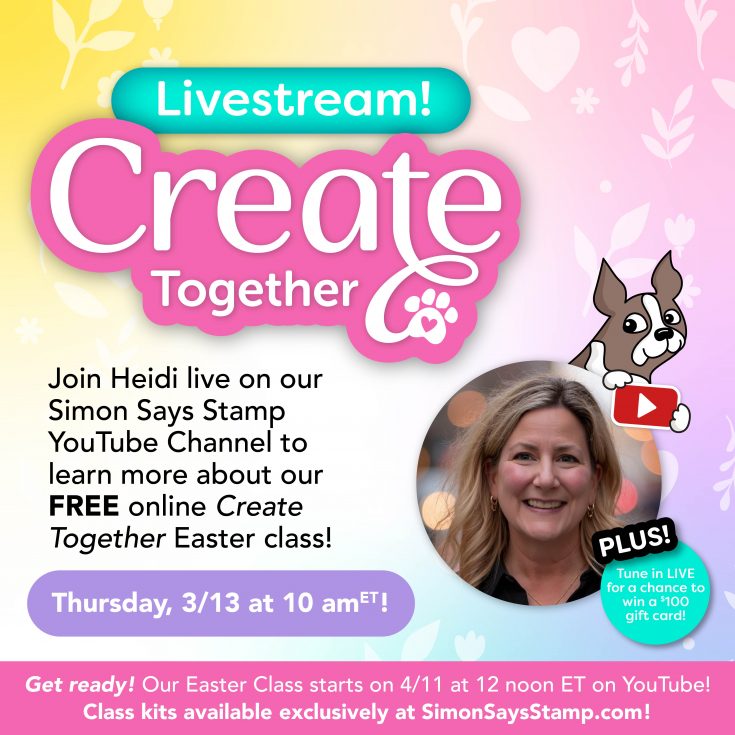
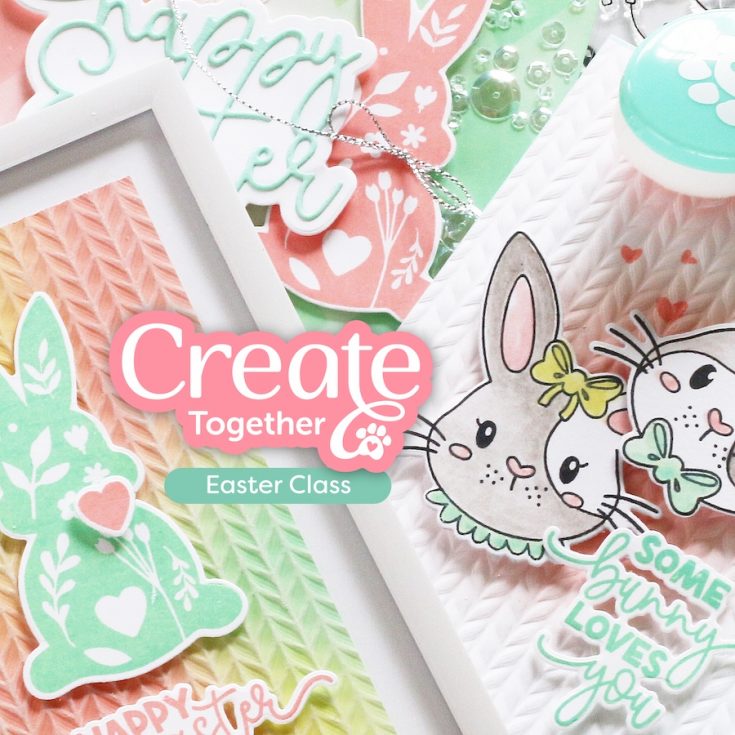
This Fabulous Easter kit includes a FREE CLASS!
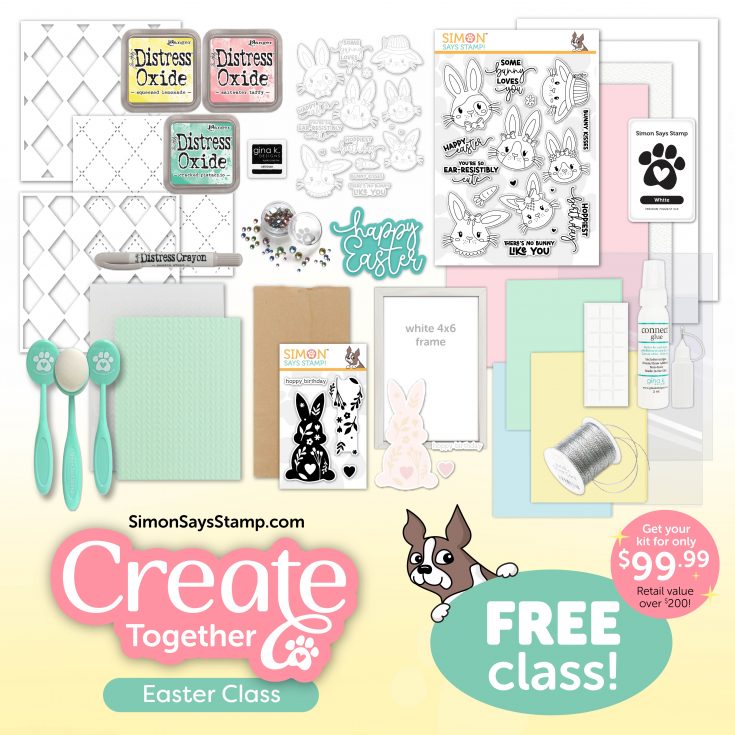
Hold onto your rabbit ears! Make beautiful Spring Cards with our Limited Edition Easter Kit!
Create together LIVE with Shari Carroll and Heidi using the kit. By purchasing this kit, you will receive exclusive, not yet released products.
Class is LIVE with on our Simon Says Stamp YouTube channel on April 11th at 12 PM ET. Not available at that time? No worries, this class will be available to you on YouTube to watch, rewatch, pause, and play again!
As a special BONUS, Saturday, April 12 we will feature 2 additional teachers making even more projects on our youtube channel.
Purchase your kit now and be ready to join us LIVE in class!
Missed our live announcement? Catch the rewatch below!

Kit contents include:
- Simon Says Stamp Exclusive Ear-resistibly Cute Stamp Set
- Simon Says Stamp Exclusive Ear-resistibly Cute Coordinating Die Set
- Simon Says Stamp Exclusive Bouncy Happy Easter Die
- Simon Says Stamp Exclusive Hoppy Birthday Stamp Set
- Simon Says Stamp Exclusive Hoppy Birthday Coordinating Die Set
- Simon Says Stamp Exclusive Argyle Stencil
- Simon Says Stamp Exclusive Neatly Knitted 3D Embossing Folder
- Simon Says Stamp Exclusive Silver Metallic Cord
- Simon Says Stamp Exclusive White Ink Pad
- Simon Says Stamp Exclusive Moonshine Embellishment Mix
- Simon Says Stamp Exclusive Pastel Tones Pawsitively Dazzling Gems
- 3 Simon Says Stamp Exclusive Large Teal Blending Brushes
- Gina K Designs Connect Glue
- Gina K Designs Fine Tip Applicator Bottle
- Gina K Designs Obsidian Ink Cube
- Tim Holtz Distress Oxide Cracked Pistachio Ink Pad
- Tim Holtz Distress Oxide Squeezed Lemonade Ink Pad
- Tim Holtz Distress Oxide Saltwater Taffy Ink Pad
- 4×6 Inch White Picture Frame
- Hero Arts Mini Watercolor Brush
- Small Kraft Treat Bag
- Tim Holtz Distress Pumice Stone Crayon
- Assortment of Adhesive Foam Squares
- 2 Clear Bags for Making Edge to Edge Shaker Cards
- 1 Sheet of 8.5 x 11 Inch Watercolor Cardstock
- 2 Sheet of 8.5 x 11 Inch Hammermill 100 LB Cardstock
- 1 Sheet of Simon Says Stamp Exclusive 8.5 x 11 Inch Cotton Candy 100 LB Cardstock
- Simon Says Stamp Exclusive A2 Card Base in Sea Glass
- Simon Says Stamp Exclusive A2 Card Base in Lemon Chiffon
- Simon Says Stamp Exclusive A2 Card Base in Mint
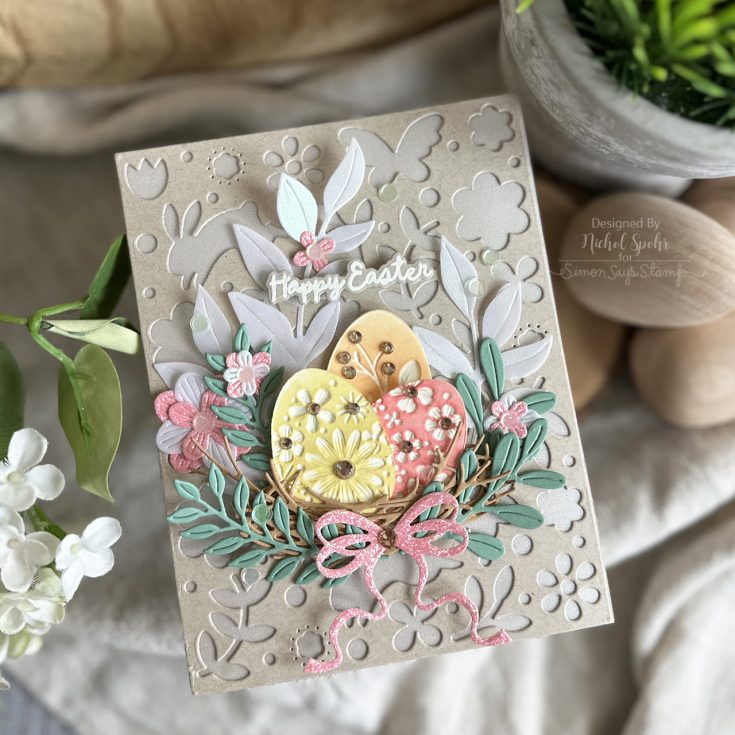
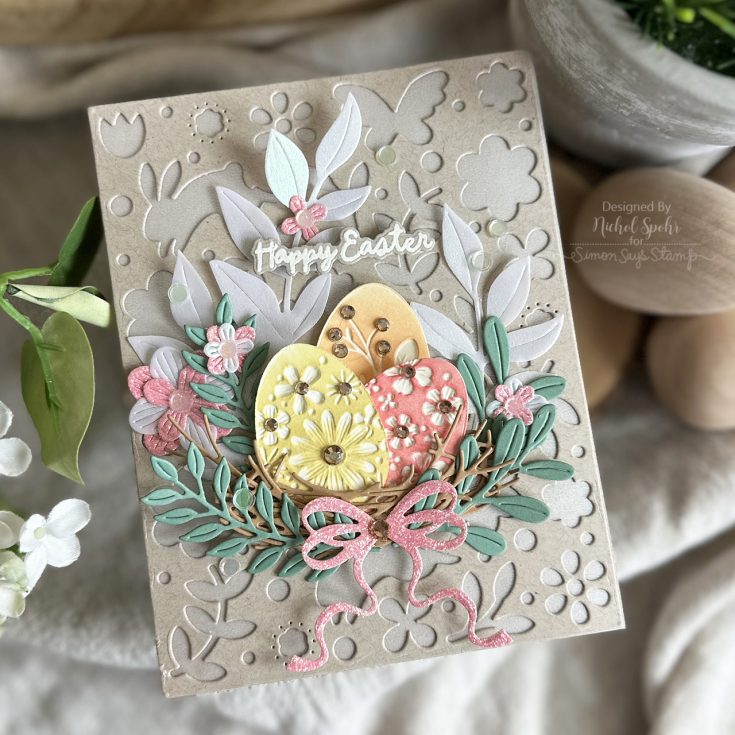
Create an ELEGANT Easter Egg Nest Handmade Card: Making the Cut

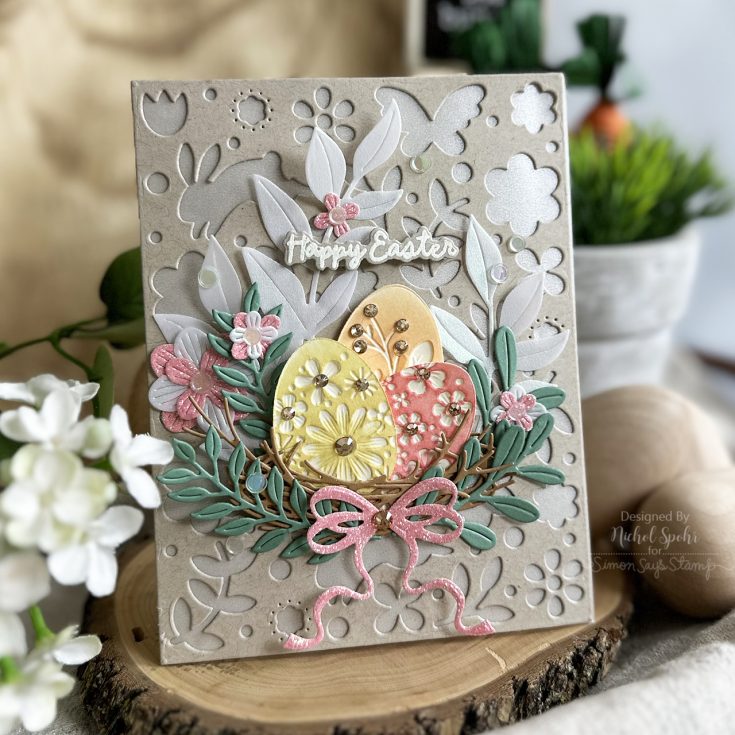
Hi friends! Happy Thursday! We’re delighted to welcome back special guest Nichol Spohr in our monthly Making the Cut series where we share the love of all things die cutting! In this gorgeous card Nichol is showcasing our Springtime Celebration Plate, Lush Leaves, Hanging Leaf Ring, Pretty Bows, Rustic Nest, and Floral Easter Eggs embossing folder and die! Be sure to watch the video for all the details, and enjoy!
WATCH THE VIDEO:

SUPPLIES:
|
Thanks so much for stopping by, and thanks to Nichol for being our guest!
Mark your calendar!
Join us live TODAY at 10 AM ET! Click or tap the bell by ‘Notify Me’ to be notified when we begin on Thursday, March 13th at 10 AM ET!