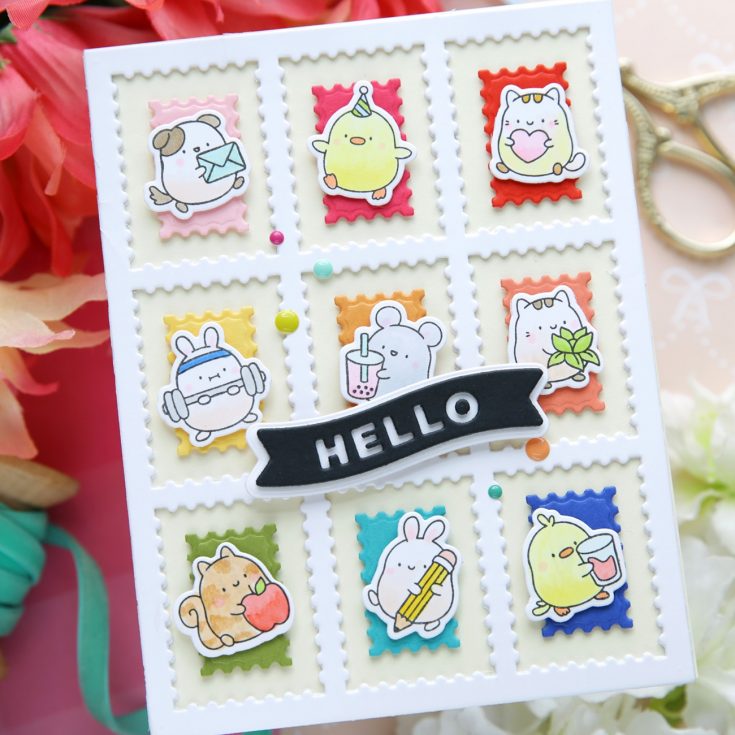
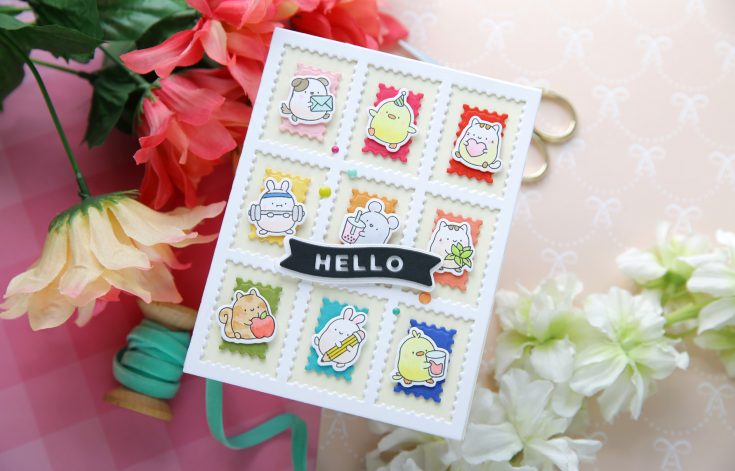
Not Just for Journals! Creative Hello Card Idea: Amore Laurafadora

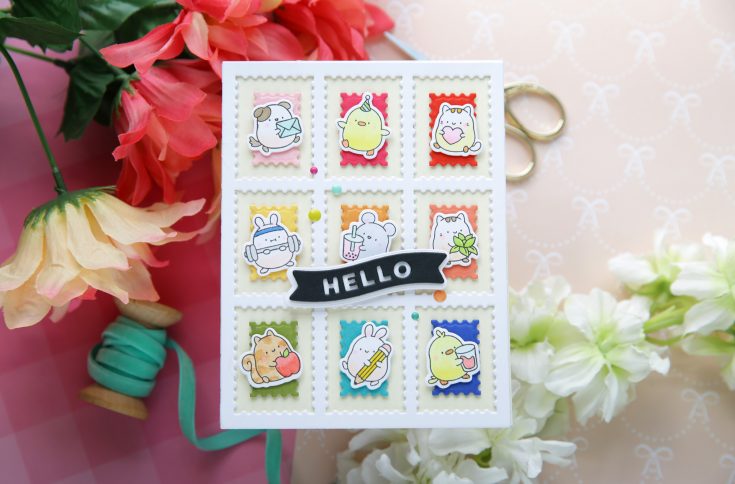
Hi friend! Happy Monday! Please join me in welcoming back special guest Laura Bassen to showcase this beyond adorable Hello Card featuring the sweet little critters from our exclusive Journal Jamboree stamp and die set as well as the oldie but goodie Little Banners Basics dies and Postage Collage Cover dies! It just goes to show you there are always fun ways to get creative with your stamps! Be sure to watch the video to learn more about the card and some of Laura’s favorite adhesives along the way!
WATCH THE VIDEO:

SUPPLIES:
|


A big thank you to YOU, our reader — and to Laura Bassen for being our guest!
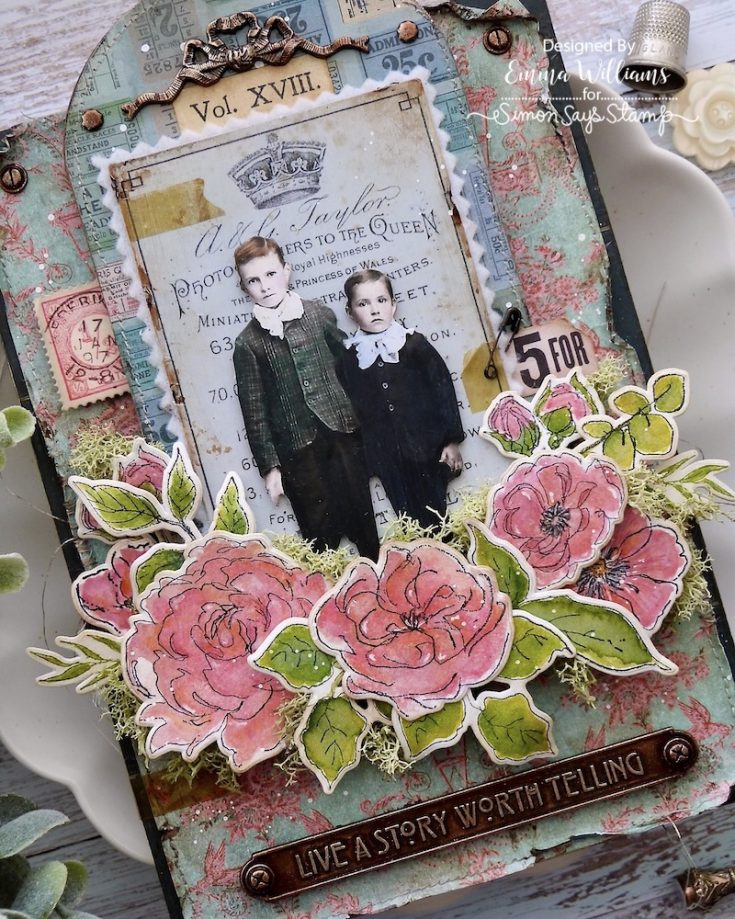
Live A Story Worth Telling Etcetera Panel by Emma Williams
Hi friend! Happy Sunday! I’m beyond delighted to welcome back special guest Emma Williams to our blog today to share this GORGEOUS mixed media creation! Read on and enjoy!
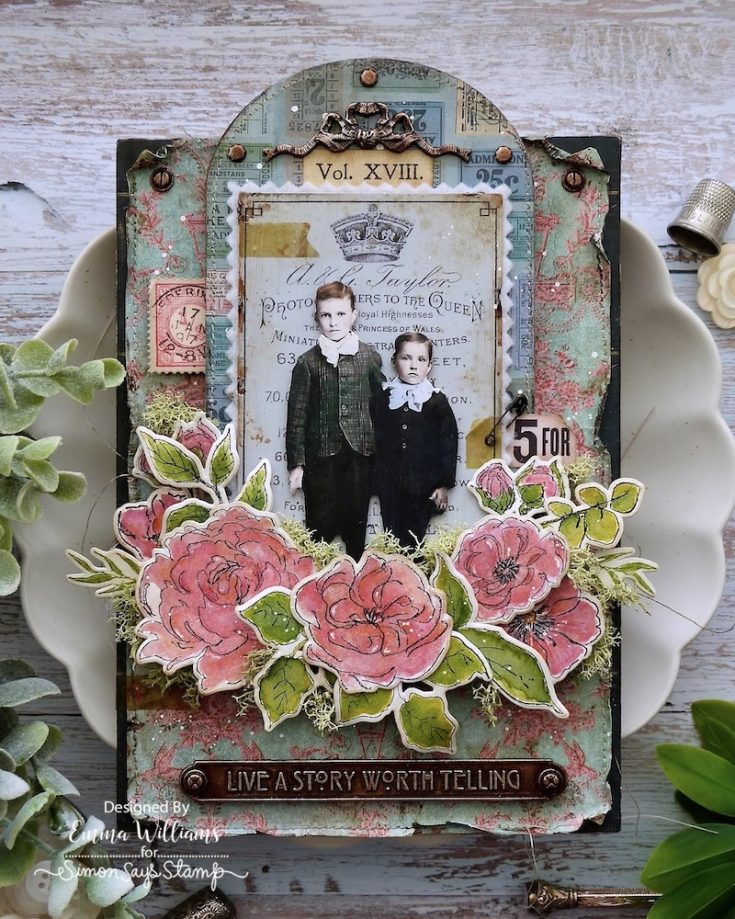
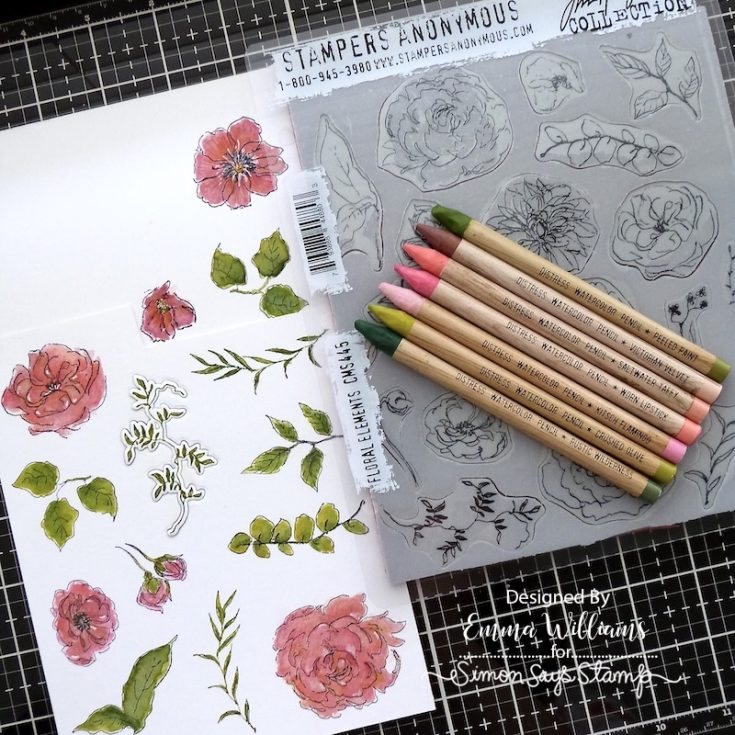
Hello everyone…I’m thrilled to be back on the Simon Says Stamp Blog today and I’m so excited to be sharing my latest project with you. This make features one of the new Tim Holtz and Simon Says Stamp co-ordinating die and stamp set bundles. These dies are perfect for those of us who love the look of fussy cut images but sometimes, just don’t have the time. So with this in mind, I chose to use the beautiful Floral Element set for my summertime project as it really creates beautiful elements that create impact and dimension to any project. So let’s begin and here’s how I made my Etcetera Panel….
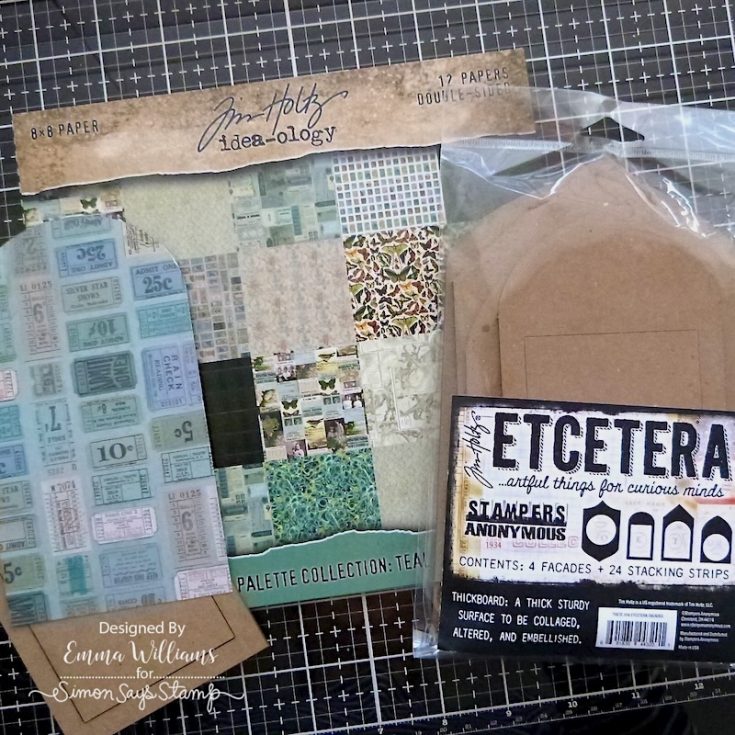
For this project, I used the smaller size of the Stampers Anonymous Rectangular Etcetera Panel and the arched Etcetera Facade.
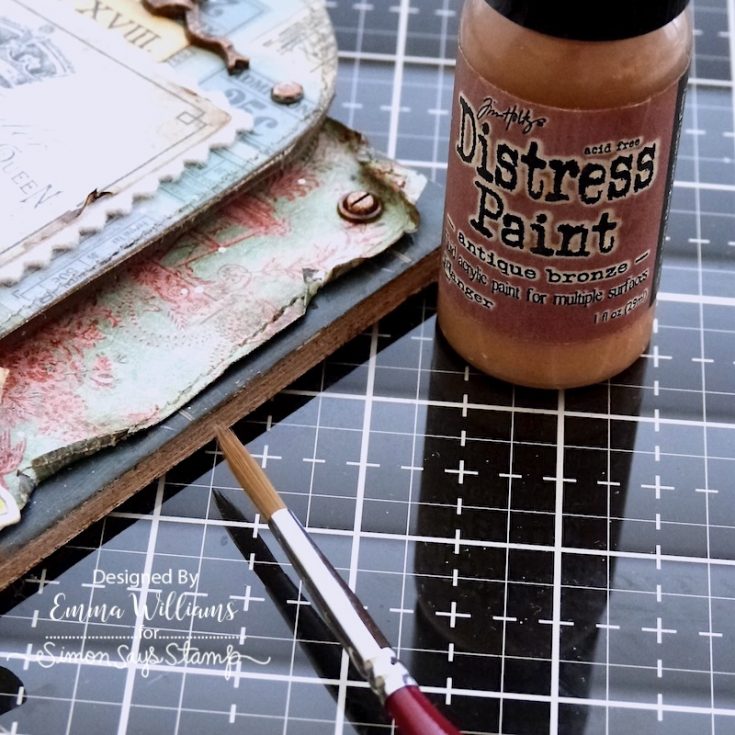
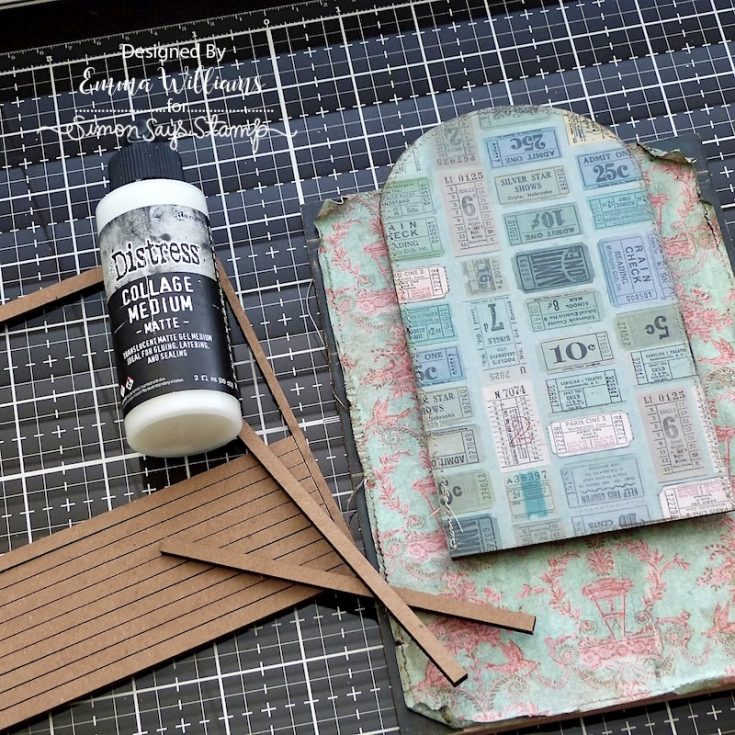
To begin with, paint the the four edges of the panel with Antique Bronze Distress Paint and allow to dry.
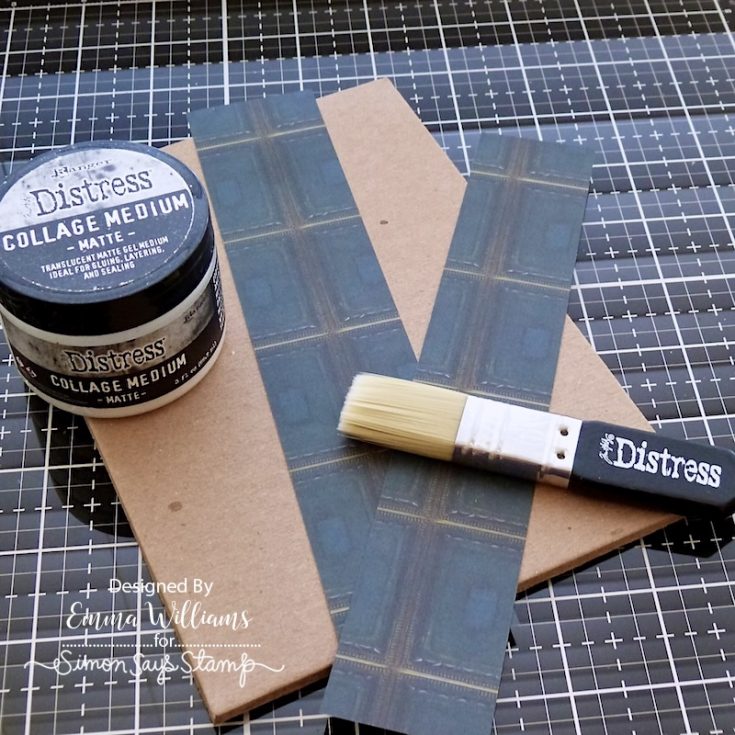
Using one of the darker coloured papers from the Teal Palette Paper Collection, cut two strips, measuring approx. 3 x 18.5cm and adhere these vertically down both sides of of the rectangular panel using Matte Collage Medium. “This little trick will help you save using a whole sheet of our much loved, and very precious patterned papers and stops the need to use unnecessary matting and layering that won’t be seen in the finished project ~ on this project you will only see a thin border down each side”.
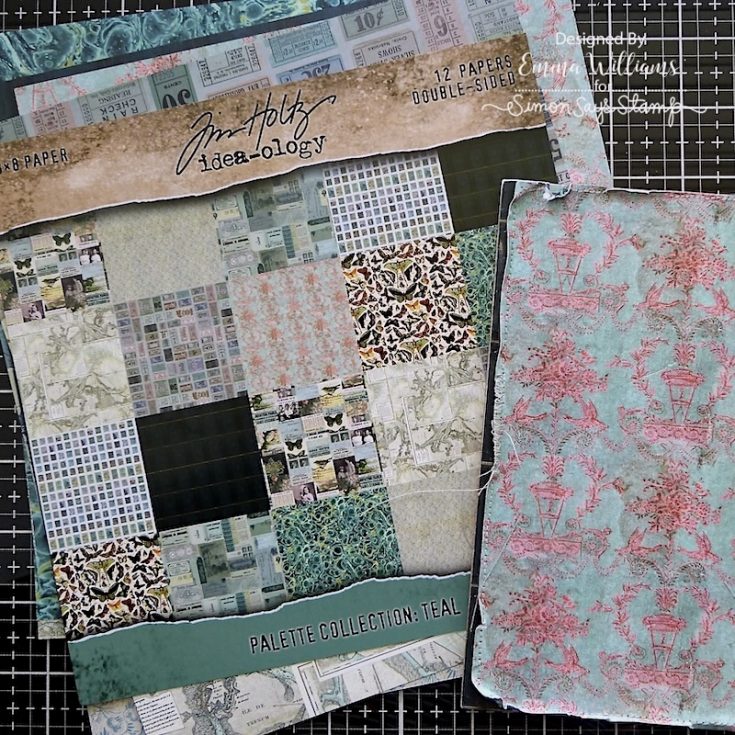
After selecting another decorative design from the Teal Palette Paper Collection, I chose one with a touch of pink, cut this piece slightly smaller than the size of the Etcetera panel. Add some rips and tears around the edges of the paper before machine stitching a border. Attach to the panel with Matte Collage Medium and apply a coat of the medium over the top to seal the paper.
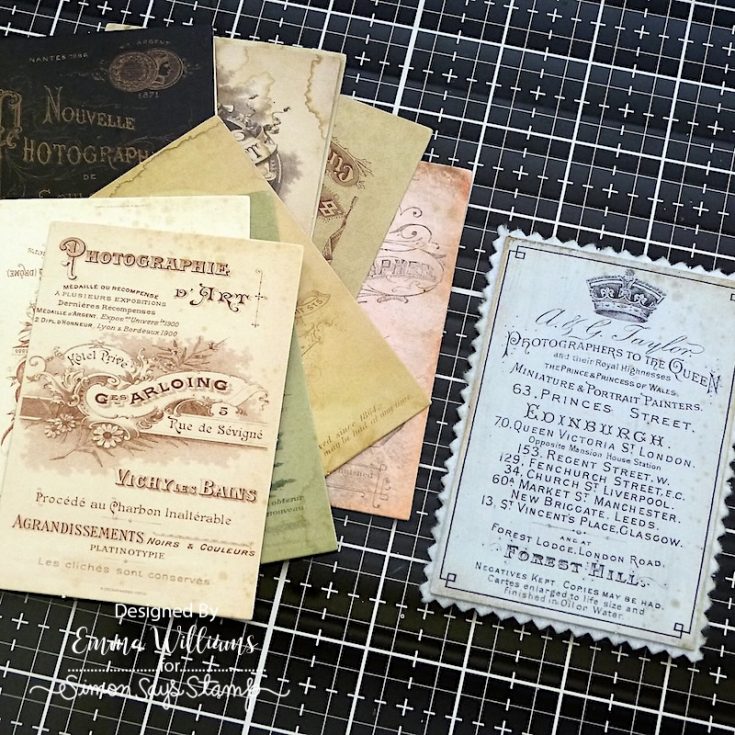
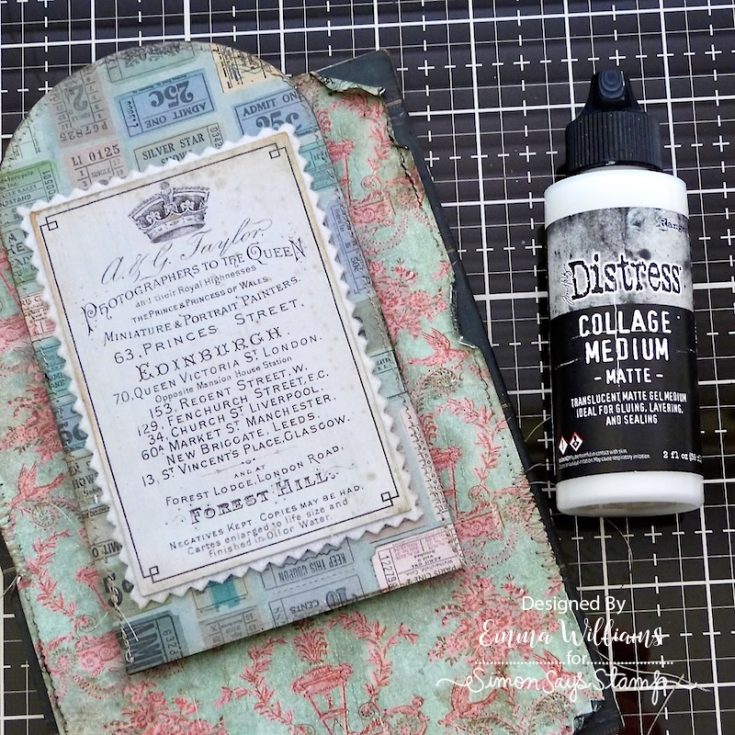
Use a pencil to trace the outline of the facade onto a third, co-ordinating design of paper from the Teal Collection, then cut along the pencil line with scissors.

Machine stitch a border around the edge of the paper before using Matte Collage Medium to adhere the panel to the surface of the arched Etcetera Facade, keeping the die cut section in the centre of the facade in place and applying a coat of the medium over the top to seal the paper. Once the medium is dry, run the Walnut Stain Distress Crayon around the edges of both the covered panel and the facade, blending any harsh lines of colour with a semi dry wipe.
Attach three of the straight edged risers from the Etcetera Facade pack to the back of the facade using Matte Collage Medium before attaching the facade to the Etcetera Panel, slightly overlapping the top edge.
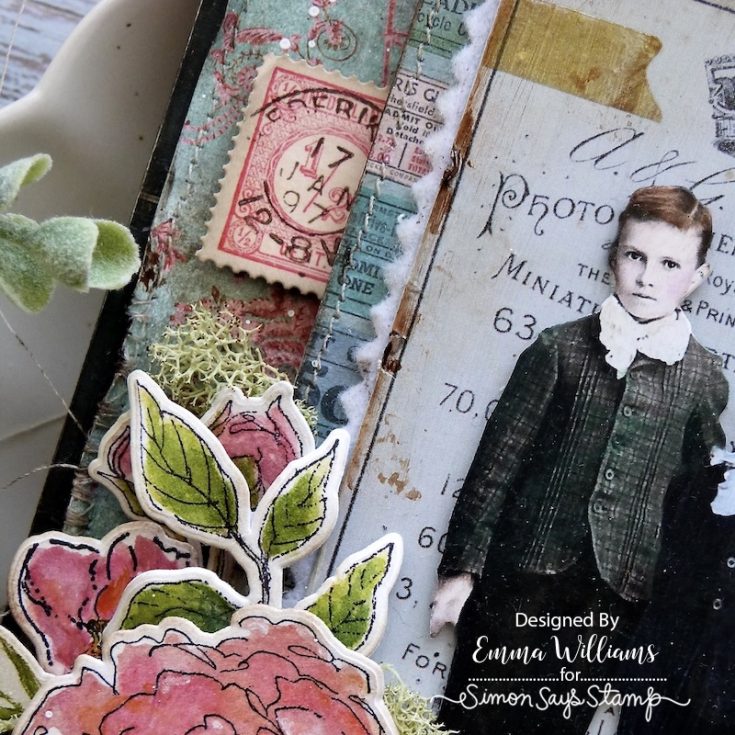
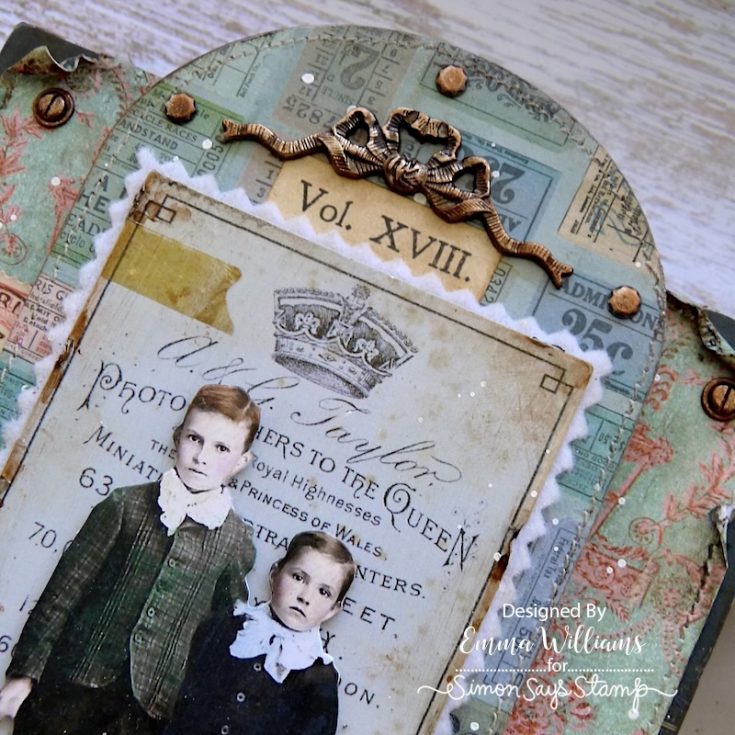
Select one of the idea-ology Layers Photo Studio pieces from the pack, ensuring it co-ordinates with the background papers. Add small rips and tears around the edge and then ink the edges with Walnut Stain Distress Ink. Attach the layer to a piece of white felt, cut with pinking shears and adhere with Matte Collage Medium
Using Matte Collage Medium, adhere the felt mounted Layer Panel to the facade, placing it in the centre.
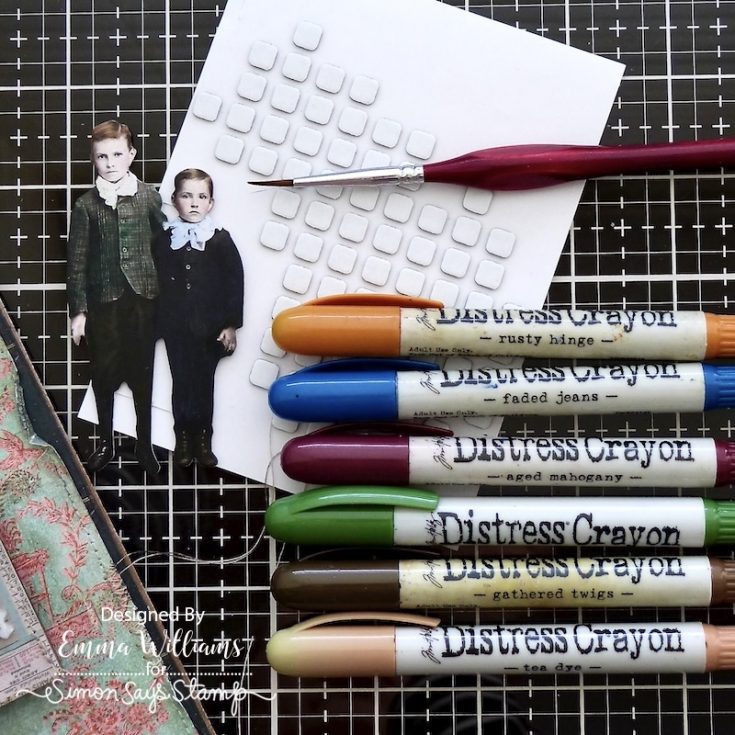
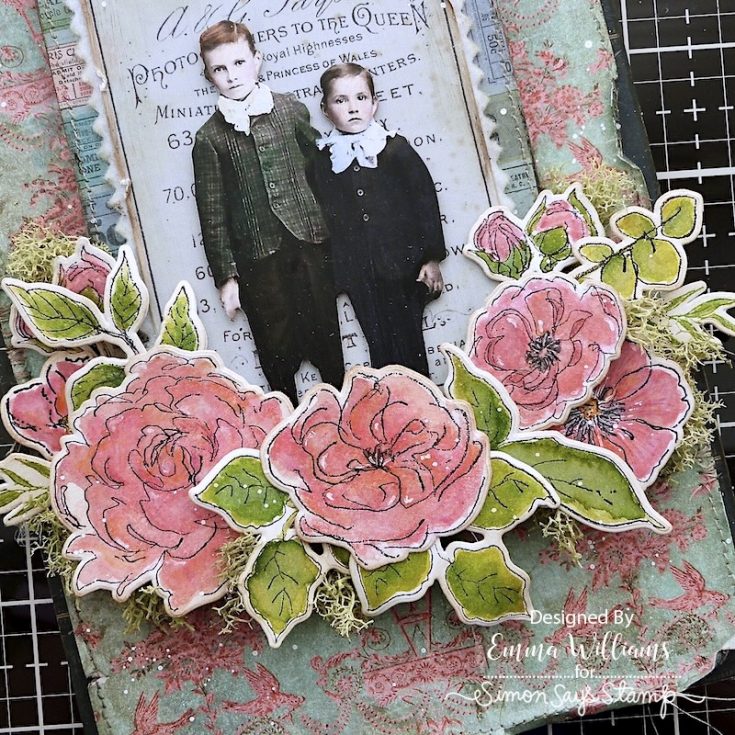
For the focal point of this project, I used a Paper Doll from the Tim Holtz idea-ology Paper Doll Poses Pack which I colour tinted with Distress Crayons. To do this, apply a thin layer of Clear Gesso to the surface of the Paper Doll to prime the card stock. Scribble the crayons onto a craft sheet and picking up the colour with a paintbrush before applying it directly to the paper doll. Once happy with the colour, allow to dry before adhering foam pads to the back.
It’s now time to create the beautiful flowers, and for this you will need to stamp a selection of the florals and leaves onto a piece of Tim Holtz Distress Watercolour card using Black Soot Archival Ink. I watercolored the florals using Distress Watercolour Pencils and a paintbrush.
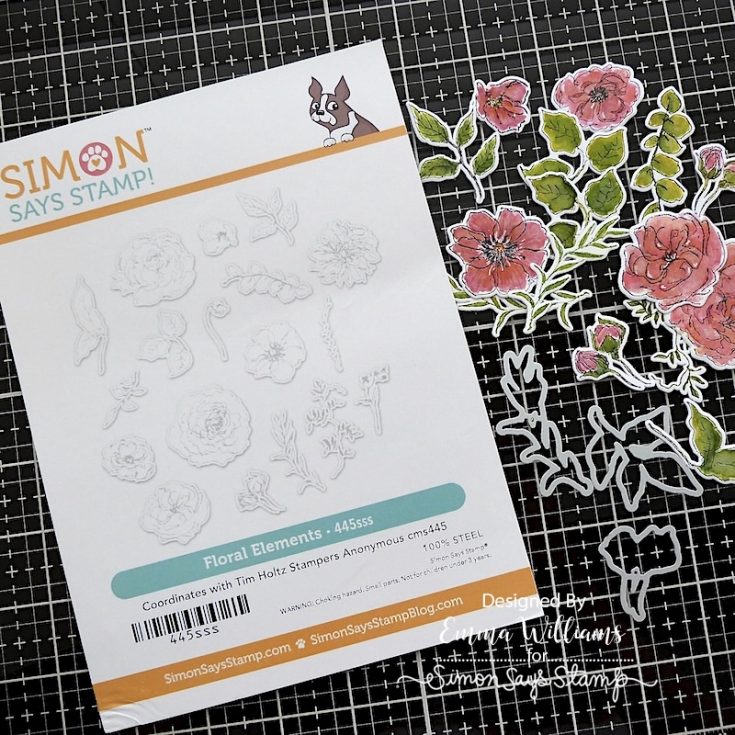
Die cut each stamped image using the co-ordinating Floral Elements die set. Using a blending tool, ink the white outline of the die cut pieces with Antique Linen Distress Ink.
Attach the florals and greenery around the base of the Etcetera Facade using foam pads to add various heights and create dimension. Attach the paper doll in the centre of the floral arrangement.
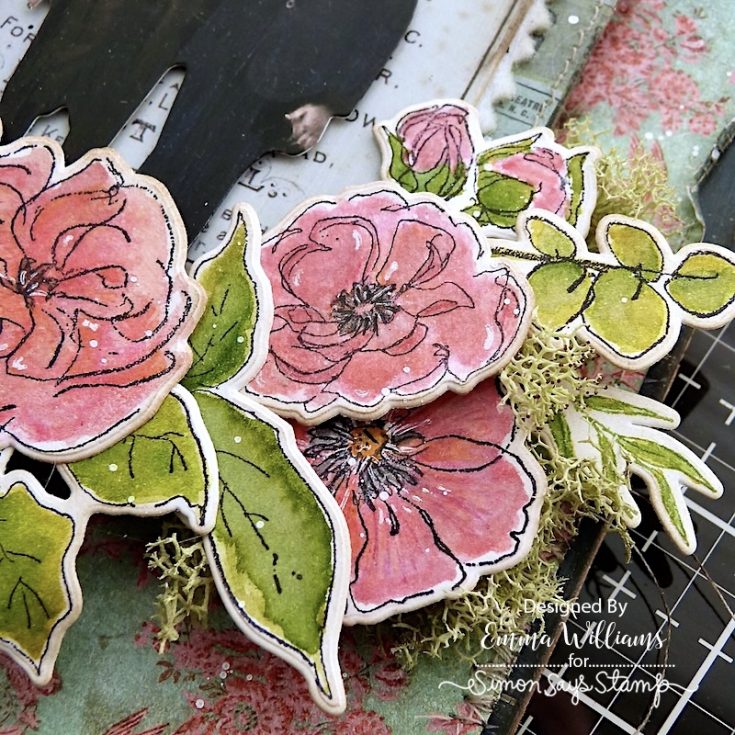

Use a hot glue gun to attach small pieces of moss amongst the floral die cuts.
To protect the Paper Doll image, cover with a piece of scrap paper before using a paint brush to gently add splatters of Dina Wakley Media White Gloss Spray across the surface of the panel. Allow to dry.
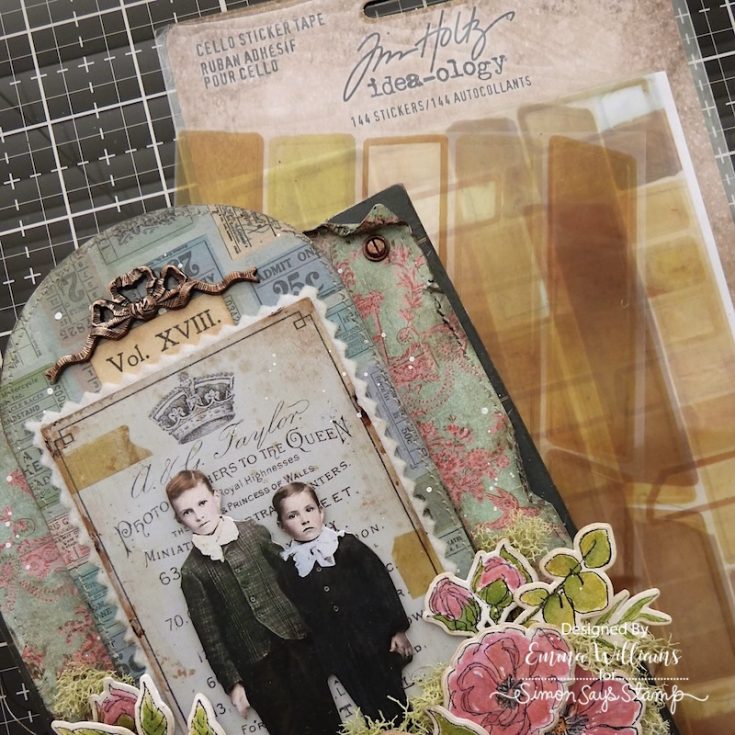
Attach a piece of Cello Sticker Tape to either side of the Layer Photo Studio.
With all the main details in position, I added the details. Matt one of the stamps from the Postmarked Sticker Book onto a piece of scrap card to add stability and then attach this stamp using a foam pad to the left hand side of the panel.
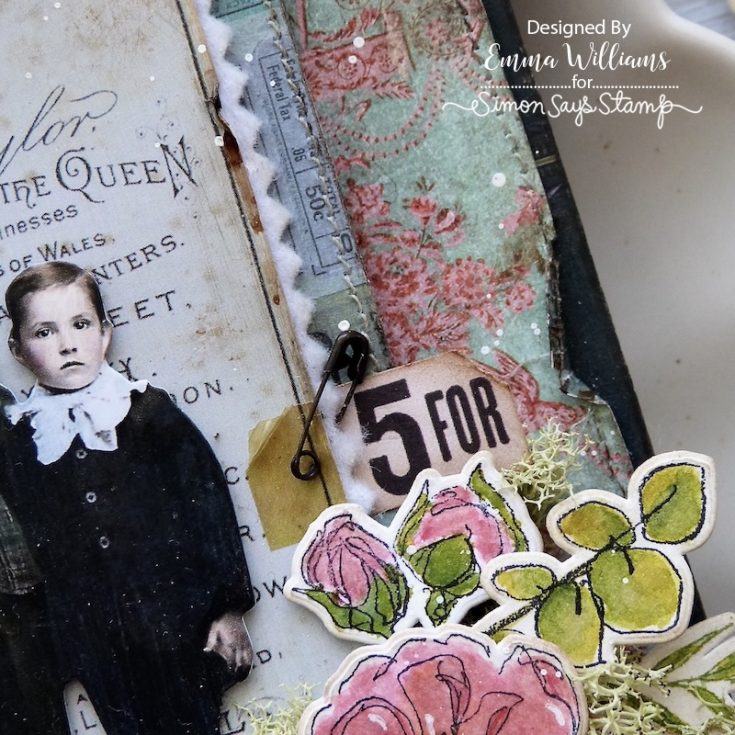
On the opposite side of the Facade, attach a Snippet Ephemera Piece and Mini Pin.
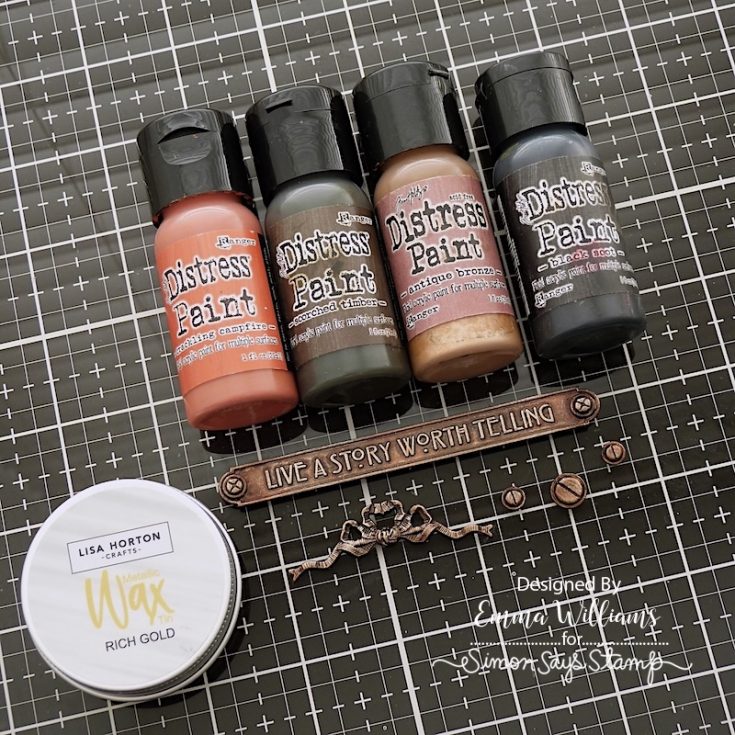
To colour the metal idea-ology pieces, which include a Word Plaque, 7 Screw Heads and the metal ribbon piece from the Ribbons and Bows Adornments, I used Distress Paint and a Gilding Wax. Begin by layering the Distress Paints and build, followed by Crackling Campfire, Antique Bronze and finally Black Soot, very sparingly applied over the top. Dab away any excess paint if you apply too much and allowing the paint to dry completely between each layer before applying the next. Once the colour is resembling a rich metallic coppery tone and the paint is thoroughly dry and using my finger, I applied a smear of Rich Gold Metallic Wax to the metal pieces to accentuate the detail and any of the raised areas. If you don’t have the Rich Gold, you could also use Copper Metallic Wax or Stamperia Wax Patina Heritage Gold.
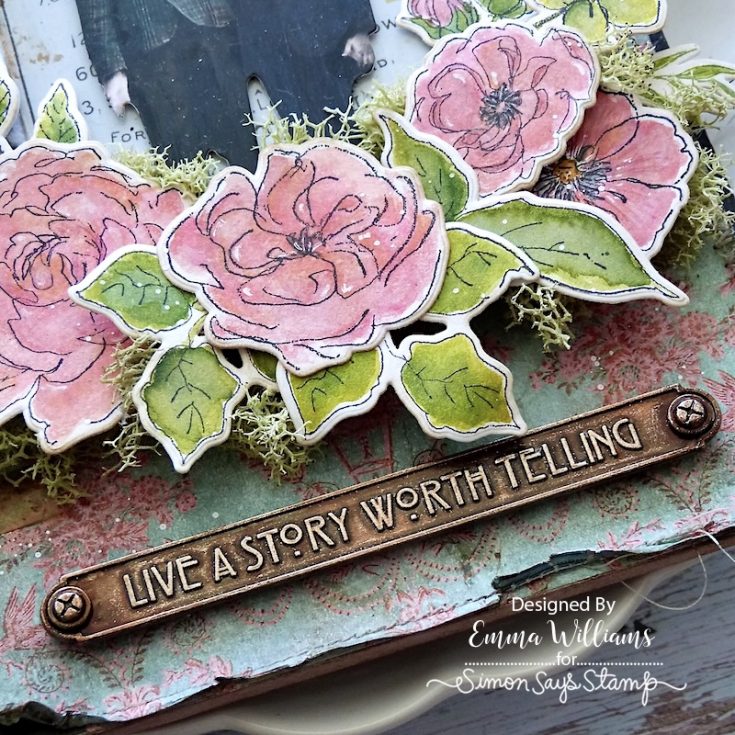
Attach two of the screw heads to either side of the Word Plaque and then attach the completed word plaque to the panel, placing it underneath the floral arrangement.
Ink the edges of a numbers snippet ephemera piece with Walnut Stain Distress Ink and then attach this to the top edge of the Photo Layer Studio card with Matte Collage Medium. Adhere the metal ribbon to the top of the facade.
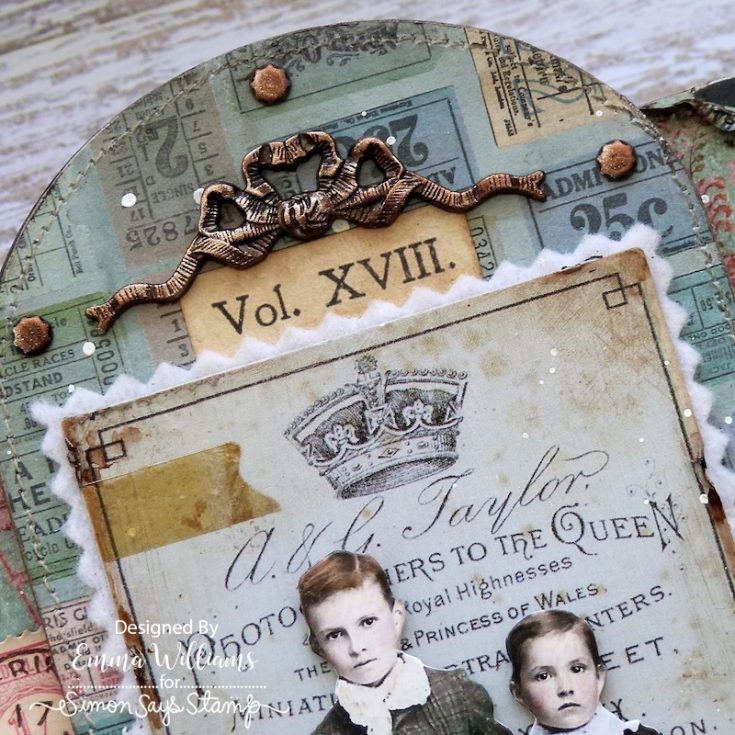
Attach the remaining screw heads, adhering one to the top left and right hand corners of the panel and the final three, around the arch of the Etcetera Facade.
So that’s my project complete, and I hope you’ve enjoyed this tutorial. As always, I’ve enjoyed sharing the tips and techniques to inspire you and I’d love to see what you make!
See you all again very soon and Happy Crafting everyone…Emma x
SUPPLIES:
|


A big thanks to YOU, our reader for stopping by, and Emma for being our guest!
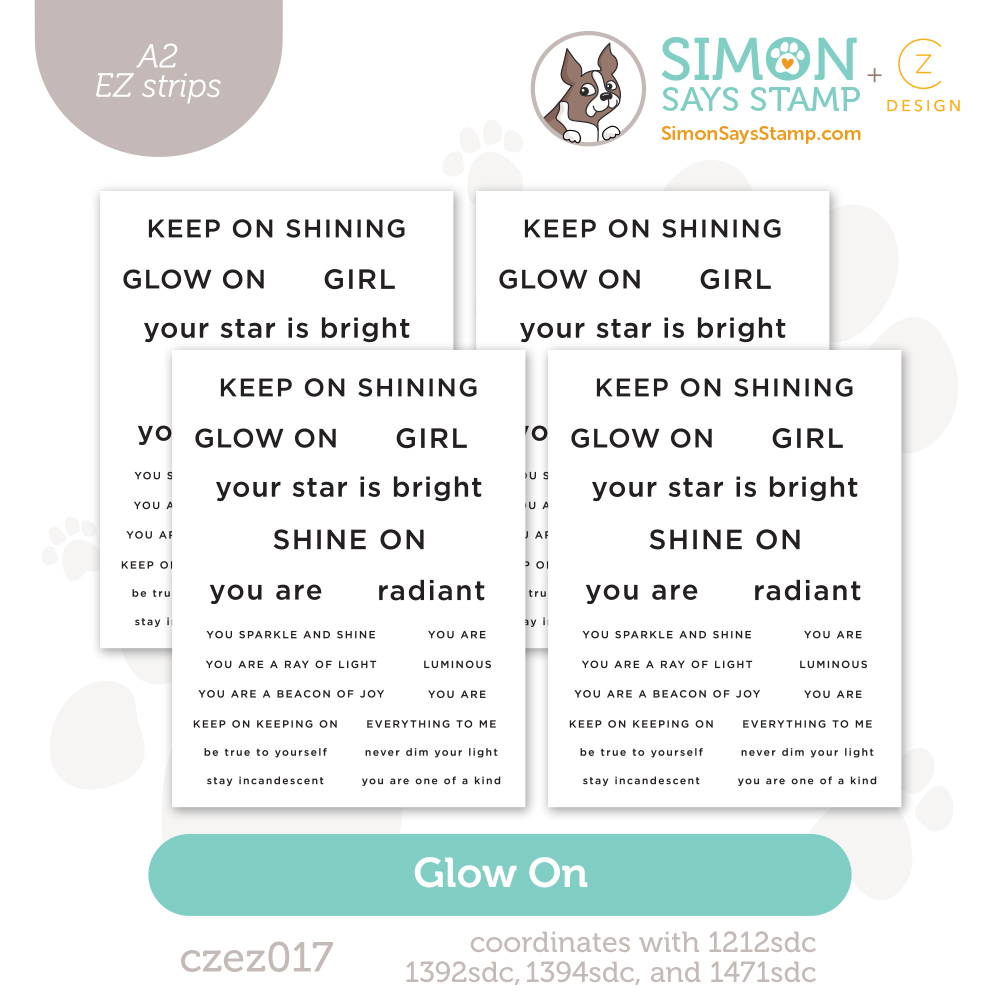
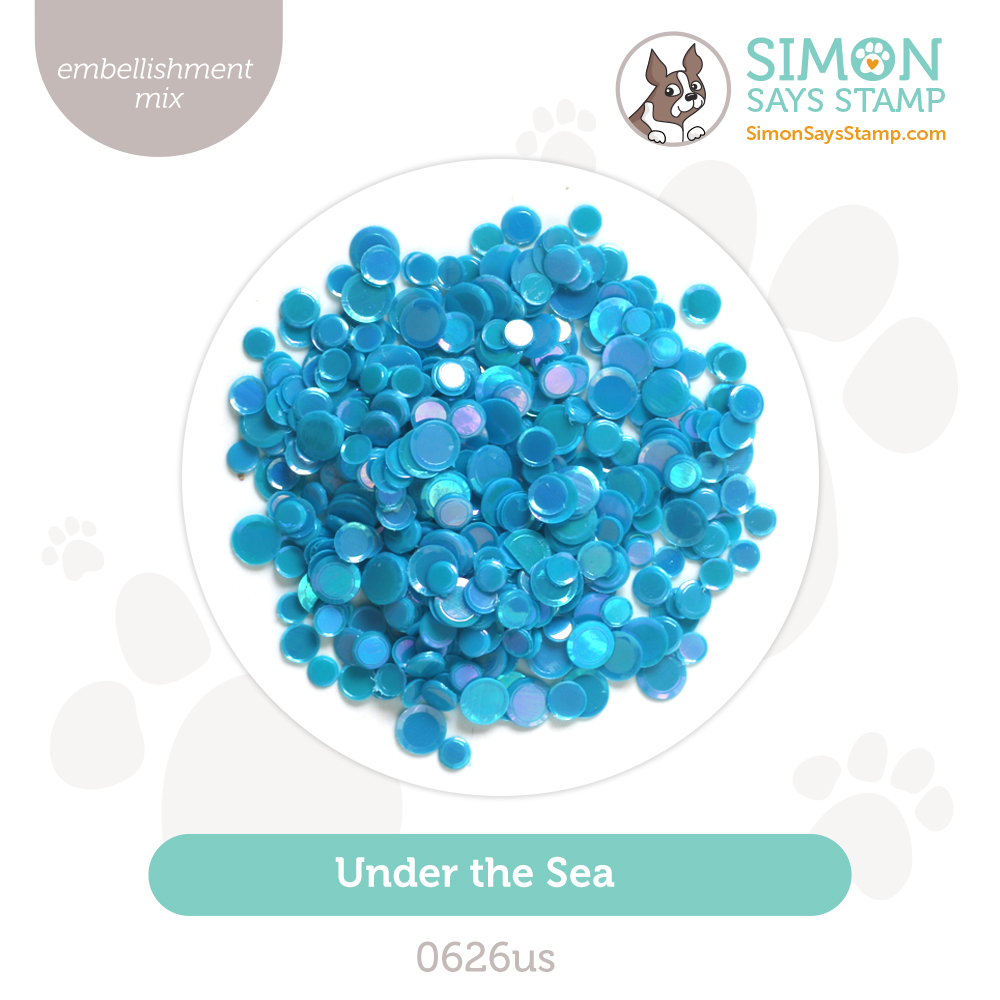
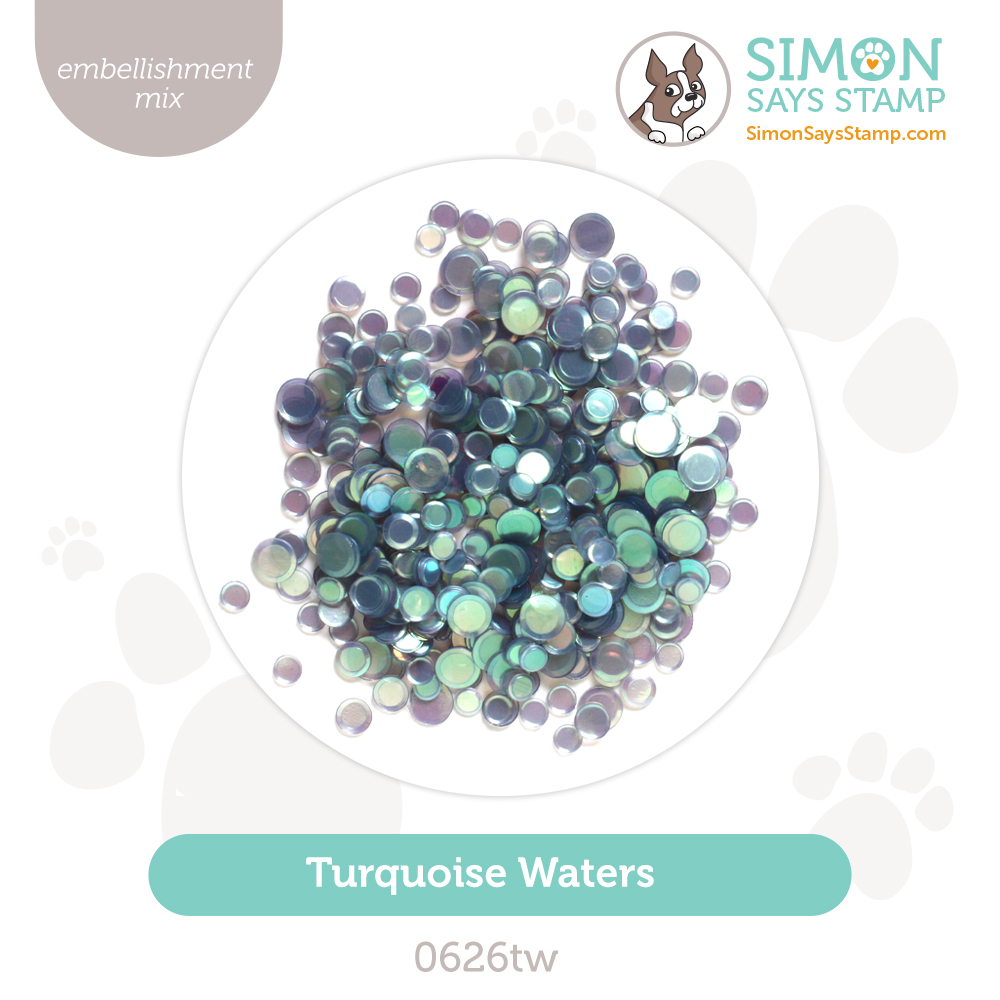
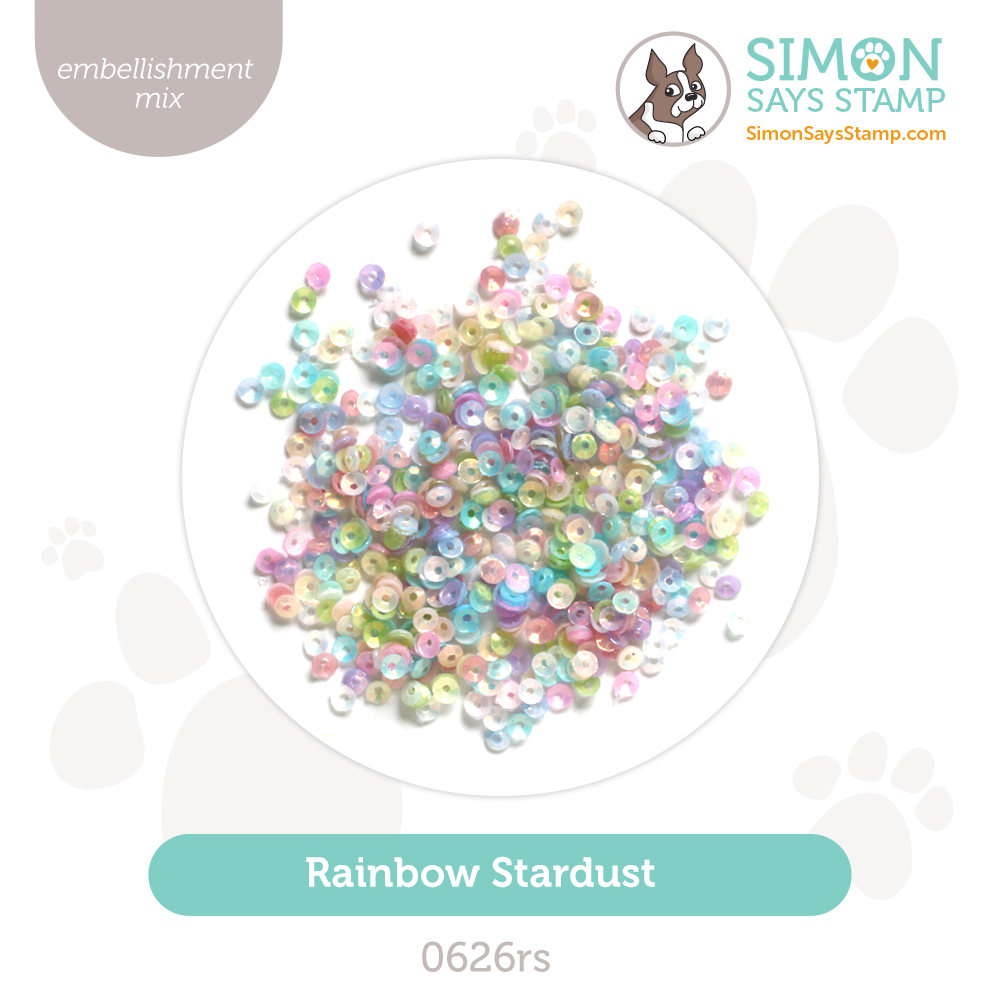
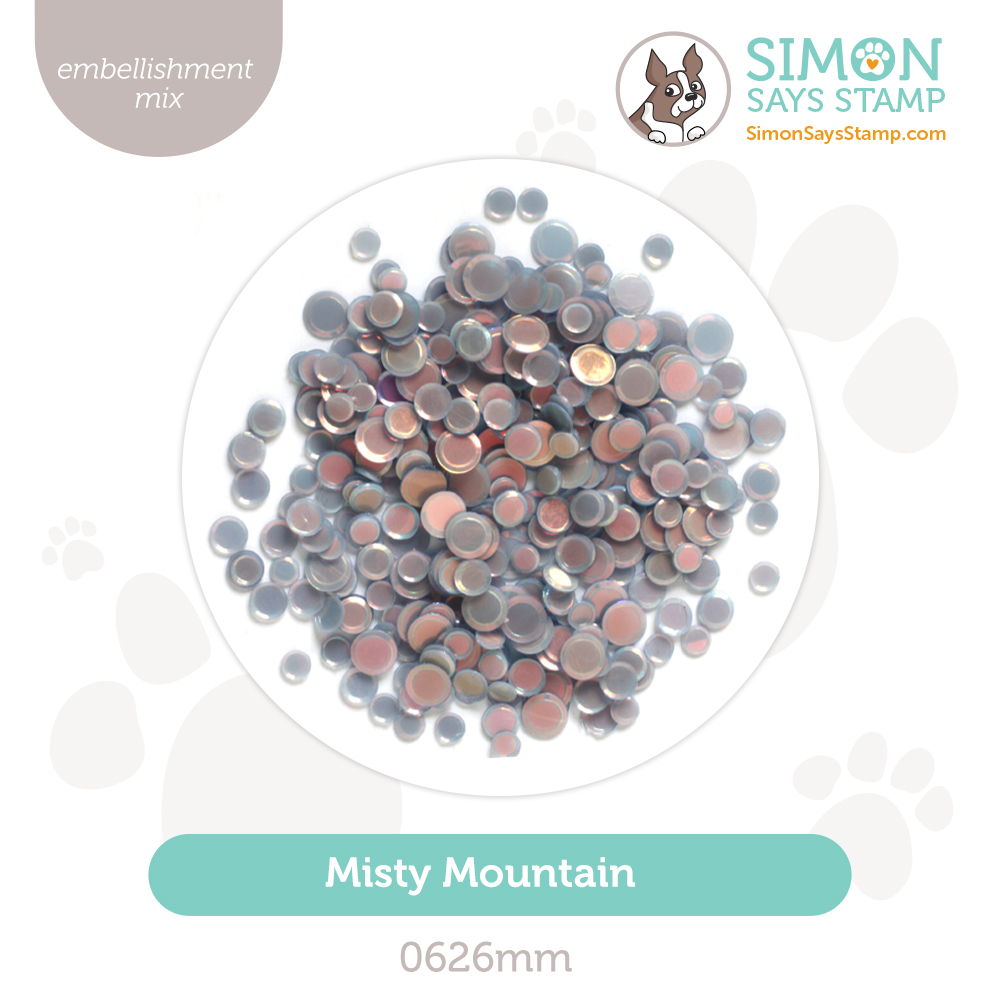
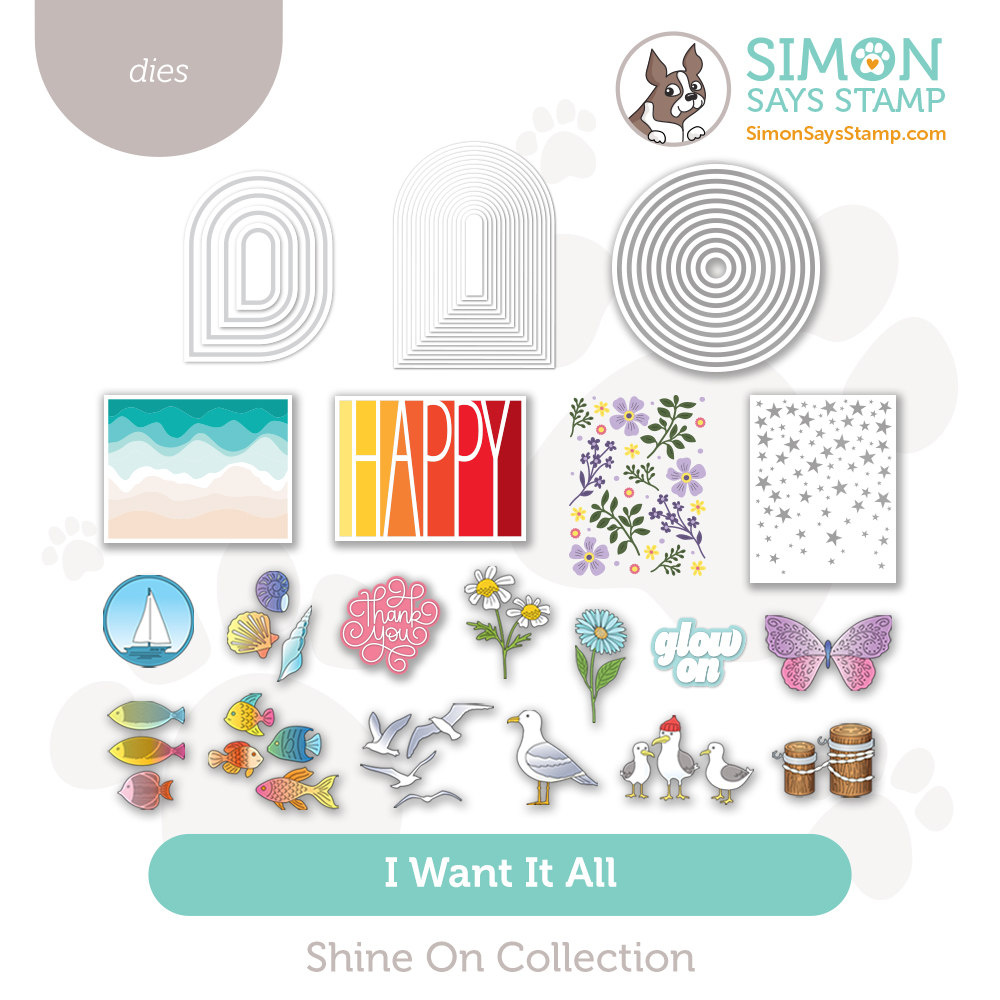
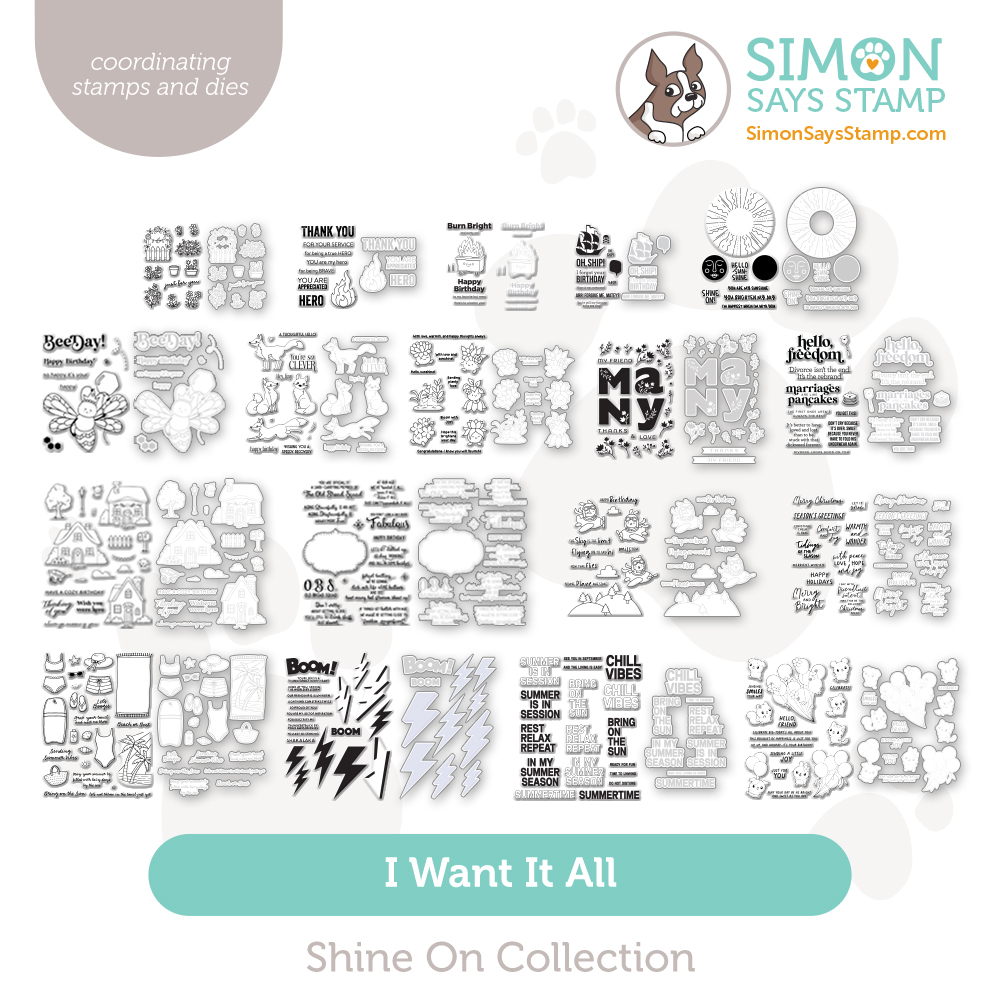
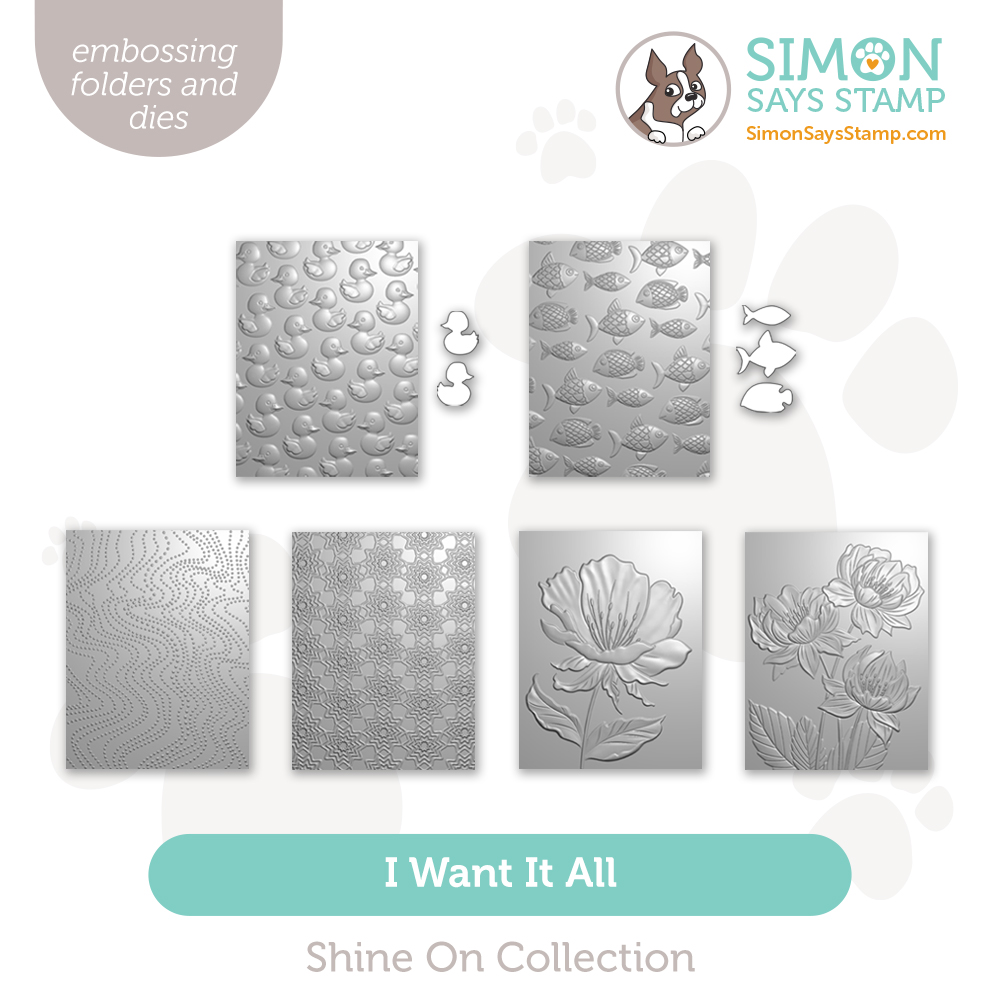
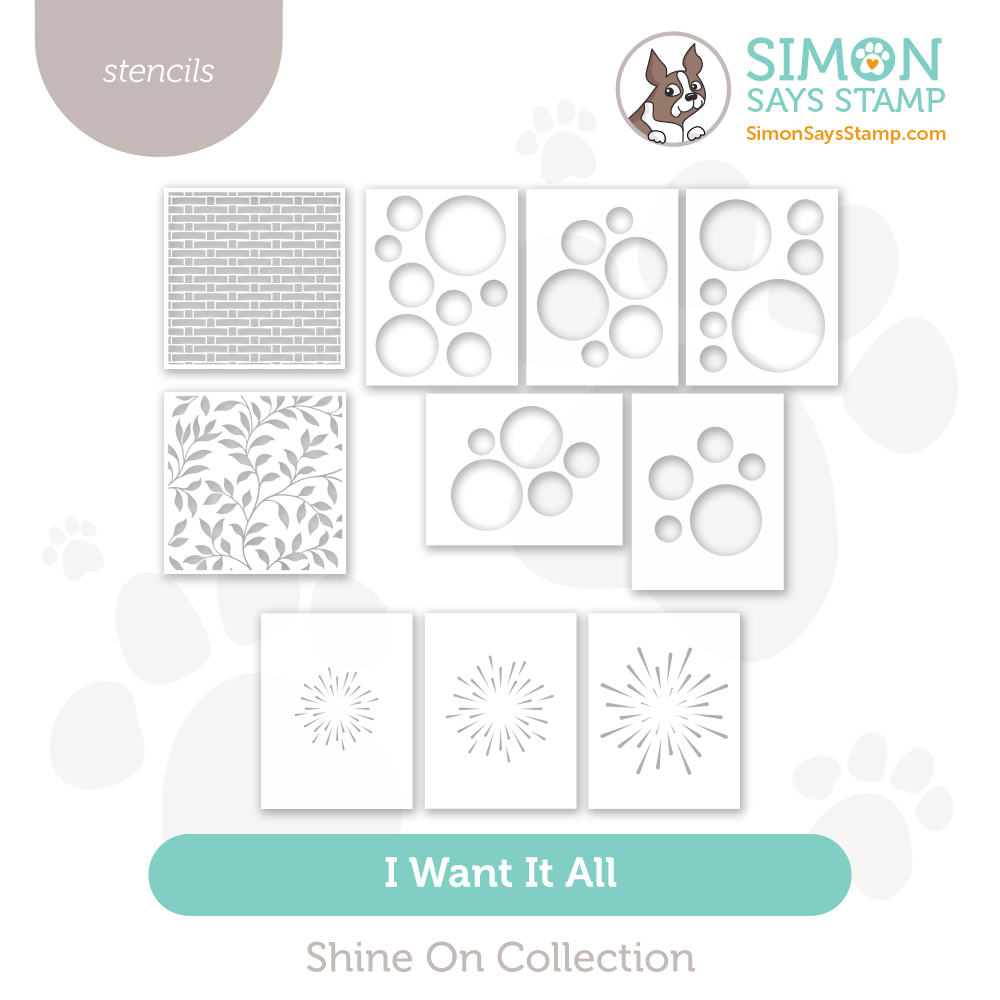
Shine On Blog Hop 2!

Hello, friends, and welcome to day two of our Shine On release blog hops! If you missed yesterday’s hop, be sure to circle back and check it out HERE.
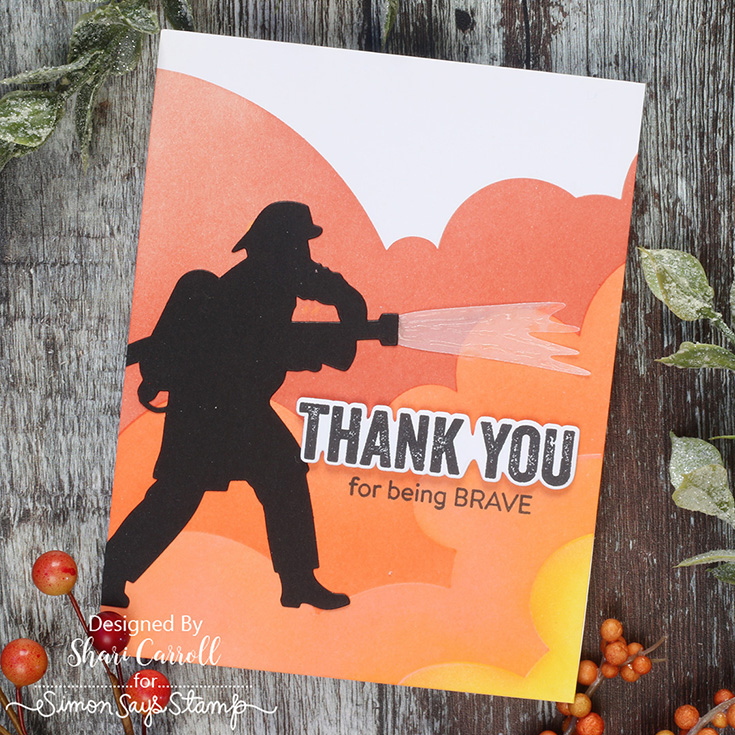
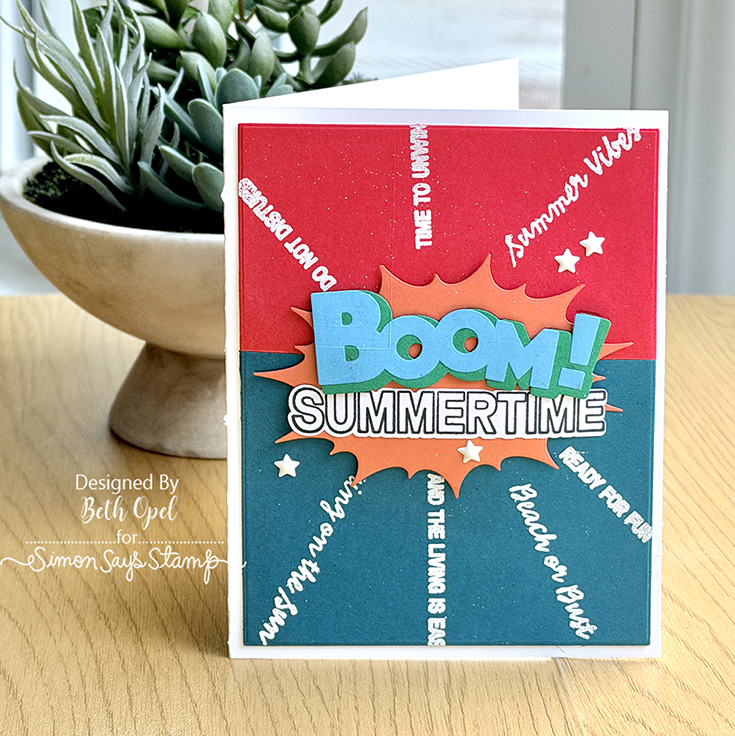
Before we hop, let’s take a look at some fabulous inspiration from Shari Carroll and Beth Opel:
We love our customers! And we love your enthusiasm for our exclusive releases and blog hops. To celebrate, Simon has set aside a free gift just for you! Our not-yet-released Simon Says Stamp Deco Blossoms 3×4 stamp is automatically added to your cart that contains any purchase from our exclusive Shine On collection! Check out the details on the banner at the top of this post for information about claiming your gift.
Ready for even more Shine On inspiration? Hop along with these talented designers! You’ll be inspired AND for every comment you leave on each blog, you’ll earn a chance to win a $25 Simon Says Stamp store shopping spree. YAY!

- Simon Says Stamp Blog <<YOU ARE HERE!
- Nina-Marie Trapani
- Heather Hoffman
- Suzy Plantamura
- Jennifer McGuire
- Cathy Zielske
- Bibi Cameron
- Laura Bassen
- Amy Rysavy
- Mindy Eggen
- Barb Engler
- Kim Hamilton
- Mary Reiner
- Maura Hibbitts
- Bonnie Crane
Please share some feedback with these creative artists who work hard to inspire and excite us! Your comments mean so much to them.
Thanks again for joining us today!

We hope you will join us on Instagram on Thursday, July 2, for an Instagram Hop featuring our Shine On release! We are excited to share awesome ideas from several creative minds using these fantastic products.
You’ll love browsing our Shine On gallery on our blog for loads of additional inspiration, and you can add your projects to these galleries as well!
Shop the entire collection:


Can’t pick a favorite? Shop our NEW Bundles:
Rewatch our LIVE!
In case you missed it, we went live on Thursday June 25th at 12 PM ET to showcase our brand new + exclusive collection, Shine On!


