The Blackout Technique You’ve Been Seeing Everywhere! Deboss an Embossing Folder: Crafty with Caly

Hi friends! Happy Sunday! Please join me in welcoming back special guest Caly Person sharing a fun and HOT technique! Be sure to watch the video for all the details, and enjoy!

I’m so excited to share today’s technique with you! I came across a reel sharing this technique with embossing folders a few weeks ago and was intrigued to try it! I played with this technique for two cards when creating with the Celebrate release and want to share a full video of the process today.
This technique uses the debossed side of an embossed panel. This allows you to add color quickly by ink-blending (or not so quickly for me, because I’m a slow ink-blender). You can also paint/watercolor or color with any other mediums you’d like! The way I share it today is the quickest, in my opinion.
WATCH THE VIDEO:
After embossing a white panel with the Hibiscus Cluster embossing folder, I ink-blended the debossed side of the panel. I started with flowers and ink-blended each flower in different color variations. Then to mask off the flowers so I could ink-blend the leaves without color-bleeding, I embossed a second panel and fussy-cut the flowers and in-laid them into the panel.
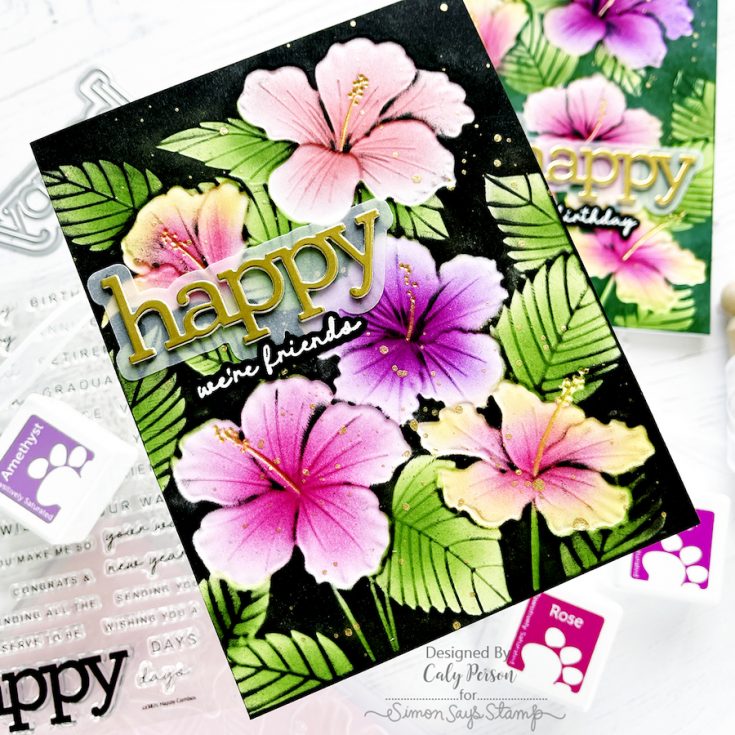
After I finished ink-blending the leaves, I used a Sakura Gelly Roll pen in yellow from the Stardust Galaxy set (you can also use a gold metallic gel pen or marker) to color in the hibiscus centers. Once this detail is completed, the magic begins!
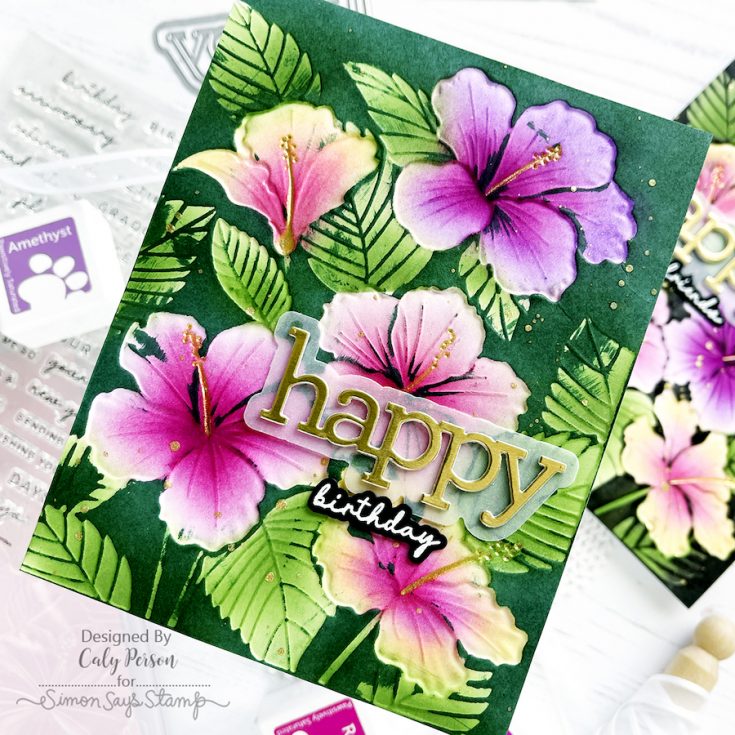
To flood all the negative areas with a solid color, I used a black felt ink pad to swipe across the panel. My second card shows that you can also do this complete this technique with a foam ink-pad, you just have to be more careful when applying the ink. I finished my cards with sentiments using the Happy die and sub-sentiments from the Happy Combos set.
I hope you’ll give this technique a try! Thanks so much for visiting today! ~Caly
SUPPLIES:
|


Thanks so much for stopping by, and to Caly for being our guest!

ENDS TONIGHT!!

The Magic of Tim Holtz Dies: Tips and Tricks for Perfect Vignettes! Not a Card with Nina-Marie
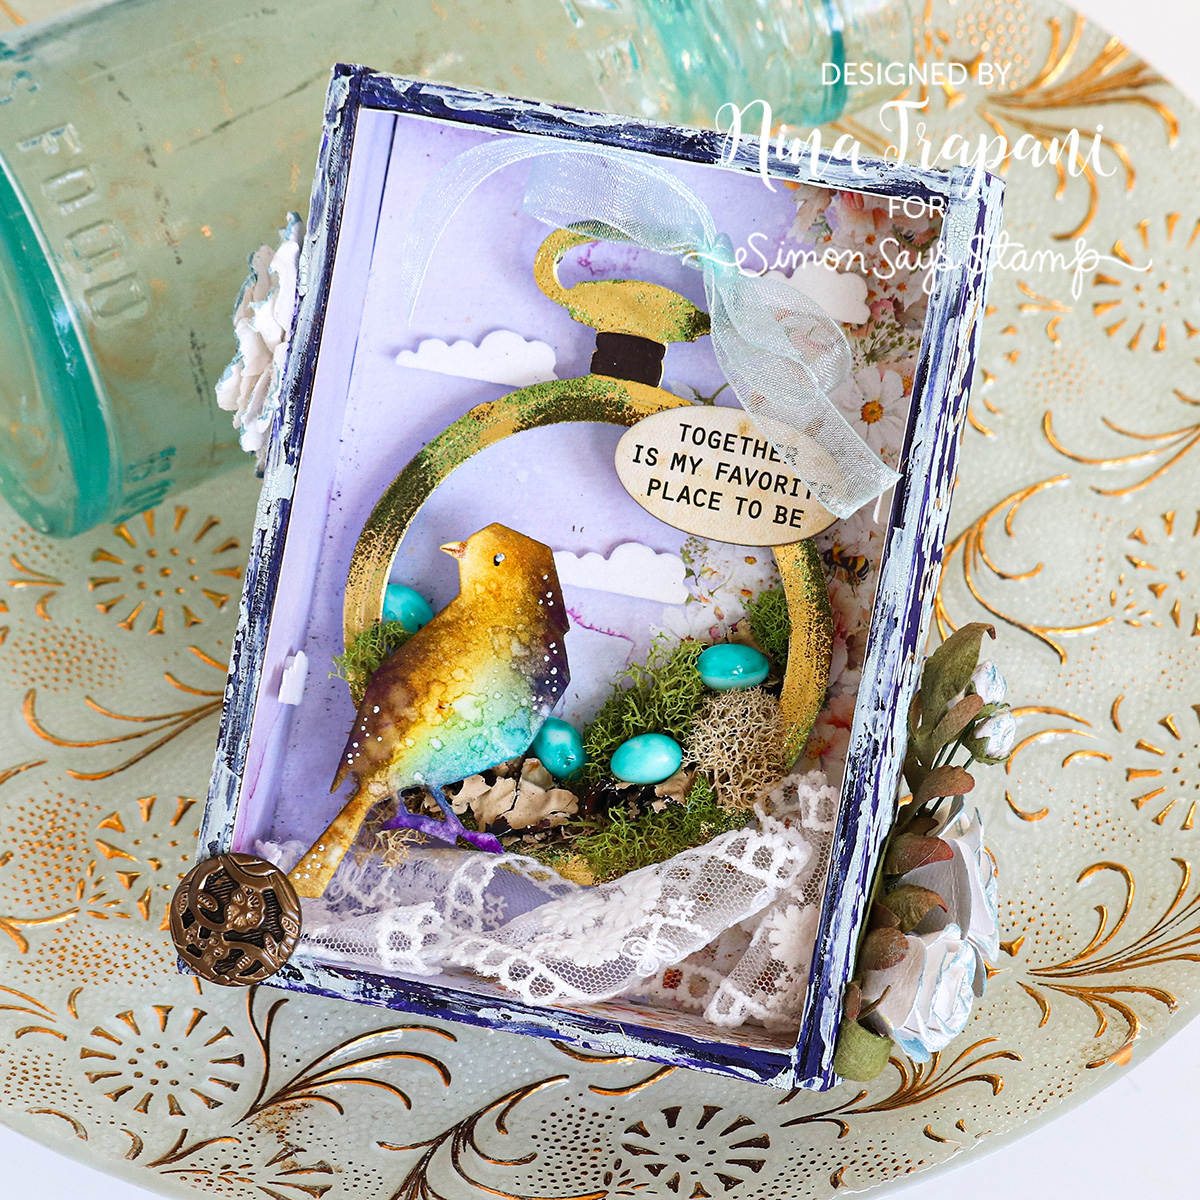
Hello there friends, it’s Nina-Marie Trapani here with you! Today I am using Tim Holtz’s “From the Vault” collection of Sizzix dies to make a vignette box.
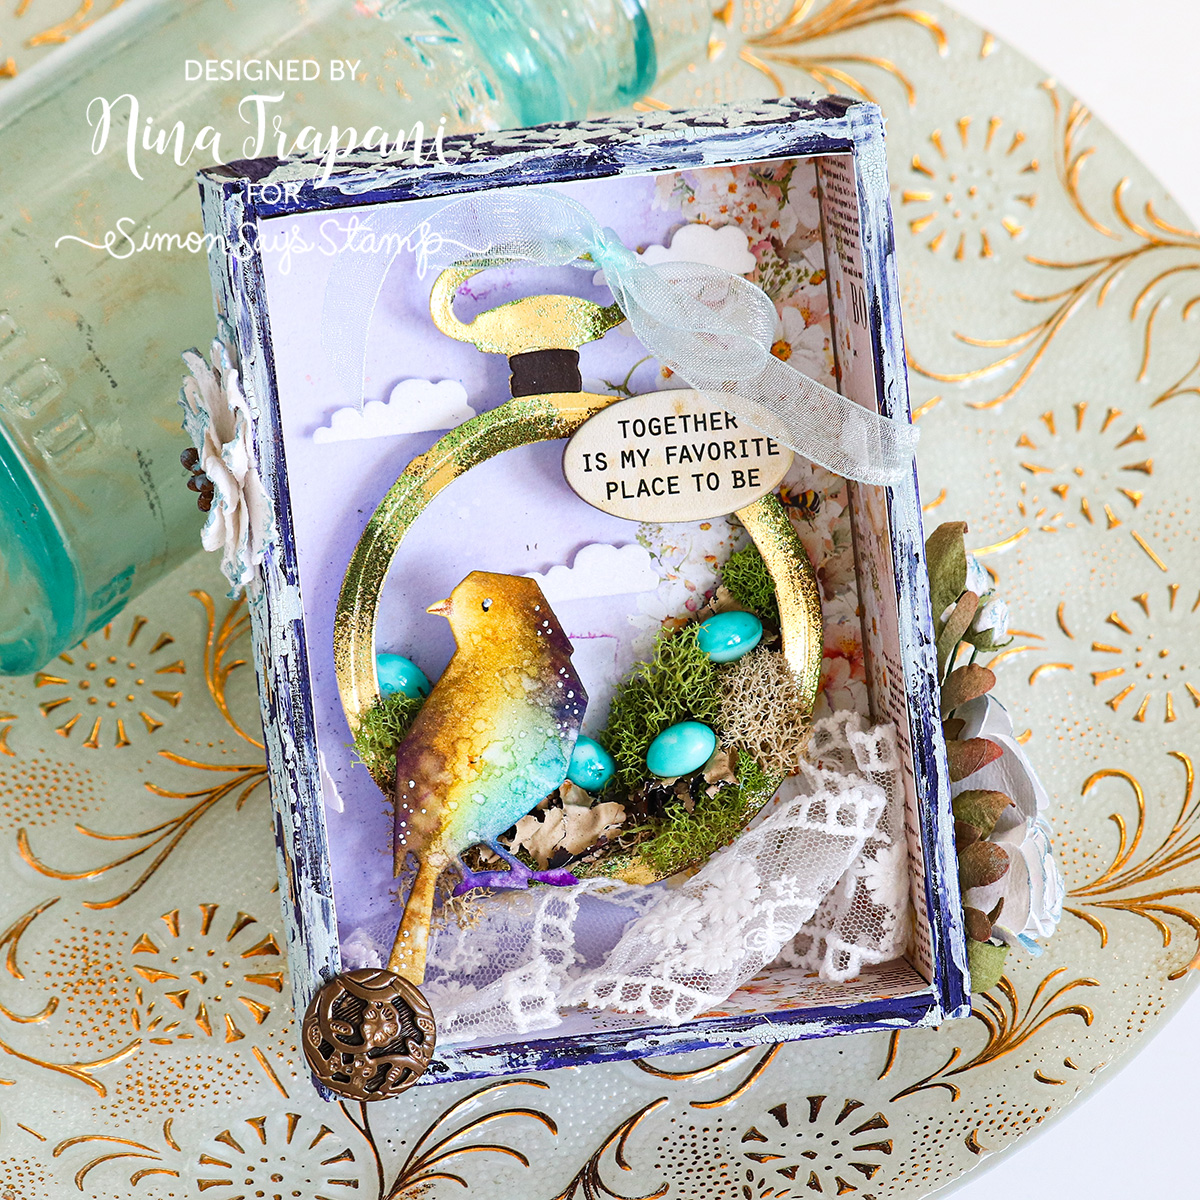
I really loved the Vault Watch Gears set and thought the watch frame would be a great altered bird’s nest! I filled the nest with moss and Tiny Eggs. The bird is from the Vault Lovebirds set and I colored it with Distress Inks.
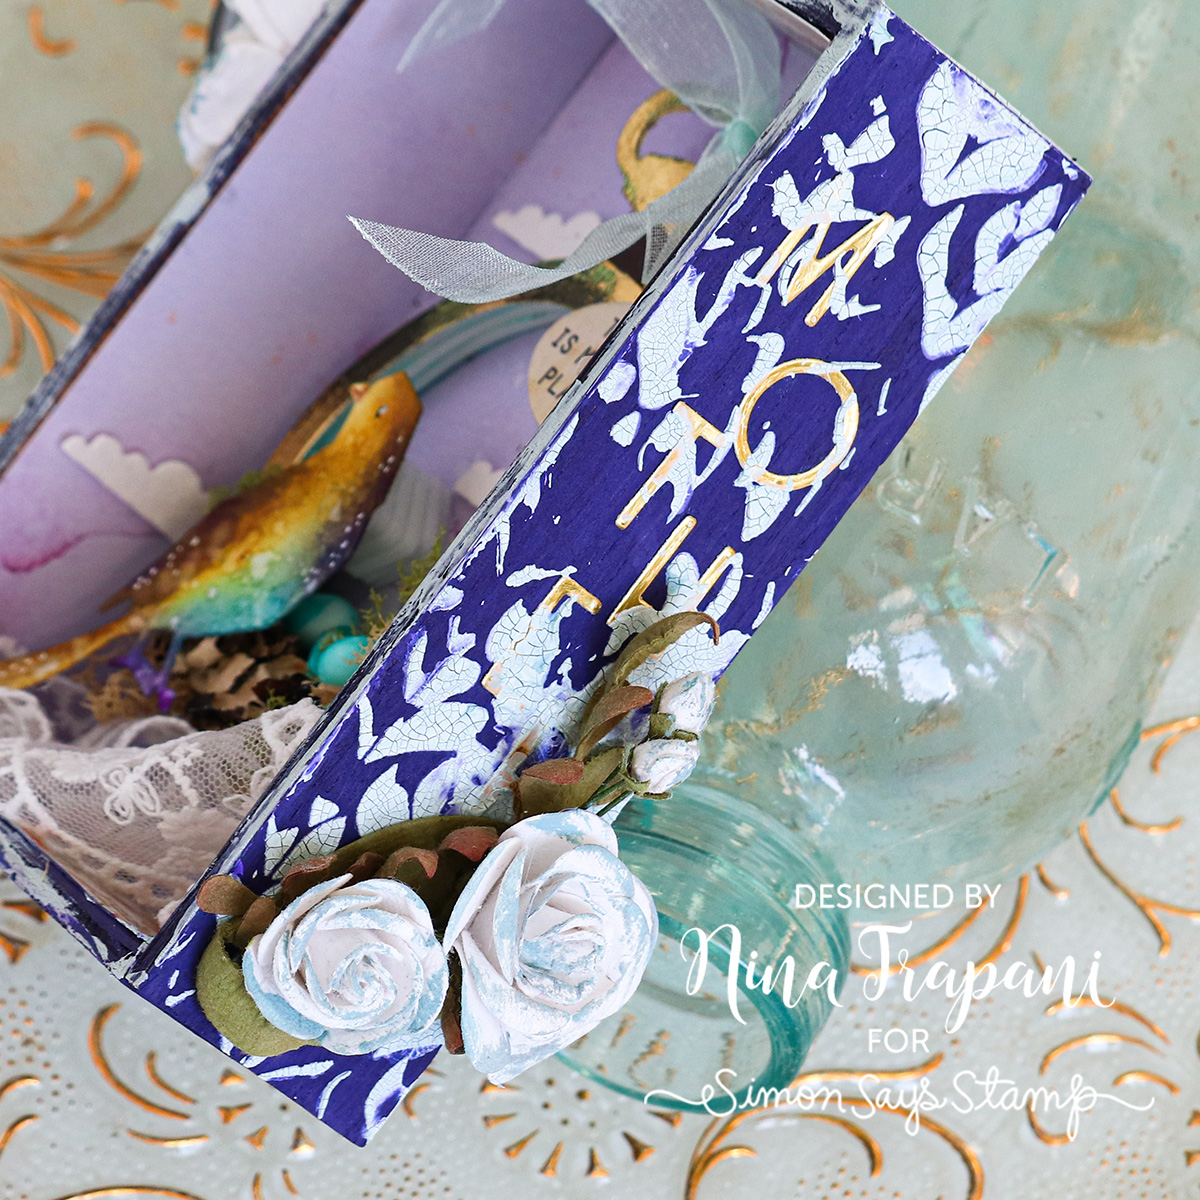
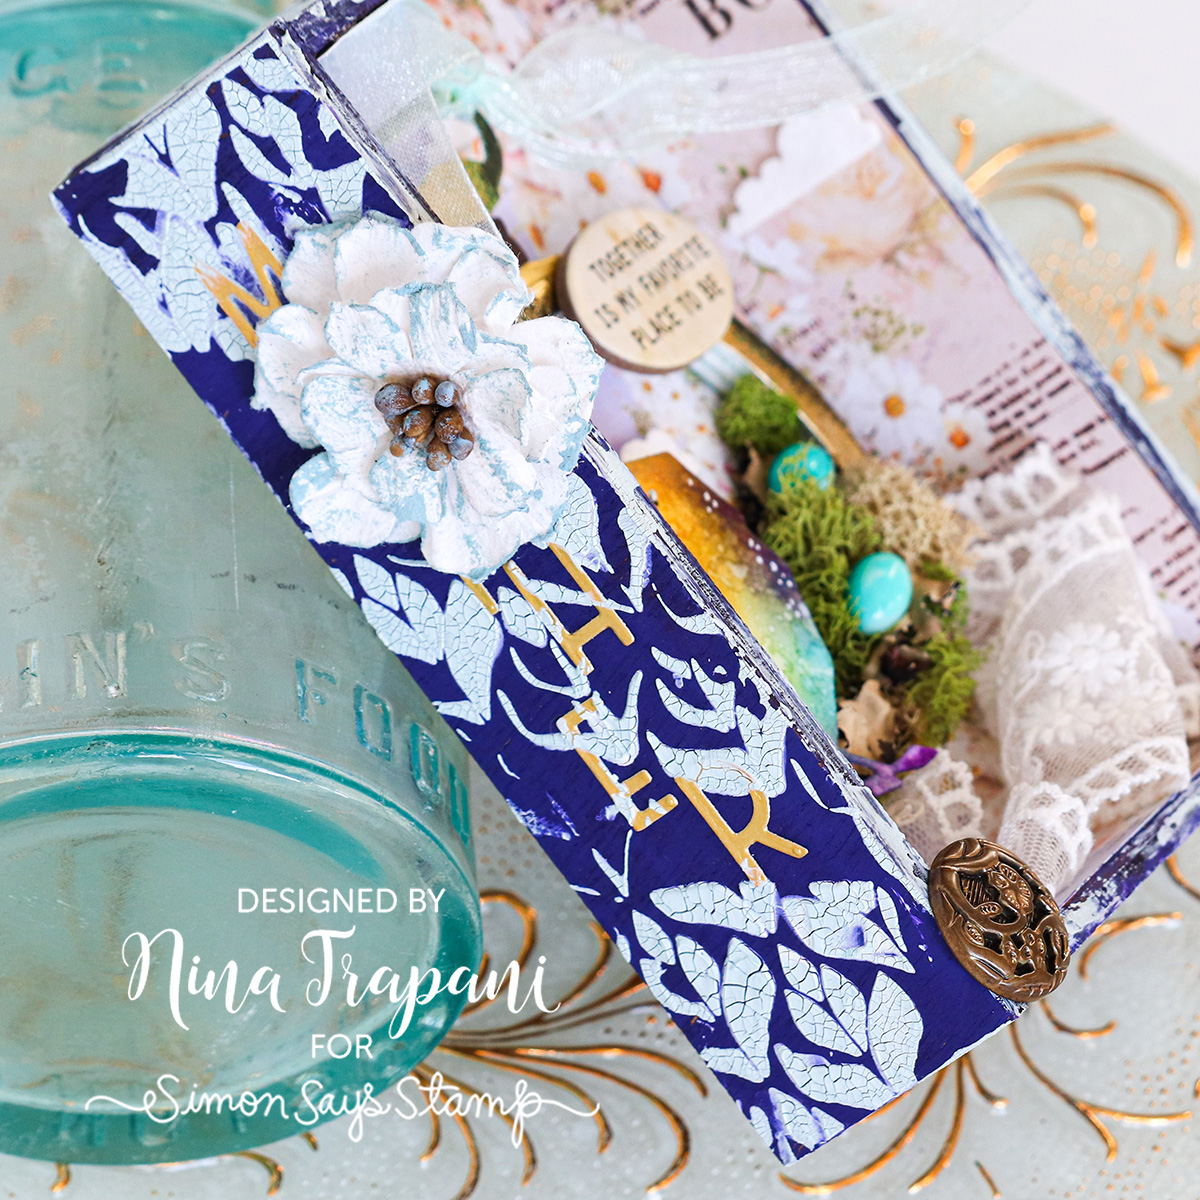
I added additional details such as clouds from the Vault World Travel die set, stenciling on the vignette with Tim’s new Deco Floral stencil and some Crackle Paste. The box also features some quote chips, buttons, lace, and other decorative elements!
Want to learn more about how I made this vignette? Watch the video below for all the details!
WATCH THE VIDEO
SUPPLIES
|


National Scrapbook Day 2024 GIVEAWAY!

Hello, talented scrapbookers! We are celebrating the love of scrapbooking and memory keeping with a BIG giveaway!
Would you like to WIN a Simon Gift Card? You’re in luck! We’re giving away ONE $100 Simon Gift Card to a randomly selected winner! How do you win you ask? It’s easy! Just share a photo of your currently in-progress or most recent scrapbook page in our link-up below for a chance to win!
Projects must be linked by May 22 at 11:59 PM EDT to qualify for the giveaway. One randomly selected winner will be chosen and announced shortly thereafter.
Happy National Scrapbooking Day!


